Service Outage: Network Offline on Whiteknights and London Road campuses. Staff and students on these campuses are unable to access most services. Please check DTS status pagefor updates.
This Microsoft Office support article covers the method for Office 365, earlier versions of Windows, Mac OS and PowerPoint online: Record a slide show with narration and slide timings. Slides with and without narration should be saved in the .pptx (current) version of file type.
If you want to record a presentation with slides, you can do this in PowerPoint. PowerPoint has an in-built recorder which will let you record
your presentation with narration
your presentation with narration and a camera input (Office 365)
The option to record can be found on the Slide Show tab under Record Slide Show.
PowerPoint presentations cut audio whilst changing slides, so take a brief pause before moving to the next slide.
Be aware that there is no in-built editor for cutting out sections, but you can re-record individual slides if you need to.
If you want to record something which isn’t in PowerPoint, You can record a section of your screen, by clicking on the ‘Insert’ tab and selecting Screen Recording.
How to record your voice
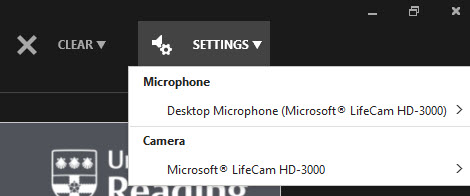
In Powerpoint click on Record Slide Show, as shown above. Then click on Settings.
Make sure that the correct Microphone is selected. This could be
an external microphone – for example a headset with microphone
a microphone built into your webcam
your laptop’s microphone.
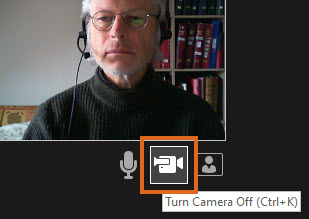
To record only audio, click on the Camera icon at the bottom of the screen, and Turn Camera Off.
When you save the Powerpoint file, your audio is saved with it.
The presentation could also be exported as a video. Please clarify with your lecturer whether you should save the file as a PPTX or as a video file.
Please note that saving a Powerpoint file as a video can greatly increase the file size. Unless instructed otherwise by your lecturer, we recommend that you choose the Standardquality setting when exporting to video.