Introduction
Adaptive Release allows you to upload content to your Blackboard course, but select the times, specific users or specific criteria for users to be able to see the content.
This guide presumes you have created the content for Adaptive Release.
How to do it
Choose the content you wish to Adaptive Release. Click on the drop down menu and select Adaptive Release.

On the menu page choose the option which best suits your purpose.
Adaptive Release Options
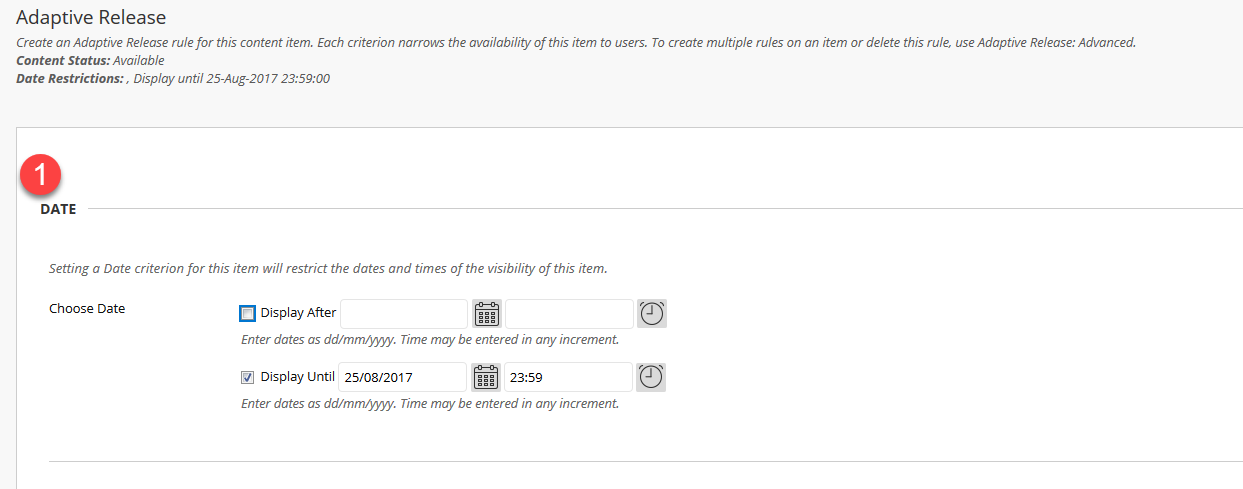
- Date: When uploading Content, you can use the date function to display it after or before a certain date. Tick either or both boxes and select the dates and times you want the content to display.
 N.B. For Assignments: You should set a date restriction for Blackboard Assignments via the Assignment Edit Options/Setup Screen, you can use Adaptive Release for Turnitin Submission Points.
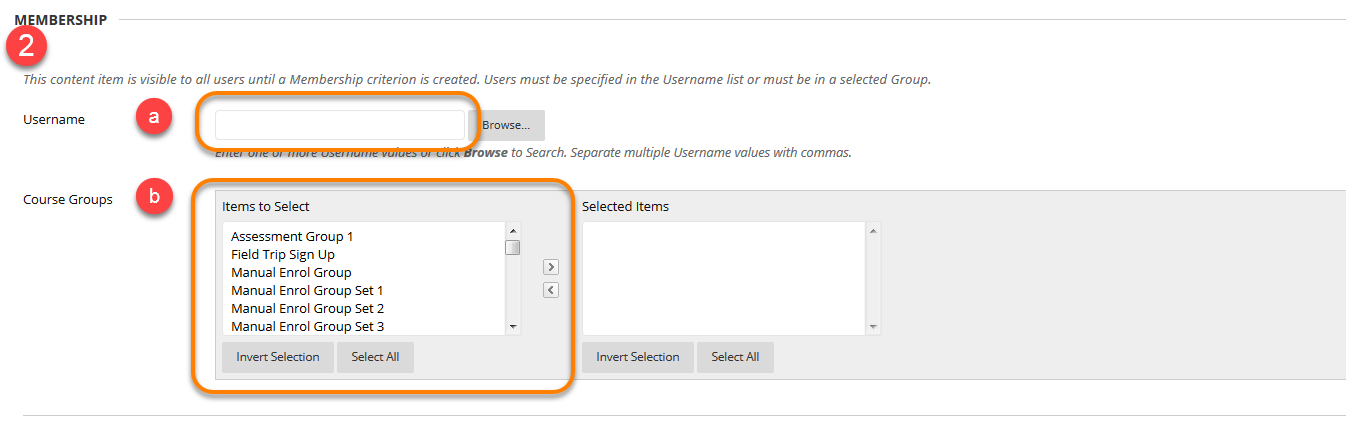
2. Membership: You can select (a) specific users to see the content, or (b) assign groups to be able to see it. This could be used for assessment information or for tutor groups.
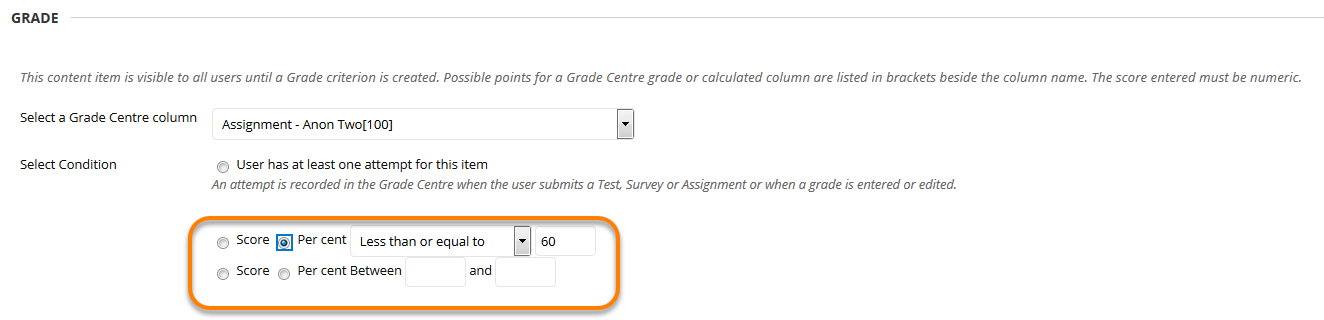
3. Grade: You can select content to display based on a user’s grade in a particular assignment or test. Select the Grade Centre column you wish the content to relate to from the drop down menu.

Then select the Condition you wish students to meet. You could release the next part of a test to those who get for example 75% or above. In this example below, we are releasing the content to those with a lower score than 60% so as to help them revise for the next assessment attempt.
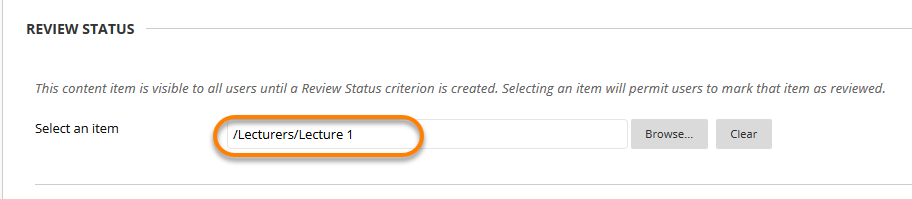
4. Review Status: Click Browse and select the item you wish to be reviewed before this item is released. This will appear in a pop-up window, which mirrors the layout of your content menu.

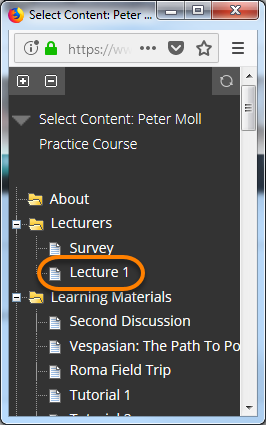
Once selected the content will appear in the box.
Students will see this buttonat the bottom of the item they need to review. When they have completed this content, they can click the button to mark the item reviewed
and the content which you have set to Adaptive Release will be available to them.
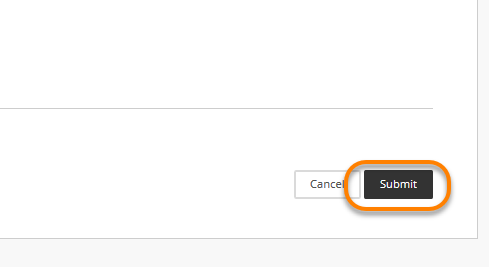
When you have set up the criteria you wish the content to Adaptive Release with then click Submit.
Adaptive Release: Advanced
To add more than one Adaptive Release setting (criteria) to an item, use the ‘Adaptive Release: Advanced’ option in the contextual menu. Adding multiple criteria will narrow a user’s ability to view a content item. The item will display to users only if all of the criteria are met.
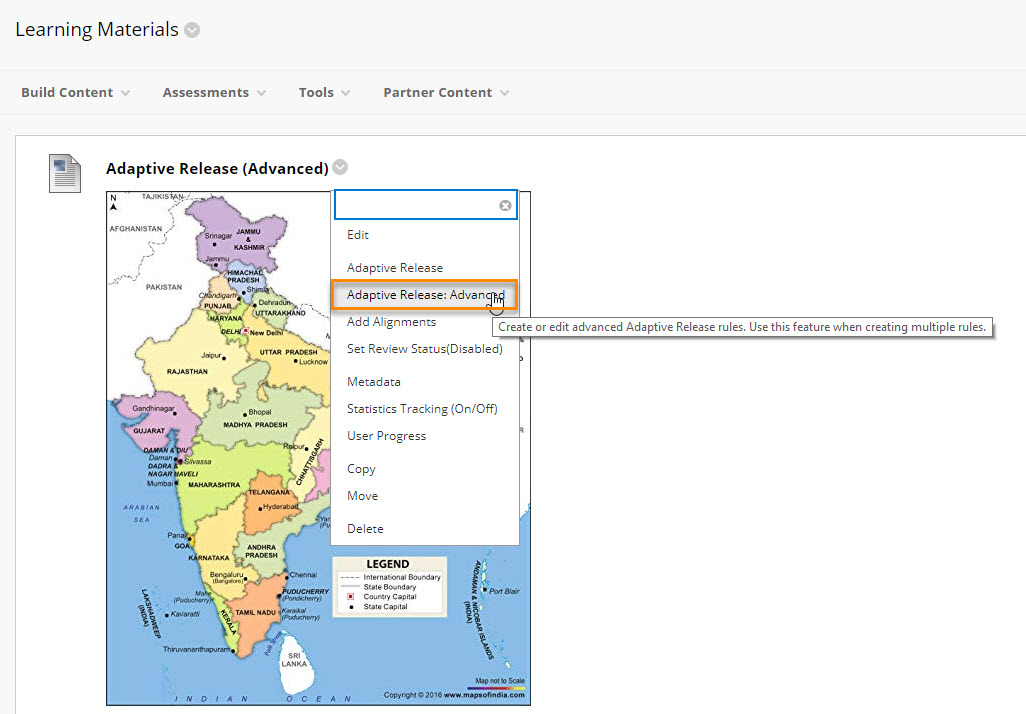
1. Click on ‘Adaptive Release: Advanced’ in the contextual menu to manage existing rules or create new rules. You can review the current status of an item, and any existing rules in the next screen.
2. To create rules for an item, click ‘Create Rule’ in the top left corner. Rules are sets of Adaptive Release criteria.

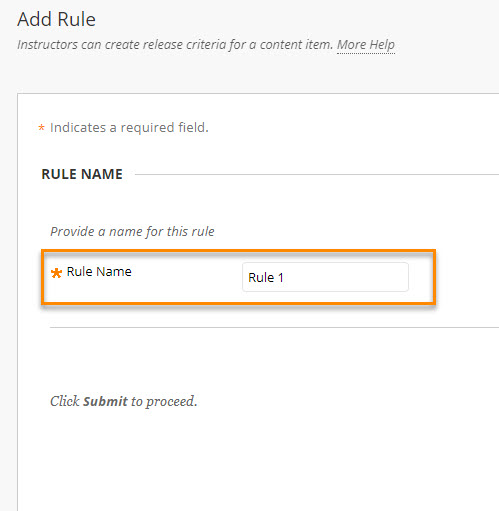
3. Each new rule requires a name. You may wish to give your rule a name which is easy to identify. The rule’s name will default to ‘Rule [number]’
4a. Use ‘Create Criteria’ to apply Adaptive Release settings based on Date, Grade or Membership, as described above.

4b. Use ‘Review Status’ to set a Adaptive Release settings based on Review Status, as described above.
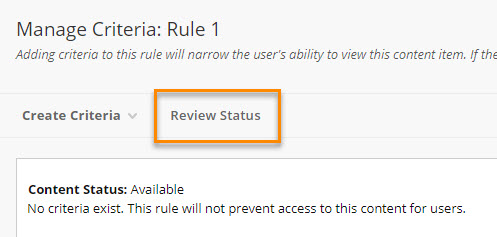
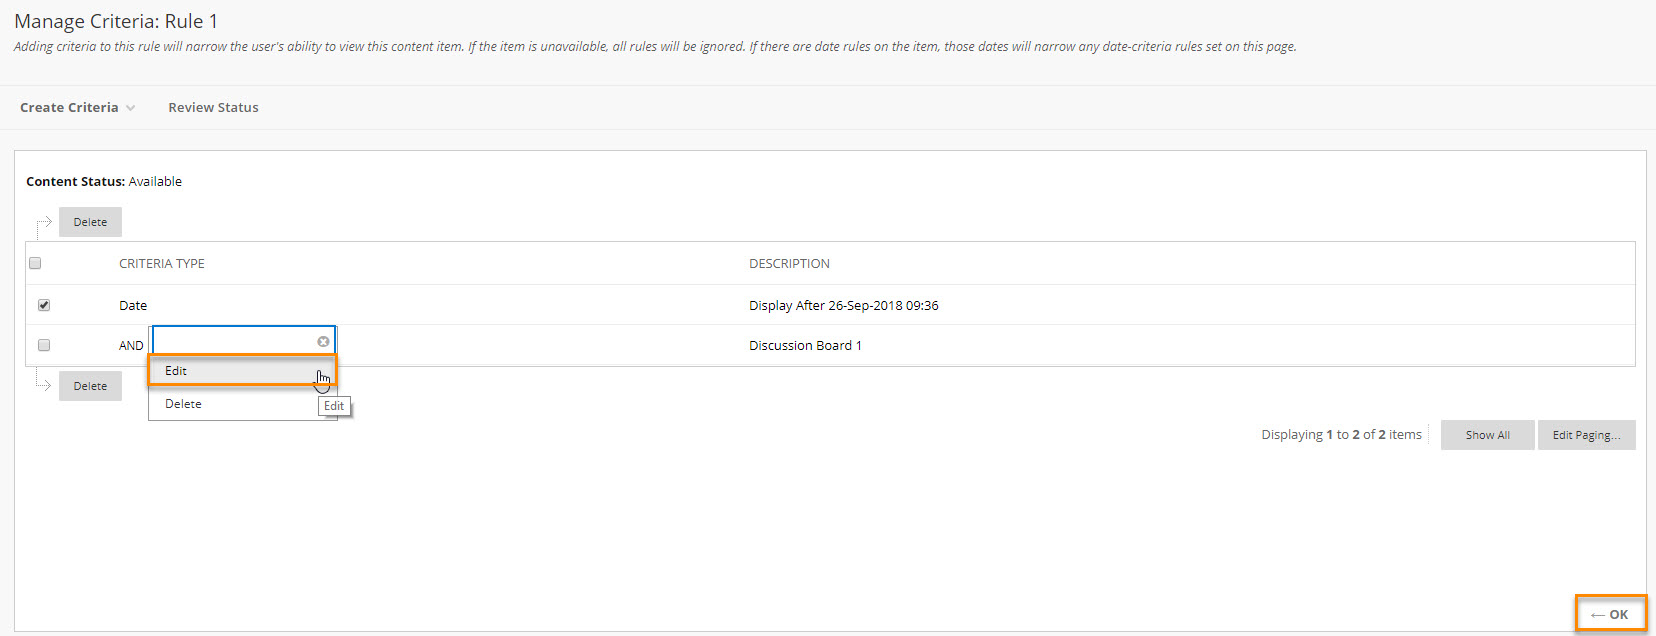
5. Once you have added your criteria, they will appear in the ‘Manage Criteria: [Rule Name]’ screen.

6. You can edit your criteria in this screen, or click ‘OK’ to submit the criteria for your Rule.
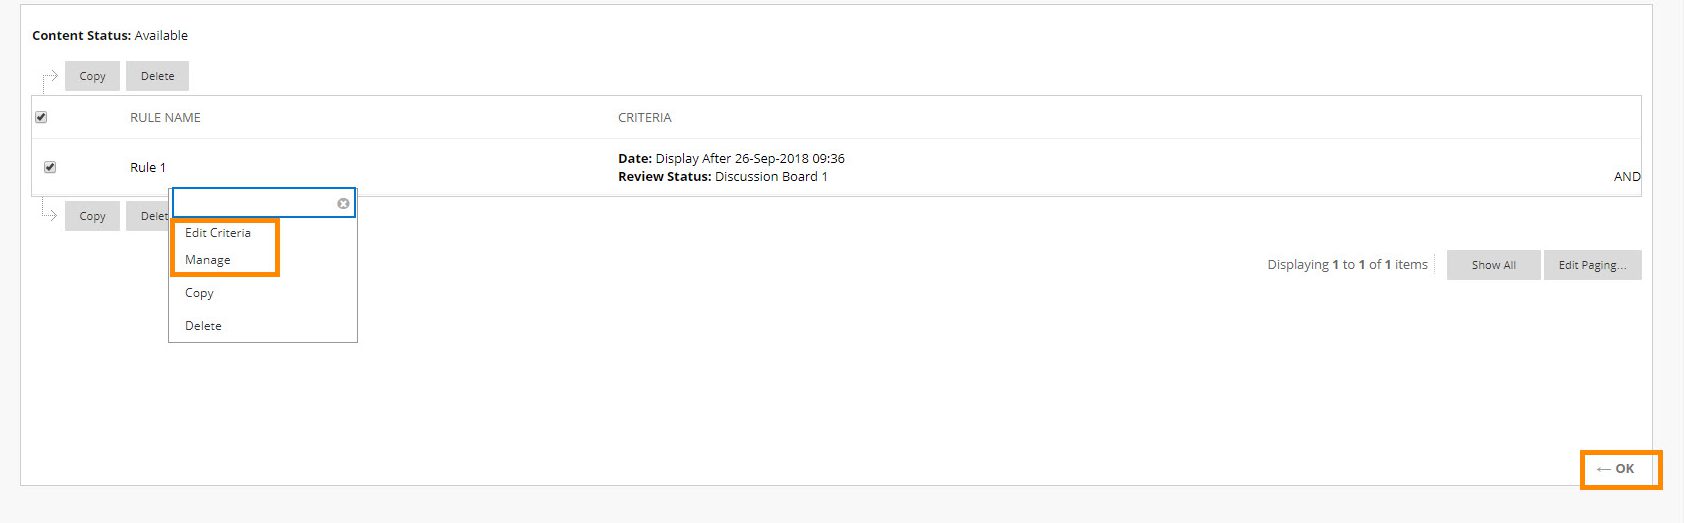
7a. Your new Rule will display, with its criteria in the ‘Adaptive Release: Advanced’ screen.

7b. To change the name of a rule, click ‘Manage’ in the contextual menu, to edit criteria, click ‘Edit Criteria’. To submit your new Rule, and apply the settings to the item, press ‘OK’.
Adaptive Release: Advanced with multiple rules
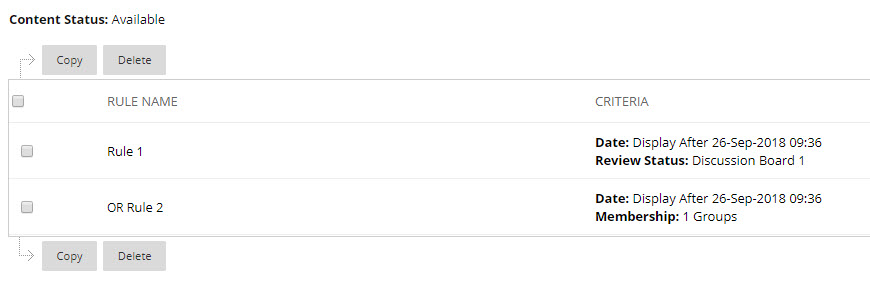
Creating multiple rules will set availability for users based on different sets of criteria.
This item will display to students based on the criteria in Rule 1 (Date and Review Status) or Rule 2 (Date and Group Membership)
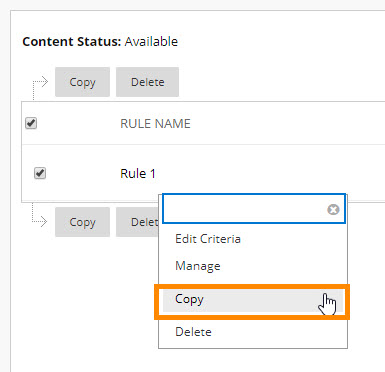
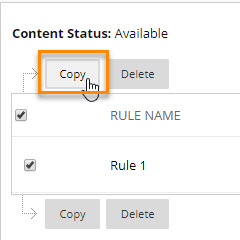
To set up a series of similar rules, you can Copy an existing rule, and edit its criteria by selecting ‘Copy’ from the contextual menu, or by ticking the box next to the rule and clicking ‘Copy’ at the top or bottom of the Rules area.
Page last updated on October 8, 2018 by Sev Raychev

You must be logged in to post a comment.