This guide is relevant to the following Modes of Submission:
Electronic Document (Individual – Blackboard)
Presentation (Individual) – Blackboard
Duplicate submission (Blackboard)
Back to RISIS Modes of Submission – full list
If you have staggered deadlines and want to create a number of Blackboard Assignments for a single RISIS assessment, you will need to select Electronic Document (Individual – Blackboard – rolling deadlines) as the Mode of Submission. This creates a Weighted Total column which can be mapped to multiple Blackboard Assignment.
Set up submission point
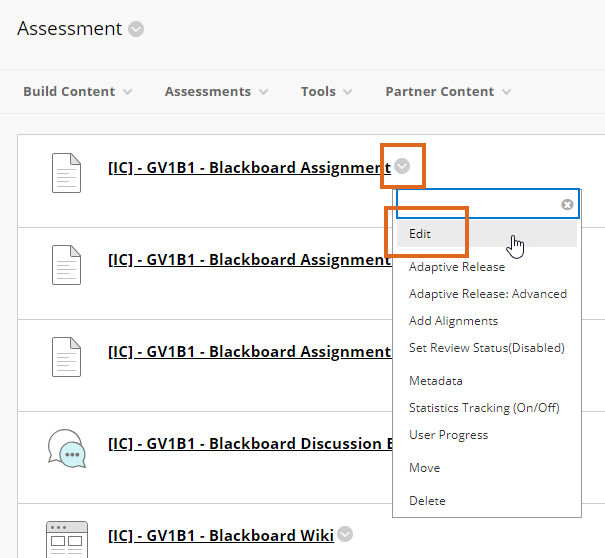
Integration will create a Blackboard Assignment in the ‘Assessment’ area of your course.
The assignment name will take the format
[IC] Module code-occurrence letter – RISIS Assessment Title
e.g. [IC] MM1F12-A – Essay 2
Default settings for Blackboard Assignments
See EMA Integration: What are the default settings applied to Blackboard assessments?
You will need to configure this assignment
- to ensure that the settings are correct
- to add instructions for students.
- Locate the assignment and choose Edit.
- Add Instructions.
- Check the
- Due Date and time
- Points Possible
- Attach a Rubric if required.
- Under Submission Details
- check that Assignment Type is set to Individual.
- check that Number of Attempts has the required setting (by default, Blackboard Assignments are set to allow unlimited attempts).
- Under Grading Options, if required tick Enable Anonymous Marking, and set the date on which anonymity will be removed.
- Under Display of Grades check that
- ‘Display grade as’ Primary display is set to Score
(or Pass/Fail/RN if this was selected in RISIS) - Include in Grade Centre grading calculations is ticked
- Show to students in My Grades is unticked
i. e. grades will be hidden from students until you choose to reveal the Grade Centre column, once marking is complete.
- ‘Display grade as’ Primary display is set to Score
- Under Availability
- check that Make the Assignment Available is ticked
- check and if necessary edit
- Display After date and time
- Display Until date and time
Page last updated on November 14, 2023 by andyturner

You must be logged in to post a comment.