Any assessments defined as Pass/Fail in RISIS will be set up in Blackboard with a Pass/Fail/RN ‘Grading Schema’.

This schema translates numerical grades as follows

0 = RN (RN means Result Not yet known)

1 (or any number between 1 and 49) = Fail

100 (or any number between 50 and 100) = Pass
Grade Centre column for Pass/Fail assessments
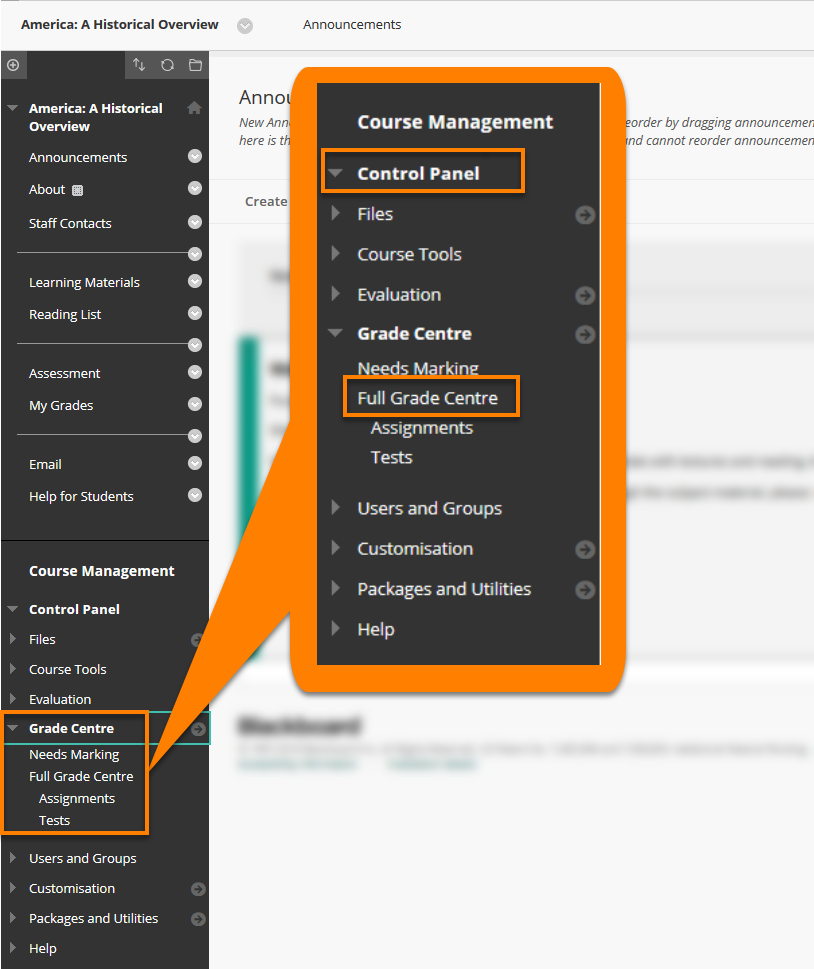
1. Go to Control Panel > Grade Centre > Full Grade Centre.
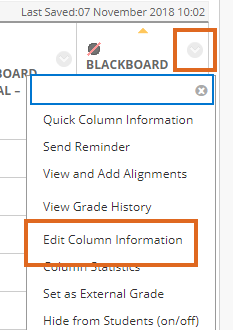
2. Click on the contextual menu for any Grade Centre column which should have a Pass/Fail schema, and choose Edit Column Information.
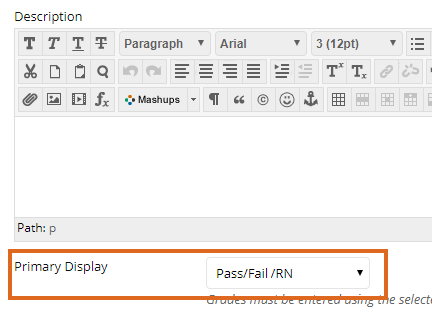
3. ‘Primary Display’ will be set to Pass/Fail/RN.
Marking Pass/Fail assessments
1. If you mark Pass/Fail assessments using Turnitin, or inline grading on a Blackboard assignment, you will need to enter a numerical value. This will then be converted into P, F or RN in the Grade Centre.
2. If marking through the Grade Centre (via Control Panel > Grade Centre > Full Grade Centre) you can enter number, or type P, F or RN.

Marking Pass/Fail assignments where you want to show students a numeric mark
If you need to show students a numeric mark in addition to their Pass/Fail result, locate the Grade Centre column and choose Edit Column Information.
Change the setting for Secondary Display from ‘None’ to ‘Score’.
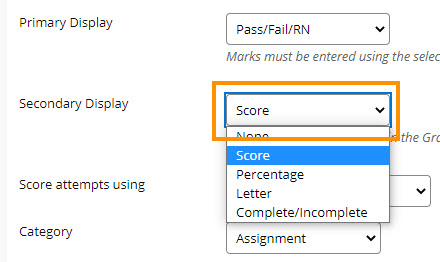
The students’ marks will now show in brackets e.g. P (65), F (32).
Additional change to make for Undergraduate modules
If you will be entering a numeric mark for an undergraduate Pass/Fail assessment, you will need to ensure that marks of 40 and higher are treated as a Pass.
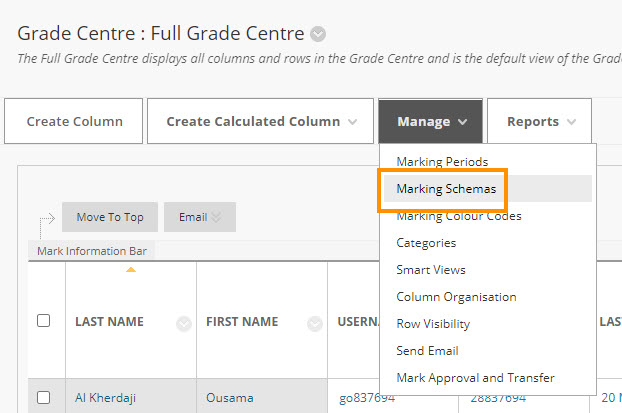
From the Full Grade Centre choose Manage > Marking Schemas
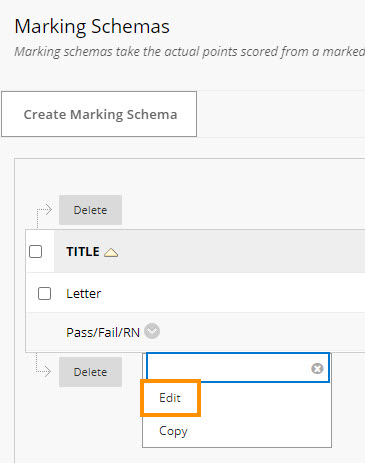
Then Edit the Pass/Fail schema.
Simply edit the first cell of the Schema Mapping from 50 to 40.
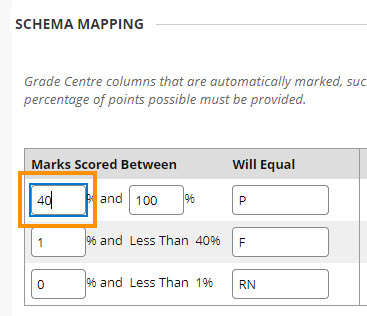
Any mark between 40 and 100 will now be treated as a Pass.
If you need more help, please log a Service Desk ticket.
Page last updated on August 24, 2023 by Asif Muhammad

You must be logged in to post a comment.