When marking a Blackboard assessment (for instance a Blackboard assignment, or a graded Blackboard wiki or journal) it is possible to record up to 5 minutes' feedback, using your computer's microphone and/or camera.
How to access the Record Feedback screen
The Insert Recording tool is available wherever the ‘Feedback to Learner’ screen appears. This includes
- Blackboard Assignments
- Manual Grade Centre columns
- Assessed Blogs, Journals, Wikis and Discussion Forums
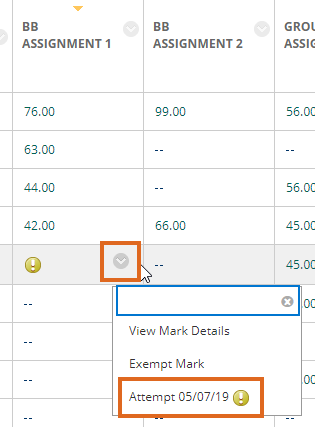
Blackboard Assignments
Access the student’s Attempt from Needs Marking or from the Grade Centre.
Open the Feedback to Learner panel, then click on the A icon – number 3 in the screenshot below – to view the full content editor.
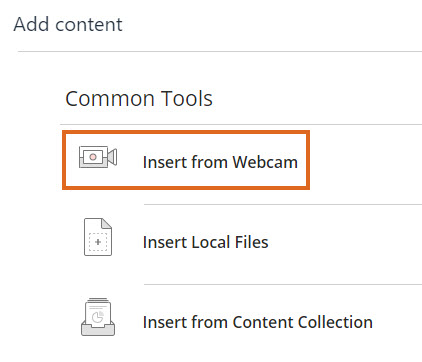
Now click on the Add Content icon on the bottom row of the toolbar.

Select Insert from Webcam.
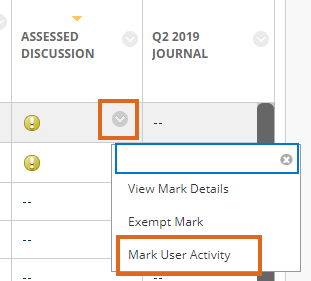
Blackboard Journals, Blogs, Wikis and Discussion Forums
Follow the same steps as for an Assignment, but choose Mark User Activity from the contextual menu in the Grade Centre.
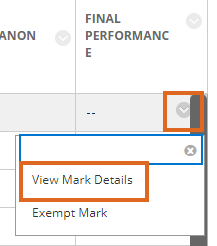
Manual Grade Centre columns
This would apply if providing audio/video feedback on an assessment where the student has not made an electronic submission – for instance, when marking a physical submission, presentation or performance.
Locate the Grade Centre column. Select a student and choose View Mark Details.
The Feedback to Learner panel will now be visible. Click on the Add Content icon as described above.
Making a recording
Set up your microphone and/or camera
The first time you use the recording tool, your internet browser will require permission to access your webcam and/or microphone.
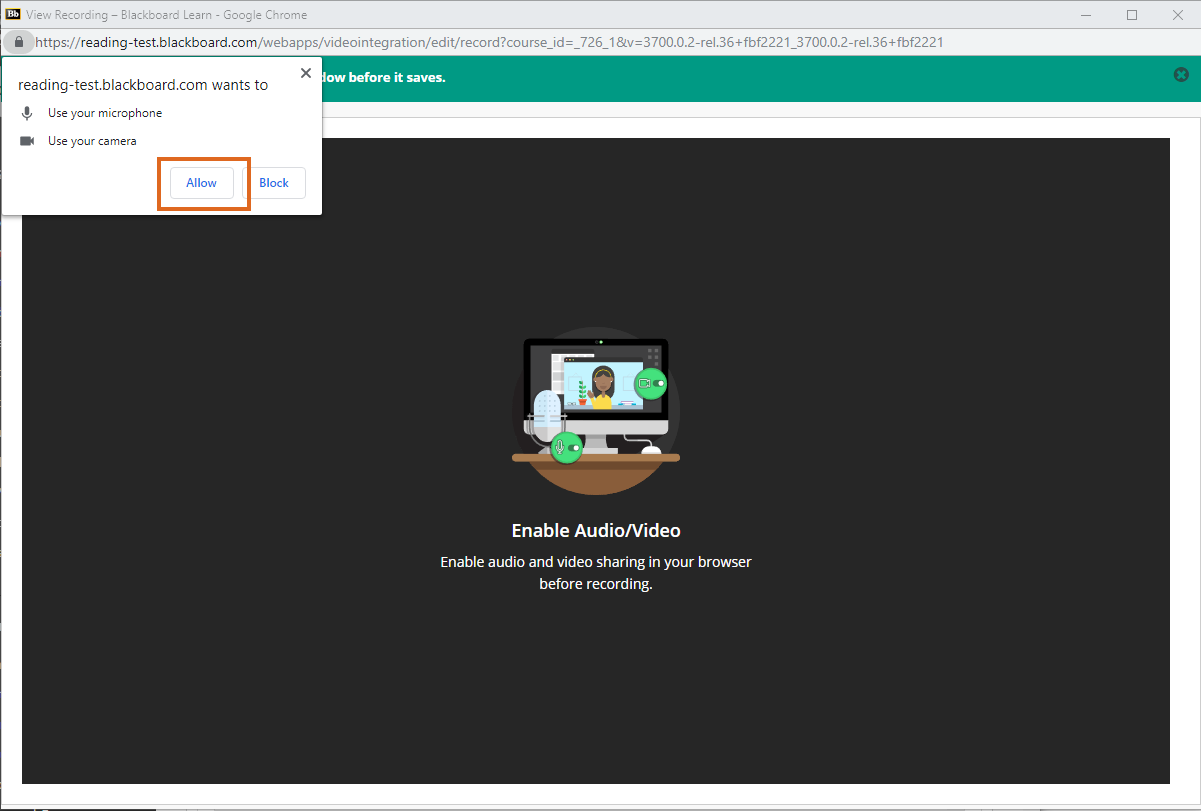
Google Chrome
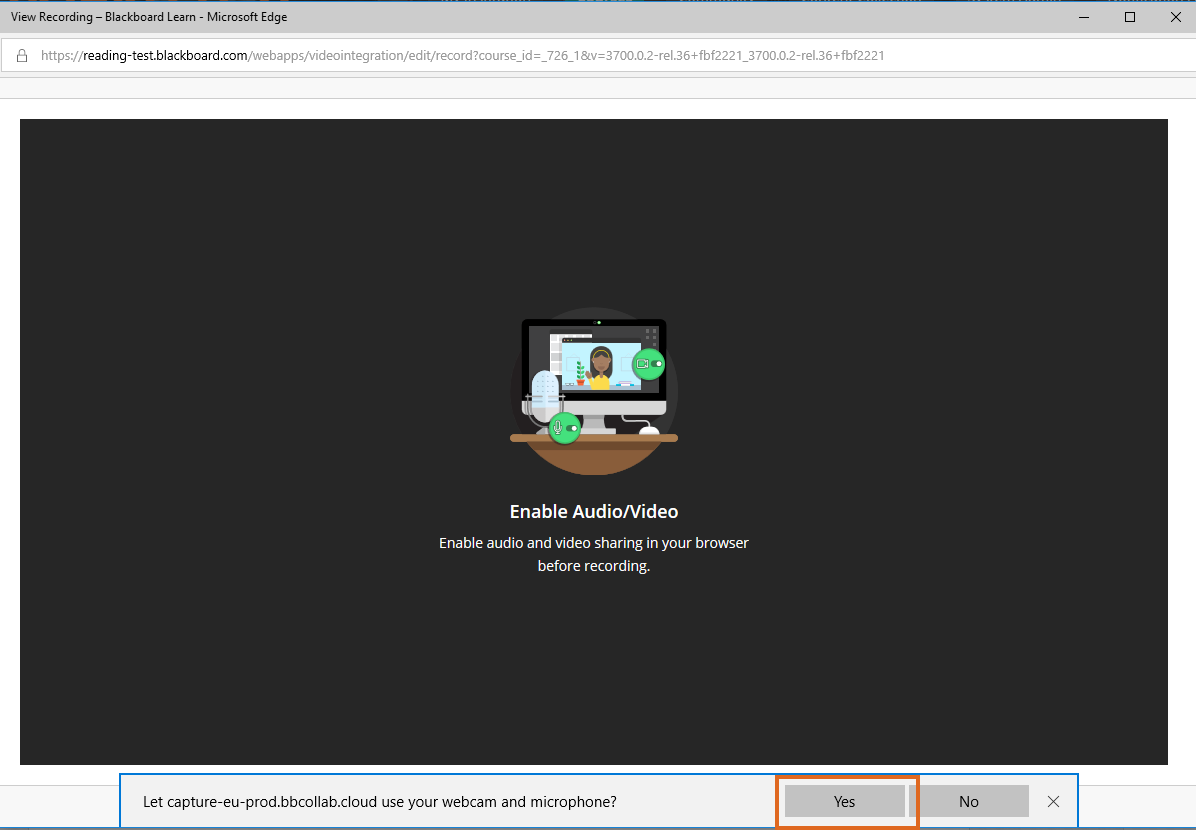
MS Edge
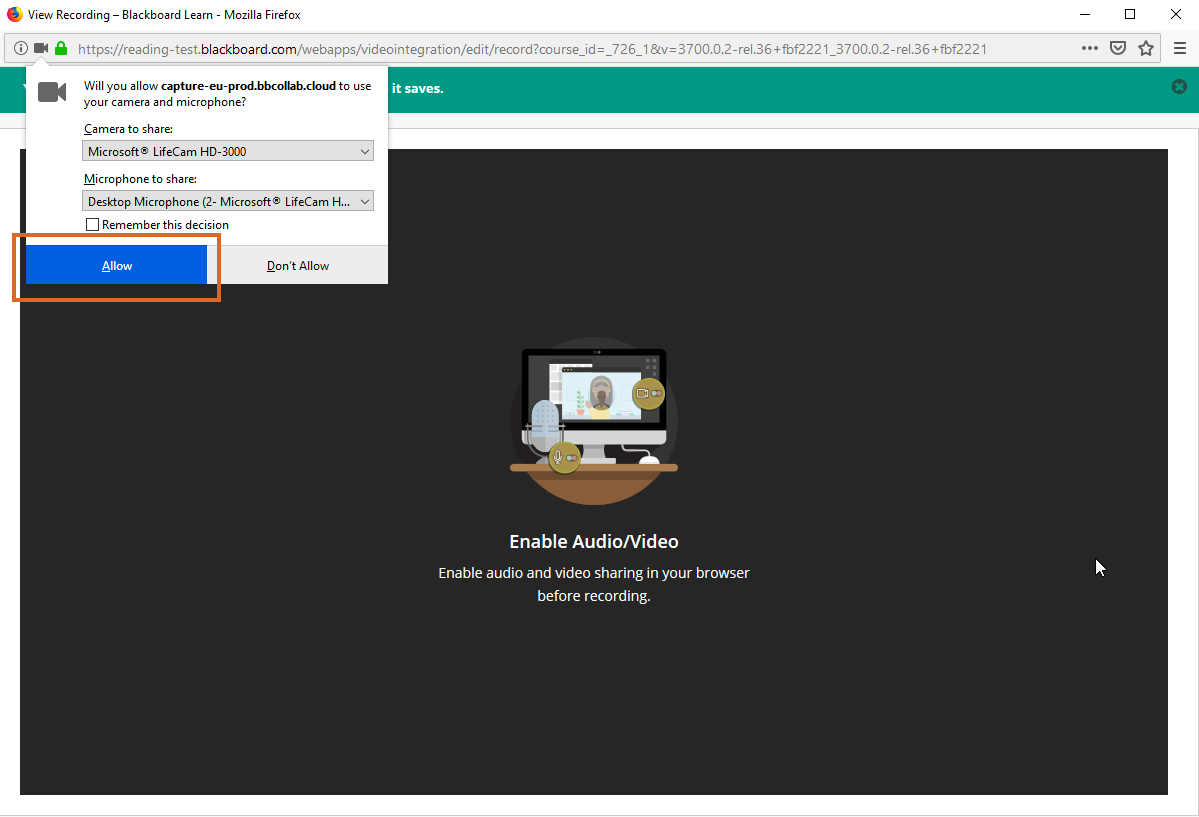
Mozilla Firefox
Before starting to record, check that your recording device is working correctly.
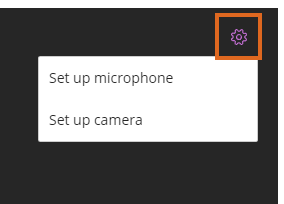
Click on the Settings icon, top right of the screen.
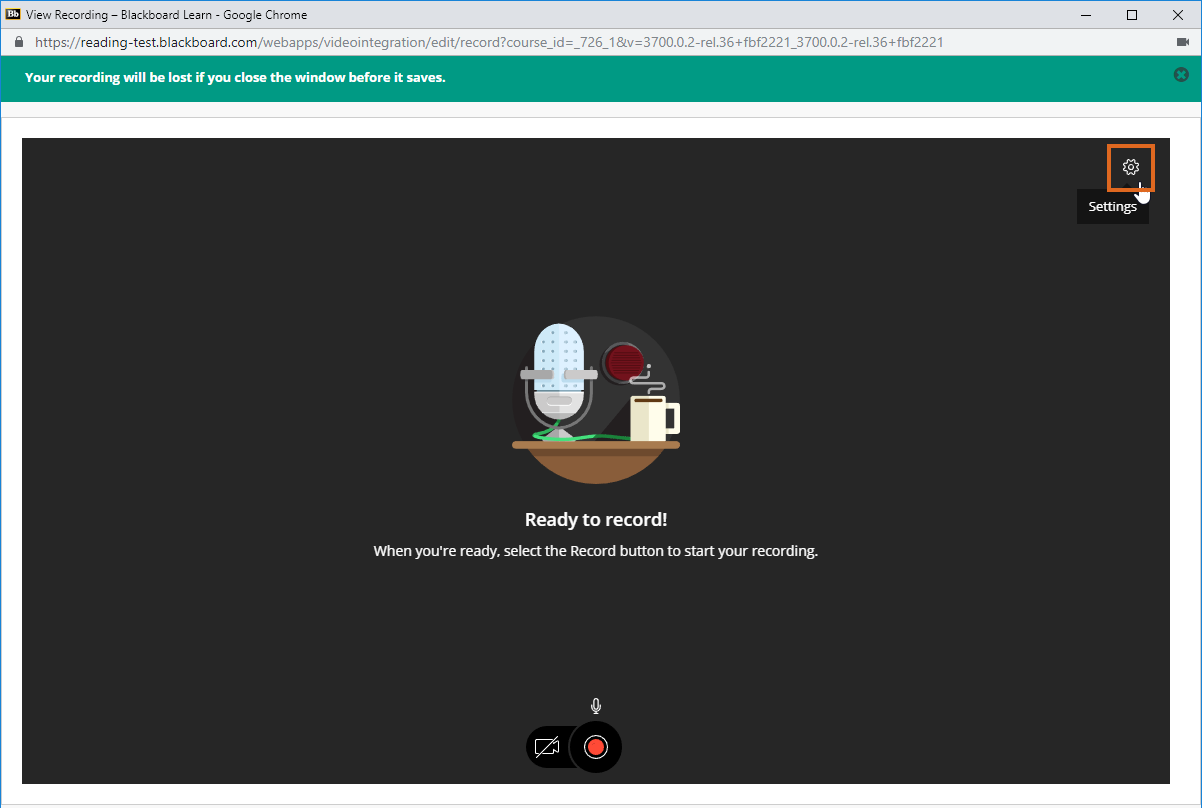
From here you can set up your camera and/or microphone.
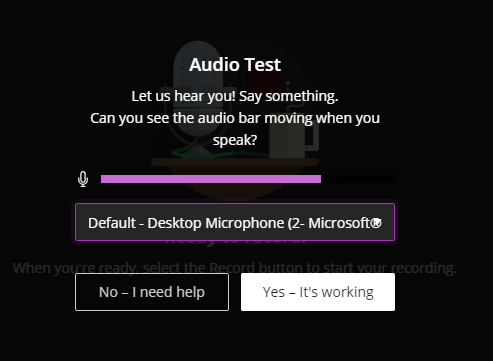
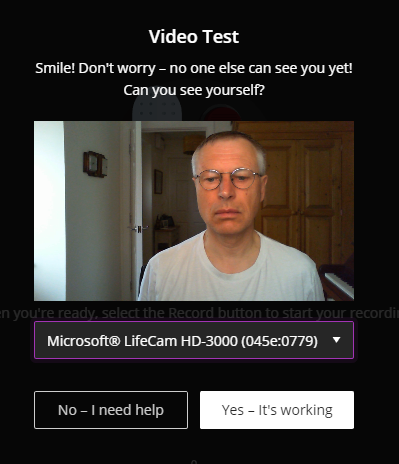
Important Warning
After setting up your microphone or camera, you MUST close the Recording window, then reopen it again to make your recording.
If you try to record immediately after setting up your microphone, without closing and reopening the window, your recording will be silent.
Audio recording
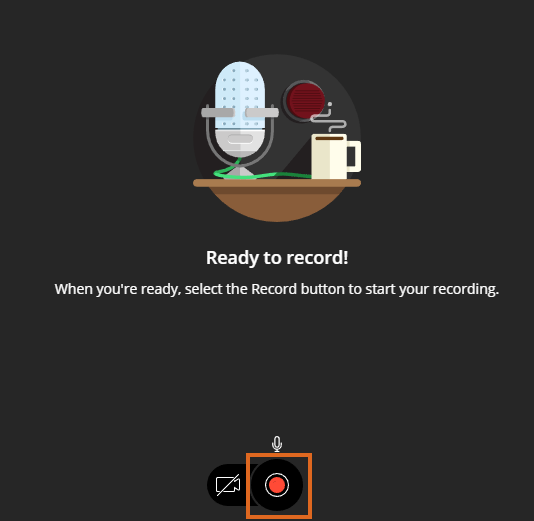
When ready to start recording, press the Record button at the bottom of the screen.
Video recording
Click on the camera icon at the bottom of the screen to enable video recording.
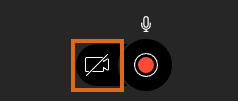
The video image is shown on screen: position yourself and/or the camera until you’re happy with the image.
When ready to start recording, press the Record button.
Saving your recording
When done, press the Stop button.
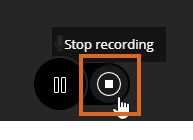
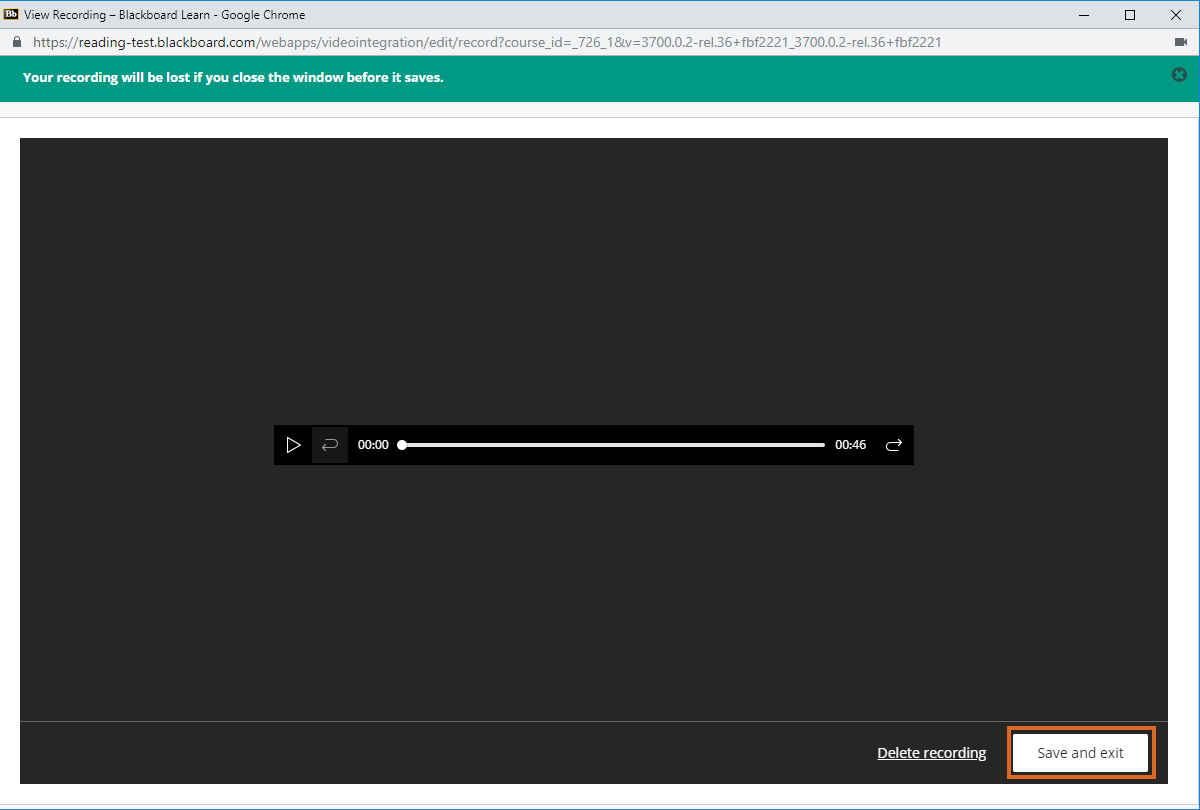
You will be able to preview your recording in the same window.
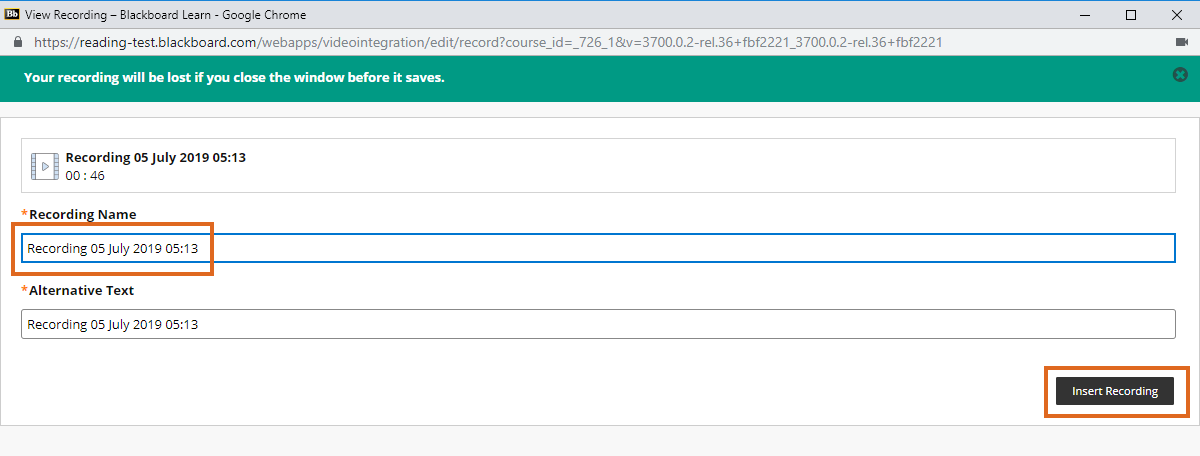
If happy, press Save and Exit.
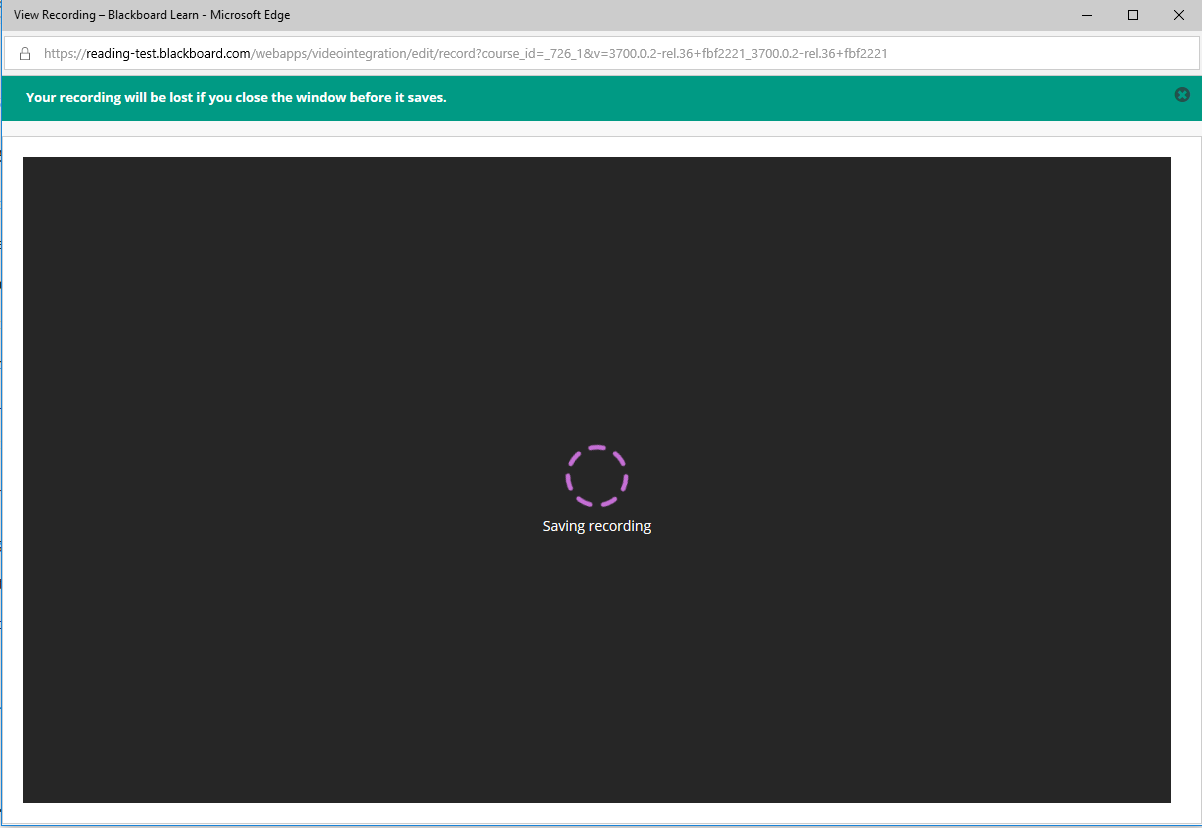
Once the file is saved, the screen which appears allows you to rename the recording if you wish. Make any desired changes and press Insert Recording.
You can of course provide typed feedback alongside the audio/video feedback.
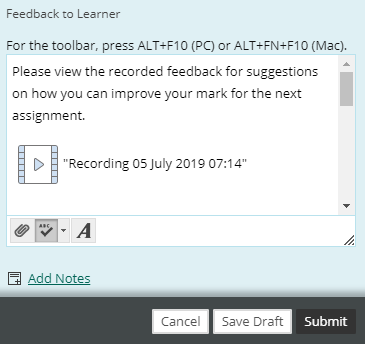
When you have finished marking the Attempt, remember to press Submit as usual.
Are there any technical limitations?
- Any modern browser should support use of this tool (i.e. not Internet Explorer).
MS Edge allows audio recordings, but does not currently support video recordings. - The maximum recording time, for audio and video feedback, is 5 minutes.
Recording stops automatically when 5 minutes have elapsed. A warning of how much time is left is shown on the recording screen.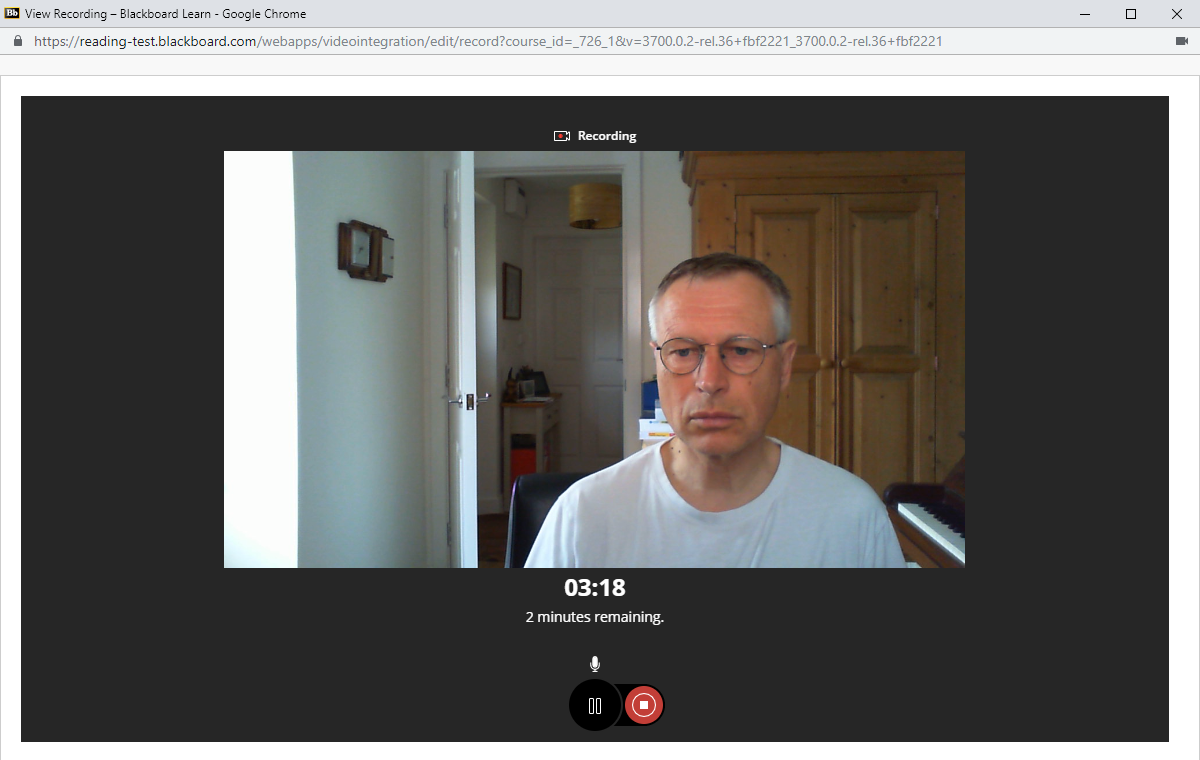
- Recordings made using this Blackboard tool cannot be edited, but you have the option to pause recording at any point, and resume when ready.
- To avoid time-out issues, if you take a break while marking a series of student assessments, always go back to Needs Marking or the Grade Centre when you want to mark the next student’s work.
Check the Blackboard Help pages for additional information.
How do students access their feedback?
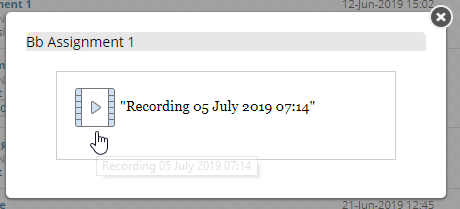
When students access My Marks any assessments with audio/video feedback will display the speech bubble icon.

Clicking on this will show all feedback entered into the Feedback to Learner area. Clicking on the Recording icon will open the audio or video feedback in a new window.
Page last updated on November 26, 2020 by adambailey

You must be logged in to post a comment.