Where to create a rubric
1. Either create a Rubric when setting up an Assignment.
a. Under GRADING click Add Rubric
b. Click Create New Rubric.

This will open up the Rubric creator in a new window.
2. Or go into Control Panel > Course Tools > Rubrics.
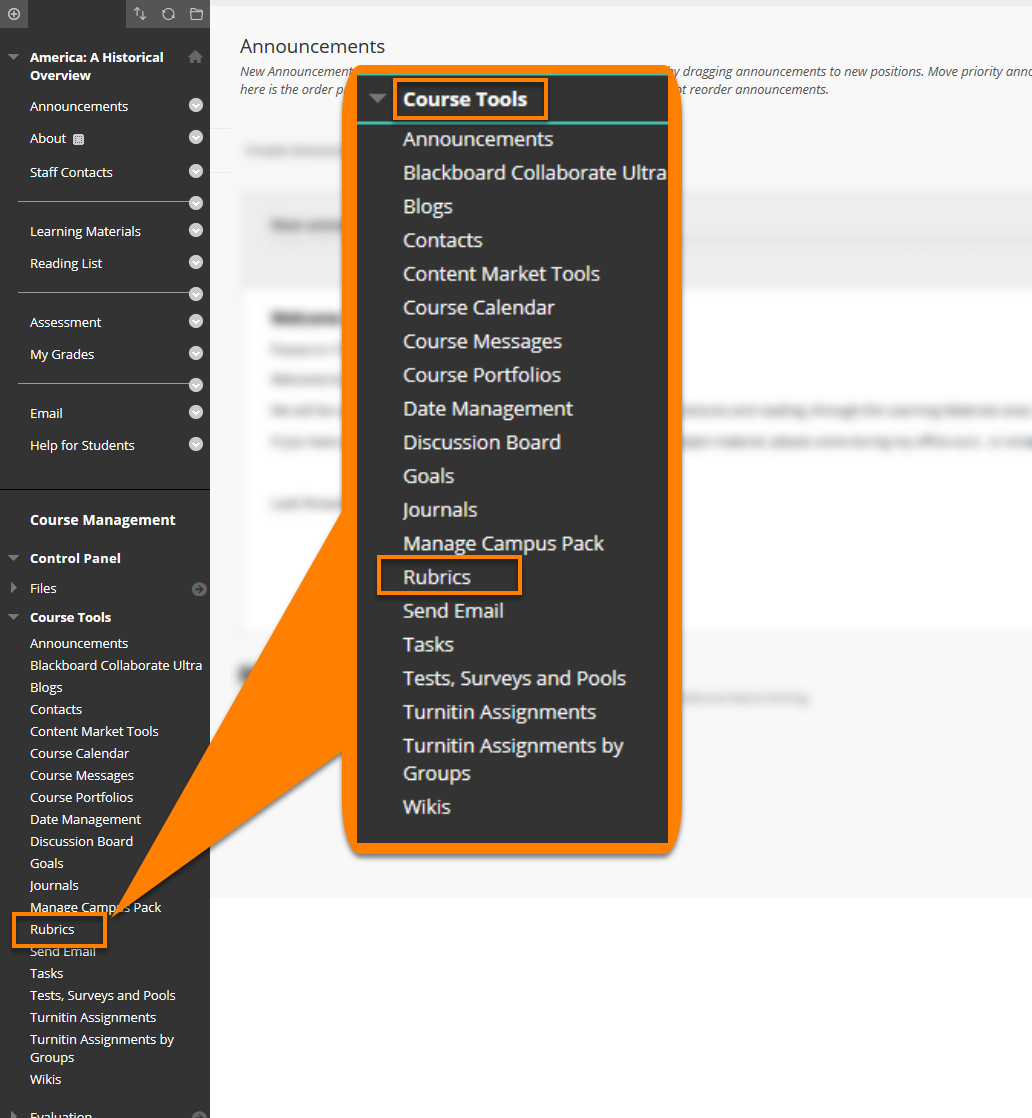
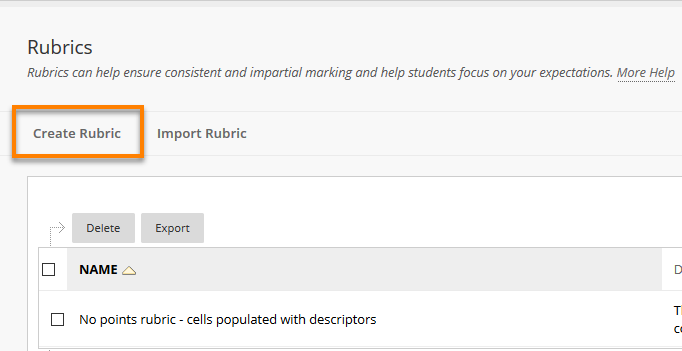
This will take you to the Rubric area which will contain any rubrics you have previously created on this course.
Here you can edit previously created rubrics, or create a new one. To do this click on Create Rubric.
How to create a Rubric
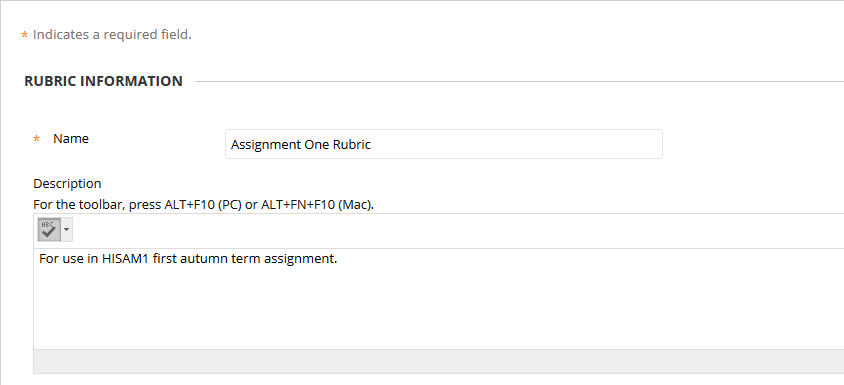
When the Create Rubric editing screen opens, enter a name for the rubric and give a description for easy identification or explanation.
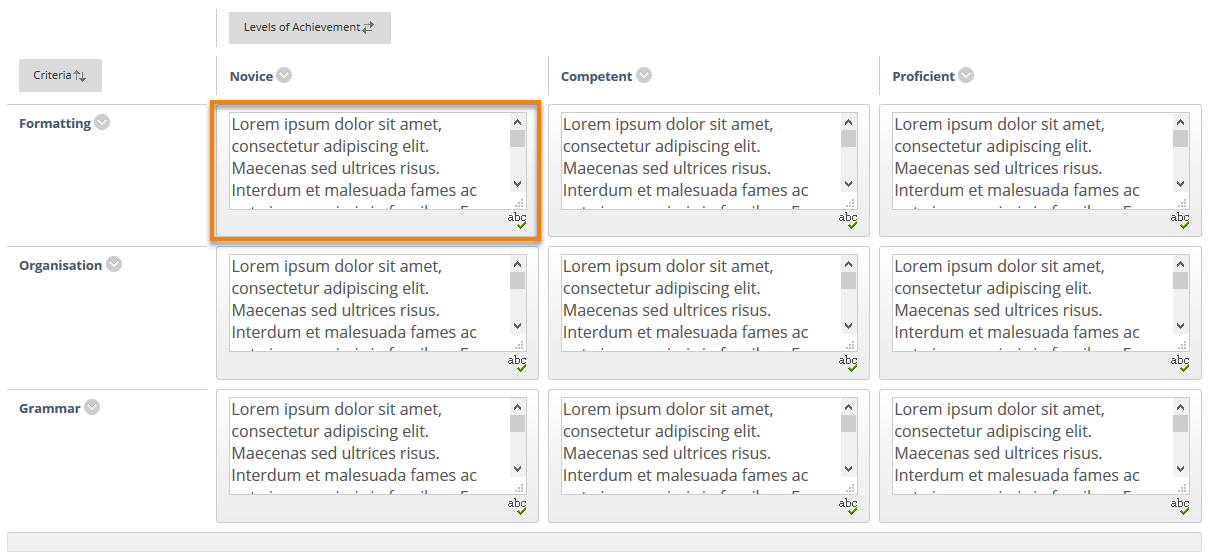
By default, a new rubric is created with three rows (assessment criteria) and three columns (level).
Each row has automatically been given a title and a weighted percentage of the total mark. This can be edited and added to create your own rubric.
Click the drop down menu next to Rubric Type to choose:
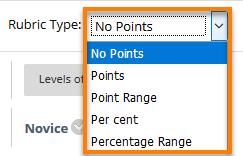
- No Points: gives feedback only.
- Points: Provides a single point value for each Level of Achievement.
- Point Range: Gives a range of values for each Level of Achievement.
- Percent: Creates a percentage value for each item in the grid dependent on the assignment’s total possible points.
- Percent Range: Gives a range of percentage values for each Level of Achievement.
Points and Percentage rubrics can be used to calculate an overall grade. Select No Points to provide a qualitative feedback. This gives you a purely descriptive rubric, which does not assign a grade automatically, but allows you to indicate to students how well they have performed against each assessment criterion.
Add and edit Columns and Rows
Click the Add row and Add column buttons as required.
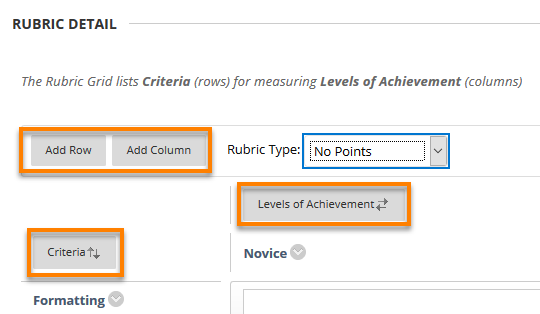
If required, click on the Criteria or Levels of Achievement buttons to reoder the items.
Edit
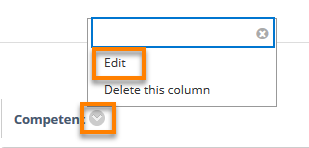
Click the More Options arrow to edit the row and column headings, to give them appropriate names.
Enter descriptive text into each cell of the rubric (Optional but recommended.)
Example descriptions:

For an assessment criterion on Referencing, the statements at differing levels might be:

- Referencing conventions are correct throughout the assignment and the Reference List.

- Referencing conventions are largely correct throughout the assignment and the Reference List, with very few inconsistencies.

- Referencing conventions are used inconsistently or some arguments are unsupported.
When you have finished creating your rubric, click Submit to save.

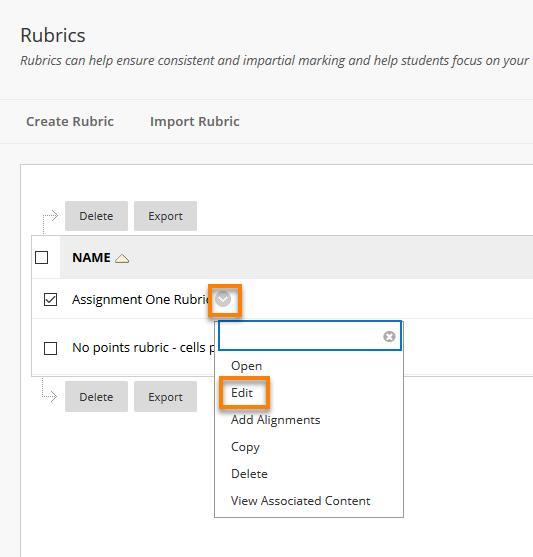
If you need to make any changes to the Rubric, go back to Control Panel > Course Tools > Rubrics and choose Edit from the contextual menu.
You cannot edit a rubric once it has been used for grading but you can create a duplicate that you can edit.
Do not detach a rubric from an assignment or delete a rubric that has been used for grading. All of the marks and feedback will be lost.
Page last updated on October 23, 2018 by Peter Moll
You must be logged in to post a comment.