For summative assessments, where you have selected Blackboard Assignment as the Mode of Submission in RISIS, the EMA Integration will create the necessary assignment(s) in your course. See EMA Integration: Blackboard Assignment.
Blackboard assignments can be set up to allow submissions by individual students or students working as a Group. Before setting up a Group assignment please ensure that you have already created all of the necessary groups in your Blackboard course.
To create a Blackboard assignment
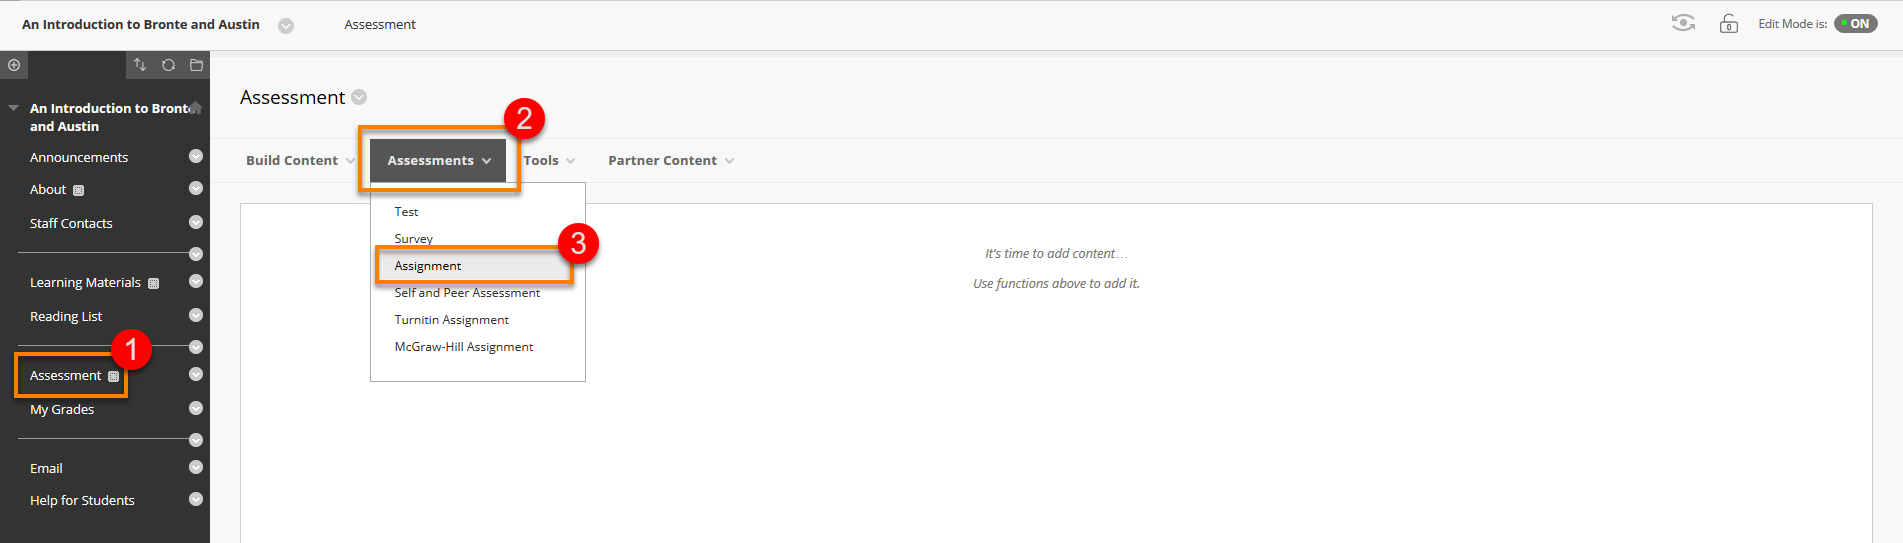
1. Go into the content area on your course where you want the assignment submission point to appear to students (we recommend that you use the Assignments/Assessments area on the course menu).
2. From the menu bar, hover over Assessments
3. Select Assignment in the dropdown menu.
Assignment Settings
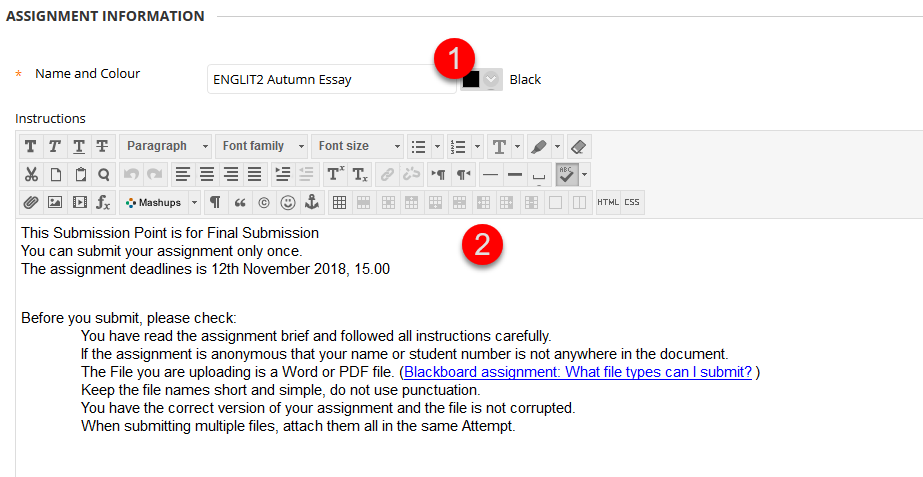
1. Give the Assignment a Name.
For Formative assessment: Clearly label Assignment titles with the word ‘Formative’ or ‘Practice’ – make clear the definition between formative and summative assignments.
2. Add clear assignment Instructions and details.
3. If applicable, you can attach a file from your PC or one that’s already in the Blackboard Content Collection.

4. Set a Due Date (Use the Calendar and Clock buttons to select this)

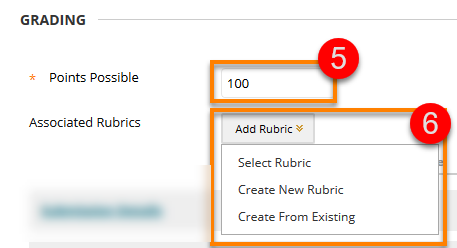
5. Set the Points Possible as 100.
6. Add a Rubric if one will be used when marking this assignment.
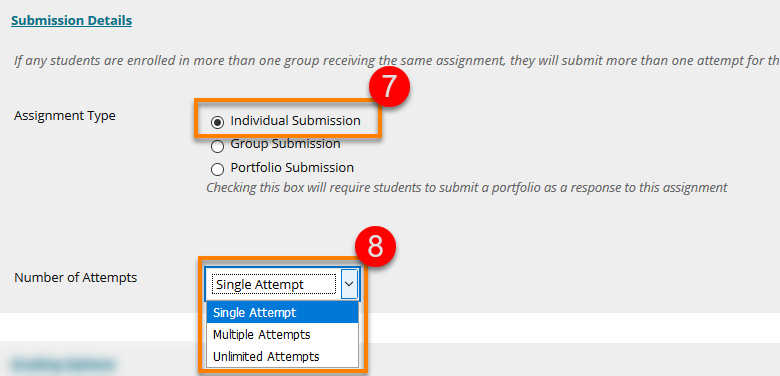
7. Click Submission Details to select the Assignment Type: Individual Submission or Group Submission.
If you choose Group Submission, you will then need to select which Groups are required to submit to the assignment.

Highlight the required groups in the left Items to Select box, then click the right arrow to move them into the ‘Selected Items’ box. This enables these Groups to submit.
8. Choose the Number of Attempts that students are allowed (if you select Multiple or Unlimited all attempts will be visible to the marker, but the last attempt will be marked).
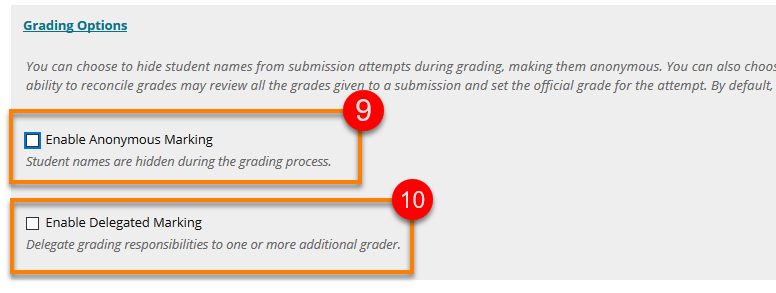
9. Under Grading Options, tick Enable Anonymous Marking if marking on this assignment needs to be anonymous.
If you select Enable Anonymous Marking you will then be asked to choose when you want to Disable Anonymous Marking. Select On Specific date and then enter the date when anonymity should be automatically lifted. You can return to edit this date later, if necessary.
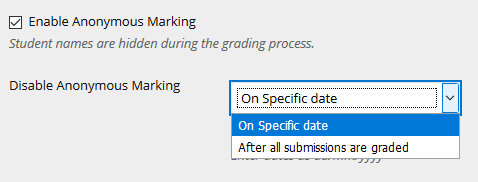
Unlike Turnitin the date when anonymity is lifted on a Blackboard assignment is not linked in any way to when students are able to view their marks and feedback.
10. Do not tick Delegated Marking.
Please get in touch with the TEL team to discuss options for distributing student work to multiple markers.
11. Under Display of Grades, choose how to display the grades to the students.
a. Leave ‘Display grade as’ on Score.
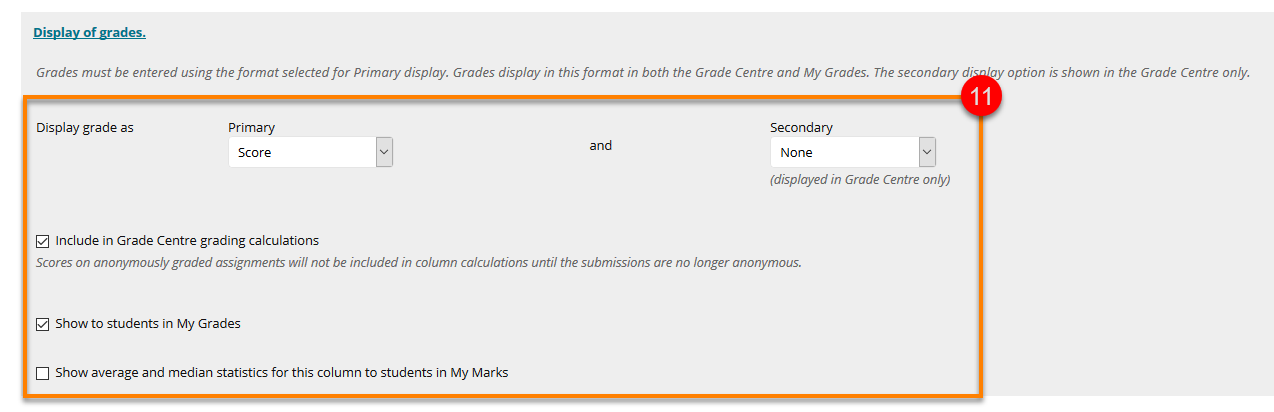
The settings on the next two tick boxes affect whether students are able to see their grades before they have been officially released.
b. Leave Include in Grade Centre calculations ticked.
This allows you to include scores from this assignment in a Weighted Total column in the Grade Centre. In order to prevent students being able to work out their marks before they are officially released, you will need to hide the Weighted Total column.
c. Un-tick ‘Show to students in My Grades’ – this prevents students seeing their mark and feedback before it has been officially released.
When you are ready to release grades to students, you will need to reveal the Grade Centre column for this assignment, so that marks and feedback are shown through to My Marks (the student view of the Grade Centre).
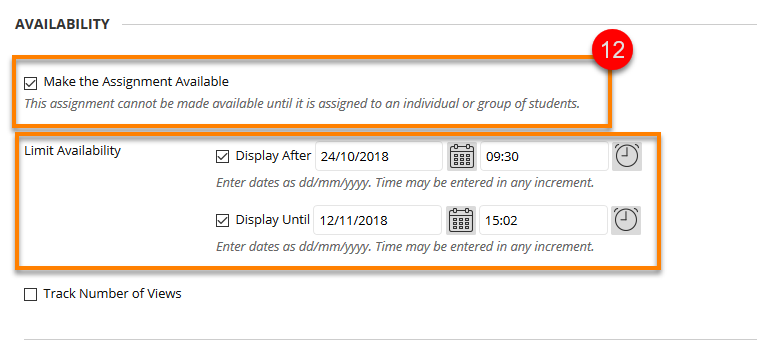
Under AVAILABILITY choose how to Make the Assignment Available.
By default, keep the Make the Assignment Available box ticked if you want to make the assignment immediately available.
If you do not want the assignment to be visible until a date in the future, keep this box ticked but then select the appropriate Display After date under ‘Limit Availability’.
To prevent students submitting after the due date, you should set the Display Until date and time so that it corresponds with the assignment due date.
Standard settings for On-time submission points:
- Due Date – enter the assignment deadline.
- Availability > Limit Availability > Display Until – tick box and the enter date/time of the assignment deadline.
Standard settings for Late / ECF submission points:
- Due Date – enter the assignment deadline.
- Submission Details > Number of Attempts > Single Attempt.
- Availability > Limit Availability > Display After – tick the box and enter date/time of the assignment deadline.
Page last updated on May 4, 2022 by andyturner
You must be logged in to post a comment.