Introduction
You can create Groups of users within a Blackboard course. These might be used for Tutorial or Seminar Groups, or where students are working collaboratively on a task.
You can create Groups and assign users to them manually or ask students to self enrol on a group, Where you are manually enrolling users, if you have a relatively small number of students to deal with, this is probably the quickest route.
However, if you have a large number of Groups and/or students, it may be quicker to use a spreadsheet to create the Groups and assign members to them.
How to do it
In your Blackboard course go to Control Panel > Users & Groups > Groups
Click on Import

On the Import Groups page it is worth clicking on More Help. This opens a new window from which you can download two sample CSV files, showing the correct formatting to use when creating Groups and assigning members to Groups. Once downloaded, these sample files will open in Excel.

In Excel
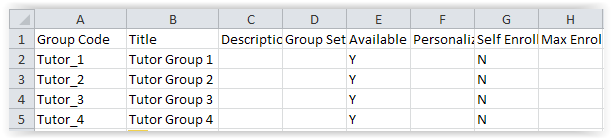
Edit sample_groups.csv
This is the file which you will use to create Groups.
· You must retain the column headings.
· Enter the details for each Group on a new line.
· For each Group you must provide a Group Code (no spaces allowed) and a Title (what will display to students). Description is optional.
· Enter Y for Availability, otherwise all the Groups will be created as unavailable.
· If you leave the Self-Enrol column empty, Blackboard will assume that the Group does not allow self-enrolment.
· If you are creating Self-Enrol Groups, you will need to fill out the following columns as well.
· You can of course rename the file as you wish, but make sure that you save it as a CSV (comma-separated) file.
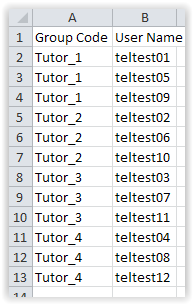
Edit sample_groupmembers.csv
This is the file which you will use to assign course members to Groups.
· Users must already be enrolled on the Blackboard course before you can add them to Groups
· You must retain the column headings.
· Enter the details for each course member on a new line.
· All that is required is
– the relevant Group Code (make sure this is exactly the same as on the other spreadsheet)
– the student User Name (this is their IT username, not their student number).
· You can of course rename the file as you wish, but make sure that you save it as a CSV (comma-separated) file.
In Blackboard
Return to the Import Groups page.
Now attach the two files.
Make sure you attach the right file to the right button
Upload sample_groupmembers.csv (list of Group members) here.
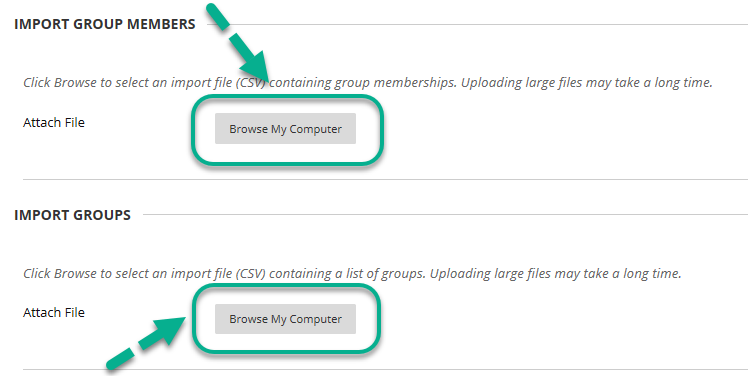
Upload sample_groups.csv (list of Groups) here.
If you are used to working with Groups, the rest of the process should be self-explanatory.
Choose the tools to be made available to each Group.
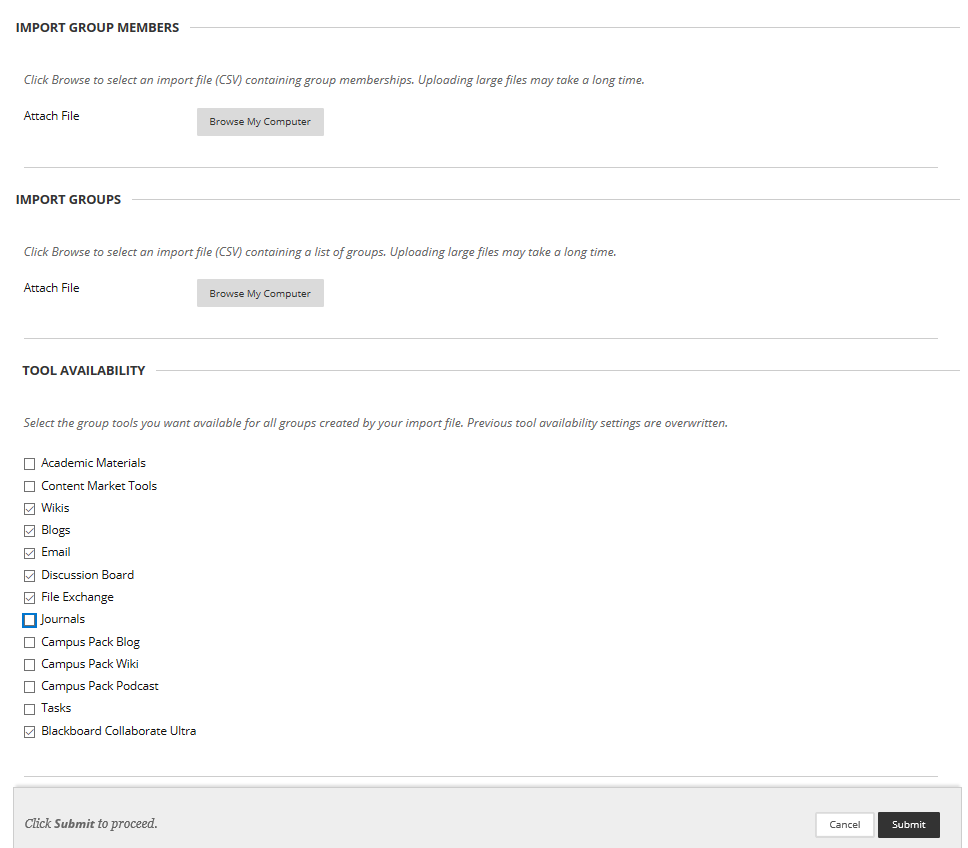
When done, press Submit.
Editing Groups
Please note
· Once created, you can edit these new Groups in the same way as manually created Groups.
· Normally you would set up your Groups and import members at the same time.
But you can import course members into previously-created Groups.
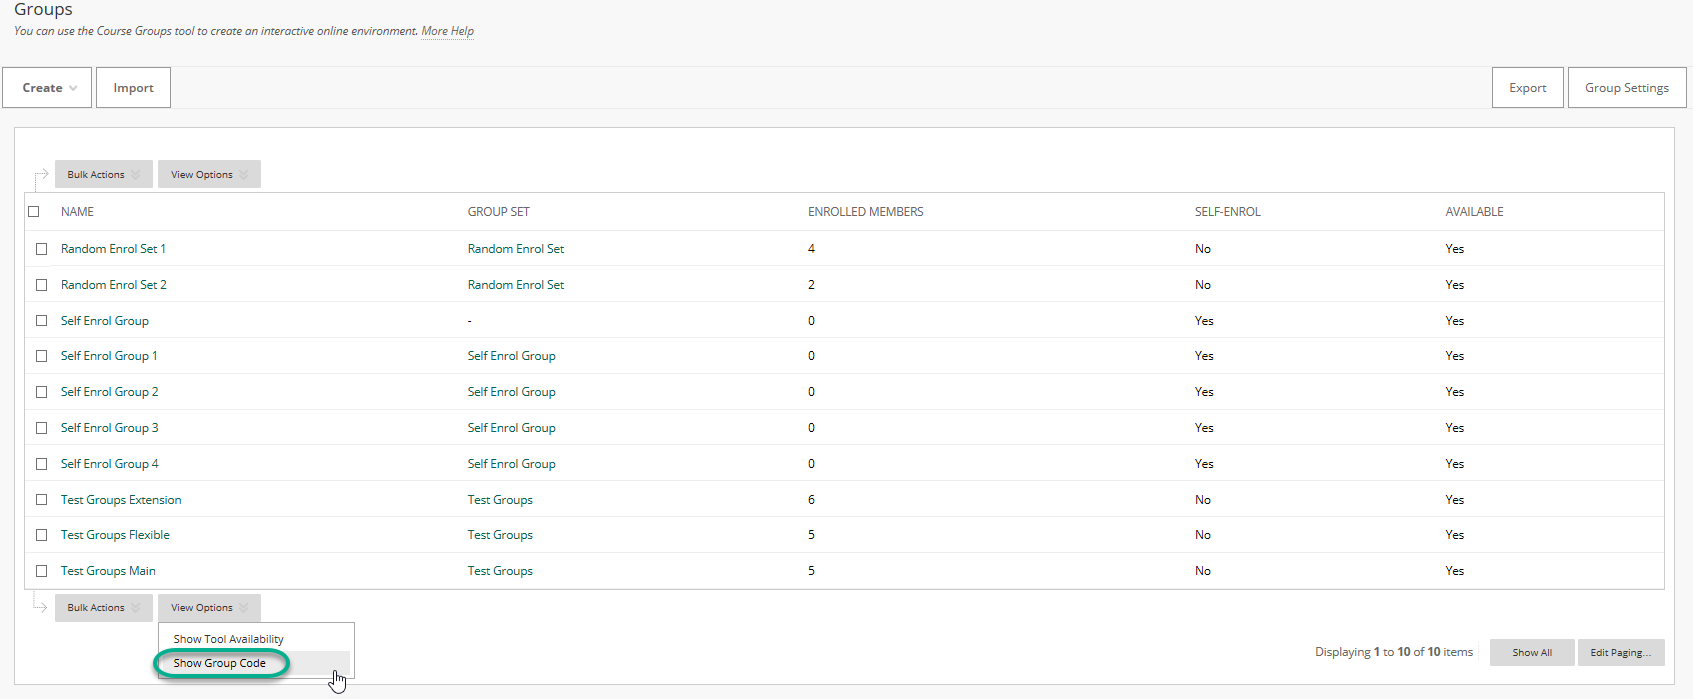
To do this you will need to know the Group Code of the existing groups – click on View Options > Show Group Code.

You can then use these Group Codes to create a new spreadsheet listing Group Code and User Name .
Follow the Import routine outlined above, but attaching only one file (IMPORT GROUP MEMBERS) .
Page last updated on August 13, 2019 by Peter Moll
You must be logged in to post a comment.