In Blackboard Learn Ultra it is possible to use Batch Edit on some functions namely making items visible to students, changing dates and deleting items.
- Batch Edit in three steps
- Batch Edit options
Batch Edit
Step 1: Open Batch Edit
In the Course Content area on an Ultra course click on the “More options for course content” menu, which is found by clicking on the three dots in the top right-hand corner of the Course Content area.
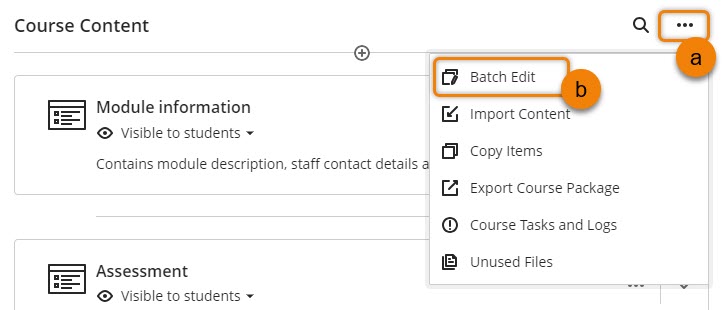
Batch Edit is the first option on this menu.
Step 2: Select Items to Edit
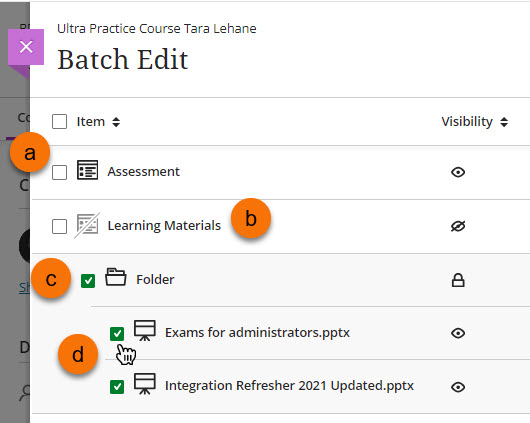
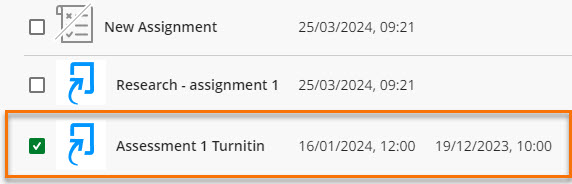
The Batch Edit page will have a list of all the items on the course.
- You can select the check boxes of all the items you wish to “batch edit”.
- Click on any container’s (i.e. Learning module) name or icon to open it.
- All items in a selected container (i.e. Folder) will also be selected.
- It is possible to deselect any of those items as desired.
Step 3: Select Edit Option
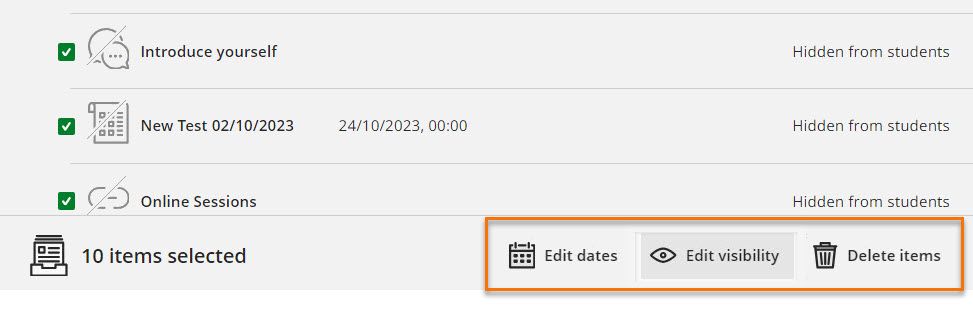
Once you have selected all the required items scroll to the bottom of the page and select one of the three options Edit Dates, Edit visibility or Delete.
Batch Edit Options
Once you have selected the items, you need to select the time of batch Edit you wish to perform. The options are:
Edit Visibility
As you select the items a counter at the bottom left-hand side of the page will add the number of items selected. On the bottom right-hand corner of the page use the Edit Selection drop down list to select Edit visibility.
A pop-up window will appear with the option Hidden from students selected. Click on the radio button for Visible to student, then click Save Visibility.
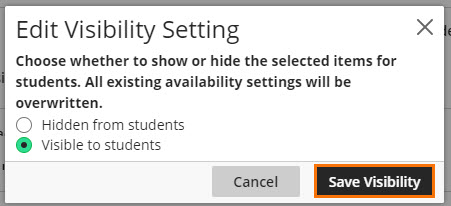
A success banner will appear at the top of the page. When you return to the Course Content the items will be visible to students
Once selected follow the same steps of selecting “Edit visibility”, make your change then “Save Visibility”.
Edit dates
There are three choices when editing dates.
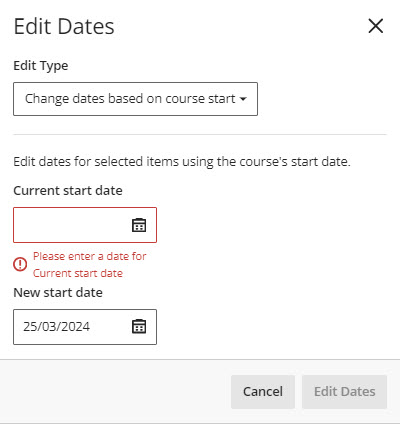
Option 1: Change dates based on course start
Option 1 will edit dates for the selected items using the course’s start date.
If you upload a previously created course into a new one, you can adjust all the dates in the new course to match the same cadence that the previously created course had. For example: You reuse content from the previous semester when your course’s start date was August 19, 2019. Your course’s new start date is January 6, 2020. All dates for the selected items are adjusted forward 140 days.
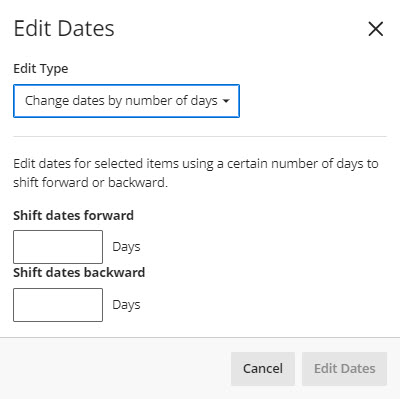
Option 2: Change dates by number of days
Option 2 will allow you to enter a number of days you will the dates to Shift forward or Shift backwards by.
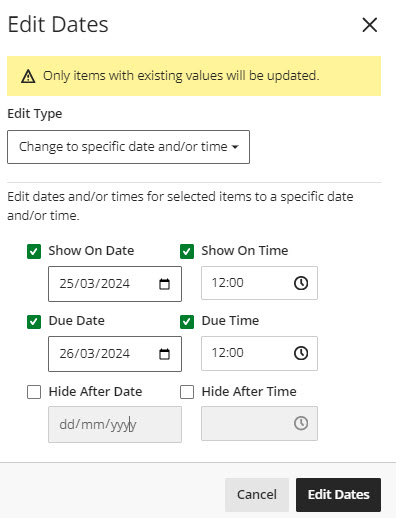
Option 3: Change to specific date and/or time
Option 3 will allow you to edit dates and/or times for the selected items to a specific date and/or time.
You can fill in some or all of the date/time types, Show on Date, Due Date and Hide After Date.
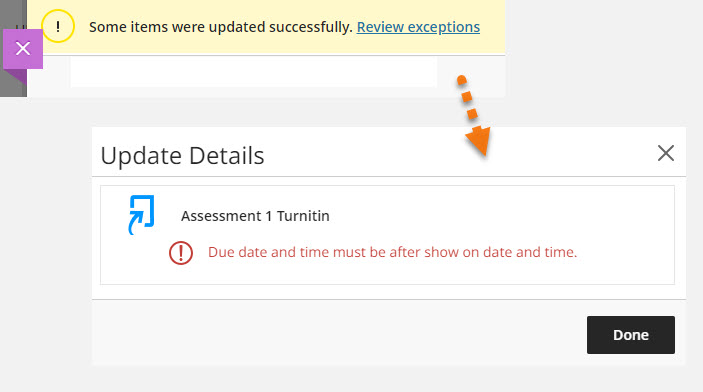
If there are any issues an warning bar will appear at the top of the screen with a link inviting you to “Review exceptions“. Reasons for this may include third party tool restrictions such as turnitin date rules.
The item in question will stay selected with the dates unchanged.
Delete Items
Any items selected will be deleted.
When you have made all the edits you want, you can close the page using the purple cross in the top left-hand corner.
Guide last updated on September 3, 2024