If you reach to storage quota for your Blackboard course or organisation, you will need to free up space before you can add more files. There are several options to achieve this:.
- Find and delete ‘unused’ files
- Manage and reduce file sizes (guide)
- Delete files
- from your Blackboard course homepage (“Content”)
- and the associated file repository (“Content Collection”)
- Purge the ‘Recycle’ folder (Blackboard retain copies of deleted or replaced files in “Recycle Bin” for up to 30 days)
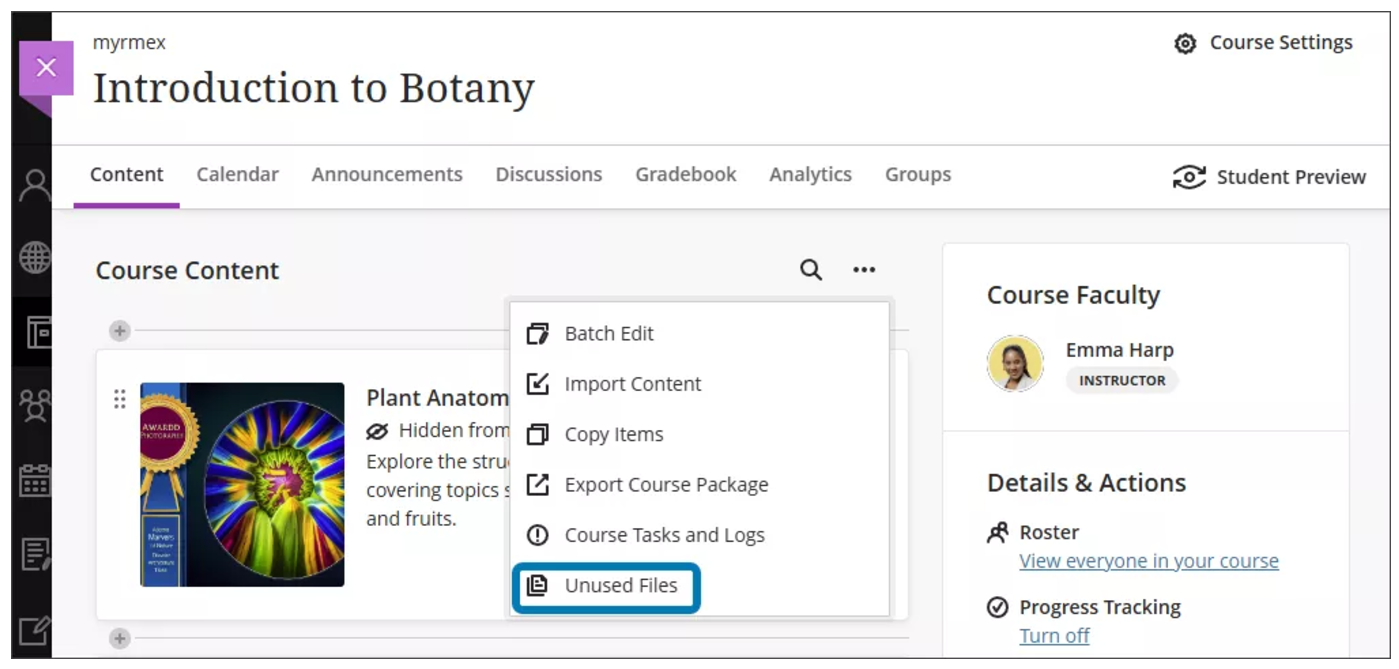
How to find and delete unused files
You can easily locate and delete unused course files in your course. Select the ellipsis (three dots) menu at the top of the Course Content page and then select Unused Files.
There are two views available on the Unused Files page: unused files (default view), which displays files that have never been opened in your course, or all files, which displays all files in your course. The file name, upload date, and file size are displayed along with an option to download a copy of the local file.
Simply select the files you want to delete and then select Delete Files.
Delete files from your course homepage (“Content”)
When deleting items from the course homepage (‘Content’), this action will only remove the display of the content. It does not immediately delete associated files from the course file repository (‘Content Collection’), meaning they still count towards your course storage quota and can be restored (up to 30 days from deletion, via ‘Recycle’ bin).
To delete items from your Blackboard course homepage:
- Click “three dots” for relevant content item
- From the drop down, click “Delete”
Accidently deleted a submission point with marks, and student submissions?
Raise a support ticket within 30 days of deletion.
Delete files from your course file repository (“Content Collection”)
To completely remove a file from your Blackboard course, and gain more storage space, you should check it is deleted from both the course homepage (‘Content’) and course file repository (‘Content Collection’). This will likely include emptying the ‘Recycle’ folder in ‘Content Collection’.
Note: Only uploaded files, or files copied to the course, are stored in the ‘Content Collection’ and count towards your storage quota. All other content types do not count towards the course storage quota, such as Links (for example, to external websites, course links or links to videos emanating from YuJa), Discussions, Submission Points, Ultra Documents etc.
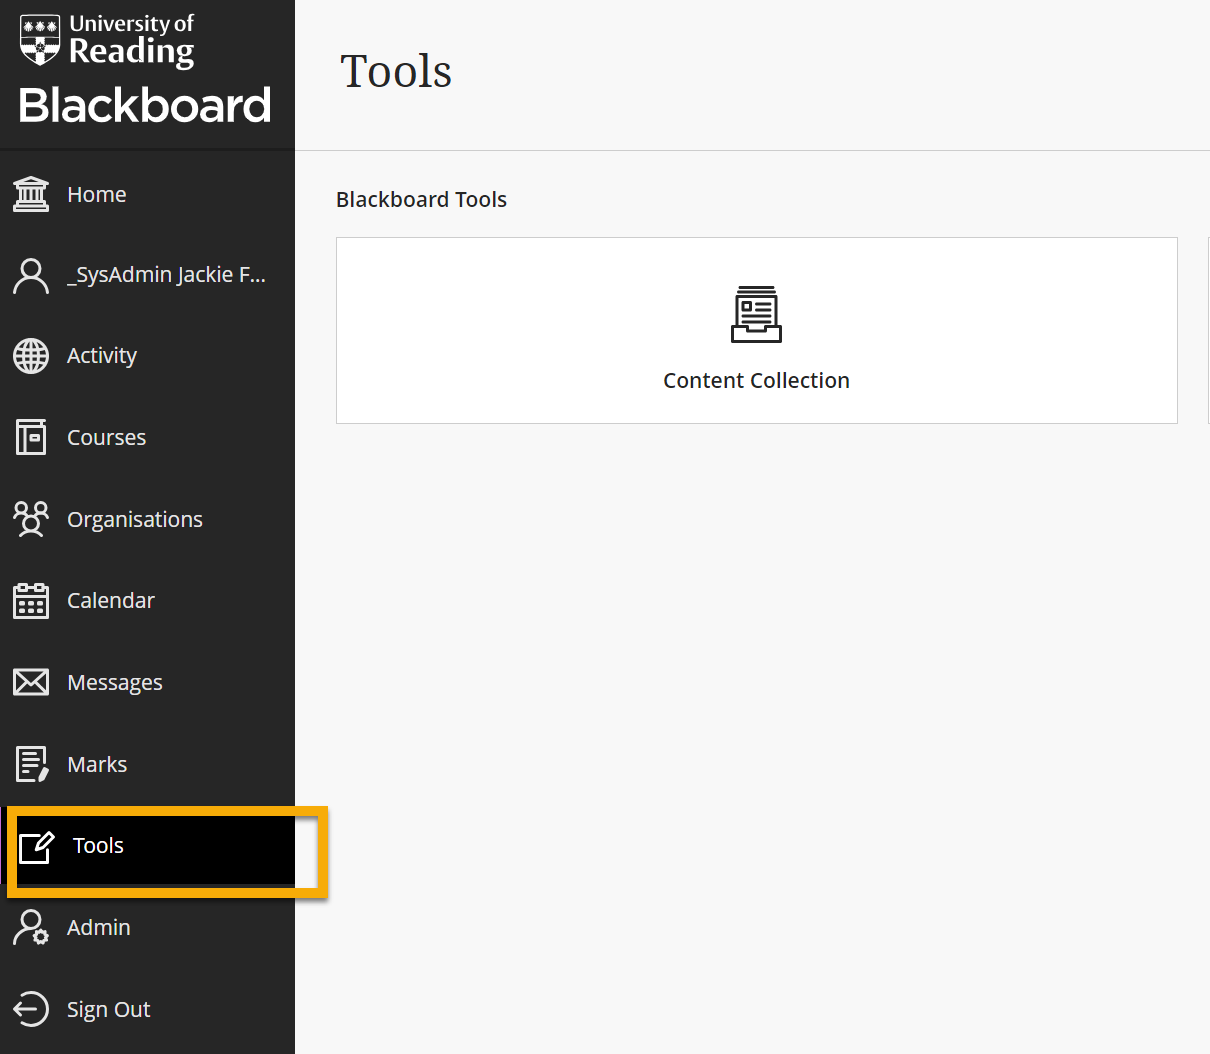
- To access your course file repository, go to the Blackboard homepage>Tools>Content Collection:
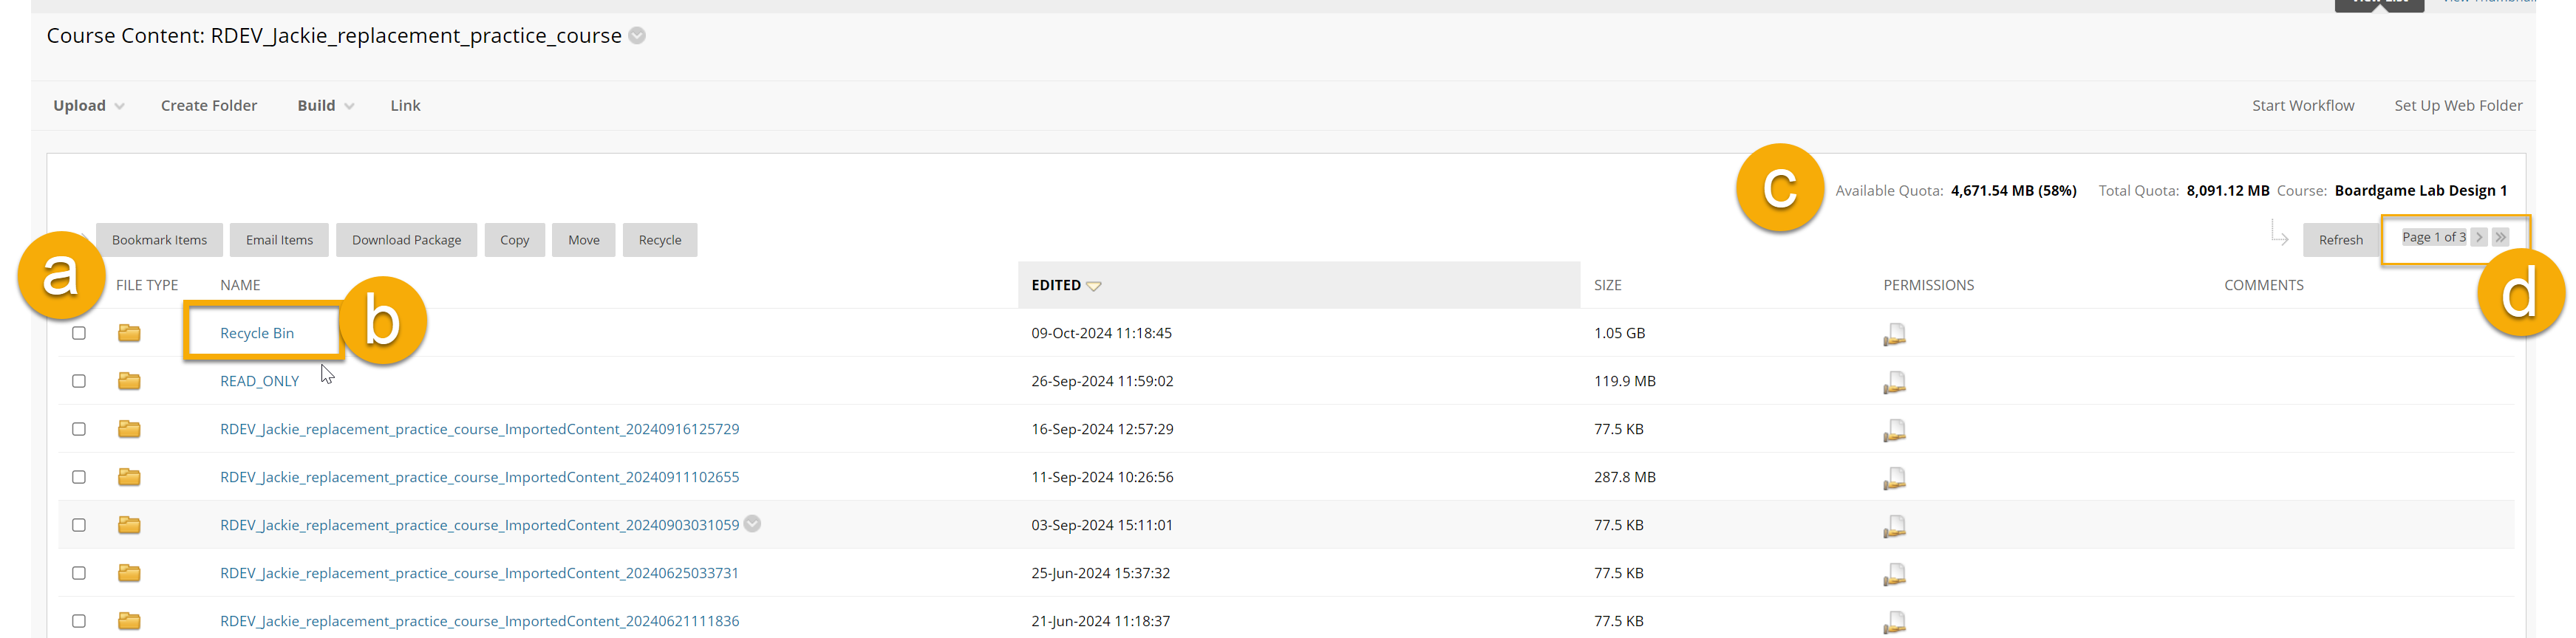
2. Find your course:
a) Click ‘Course content’
b) Select ‘Show all’
c) Press Ctrl+f on your keyboard, this opens a search bar. Begin typing your course name to see it highlighted in the list.

3. Find your content:
a) You can sort the lists into ascending or descending order, to do this: click any column heading (‘FILE TYPE’, ‘NAME’, last ‘EDITED’, file ‘SIZE’ etc) and click a second time to change the order.
b) One of the folders will be titled ‘Recycle Bin’. It contains files that have been ‘deleted’ from your course homepage (‘Content’). If you need to restore or empty this folder, check the next section of this guide.
c) You can check the available storage at any time. The total storage available to courses is 5GB.
d) If your files are listed over several page, scroll to the bottom of the page and click ‘Show All’.
‘Recycle’ bin: How to purge the folder or restore files
- Open the course file repository “Content Collection” via Blackboard homepage>Tools>Content Collection>Course Content (scroll to locate and select your course folder).
- Open “Recycle” folder (you may need to scroll up/down to find the folder, or use Ctrl+F to open a search field)
- Locate and select the file/s you would like to restore
- Press “Restore” to send the files back to the Content Collection (the ‘Restore’ option will appear at the top of the page, only for files or folders which can be restored).
- Or press “Empty Bin” to purge, and delete files permanently. You will have additional storage space.
Guide last updated on November 4, 2025