IC columns, also known as Integrated Columns are generated from the RISIS to Blackboard integration. They could be a calculated column, a blackboard assignment or a manual column.
IC calculated columns are a unique type of calculated column which are created automatically in the Gradebook by integration between RISIS and Blackboard. They can be mapped to other columns containing marks (Blackboard test columns for example) in order to allow the automatic transfer of marks from Blackboard to RISIS.
IC columns can also calculate marks for a number of different scenarios, such as;
- Converting a set of marks into a weighted overall mark
- Add up a set of marks into an overall total
- Excluding individual marks from a category (e.g exclude the lowest mark from the Test category)
Contents on this page
- When will I need to map IC columns?
- How to map IC columns
- Mapping a single mark to an IC Column
- Mapping multiple marks to an IC column
- Using IC columns to calculate a weighted total mark
- Excluding marks from mapping
When will I need to map IC columns?
IC columns will be created by RISIS based on the Mode of Submission you select when inputting your sub-modular assessment data. The following Modes of Submission will result in an IC column being created:
- WC08 Bb assignment (rolling deadlines)
- DB01 Bb discussion forum
- JO01 Bb journal
- TE01 Bb Test
- WC07 Flexible assessment
- MC06 Gradescope coursework
- MC03 Hard copy – hand written (exams only)
- WC05 Multipart submission
- WC04 Other
- WC06 Physical entity submission
- WC03 Turnitin
- WC01 Turnitin duplicate submission
- WC01 Turnitin presentation/performance
The created column will be named in the format:
IC Module code-occurrence letter – RISIS Assignment Title e.g [IC] MM1F12-A – Essay
How to map IC columns?
Any IC columns that have been created can be mapped from within either the Markable Items or Marks view of the Gradebook. Look for the columns titled in the format IC Module code-occurrence letter – RISIS Assignment Title.
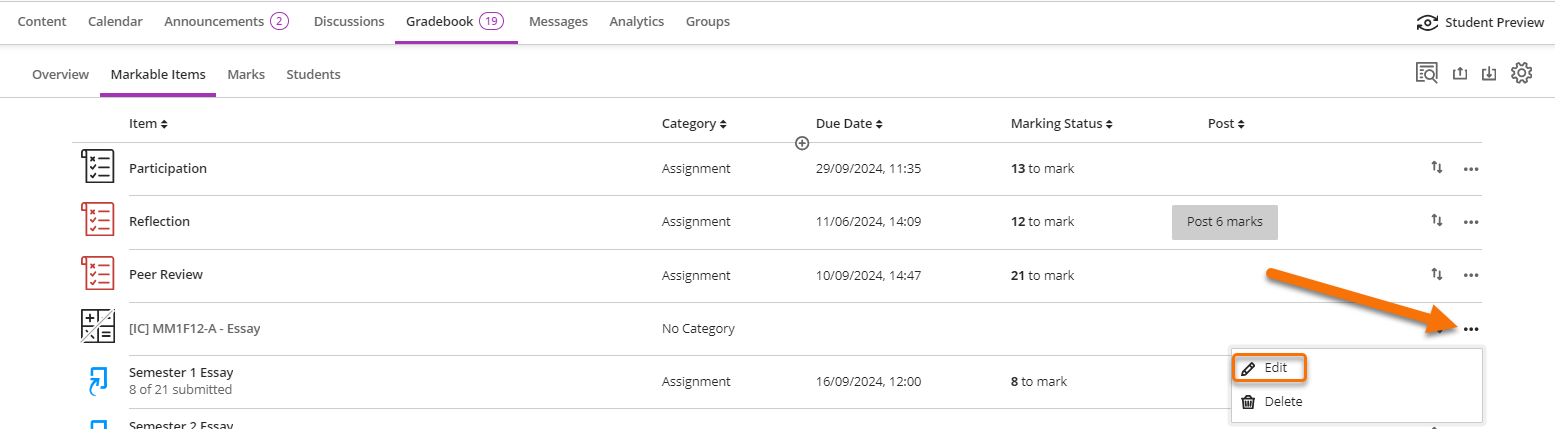
In Markable Items, find the relevant entry on the list and click the three-dot menu. Select Edit.
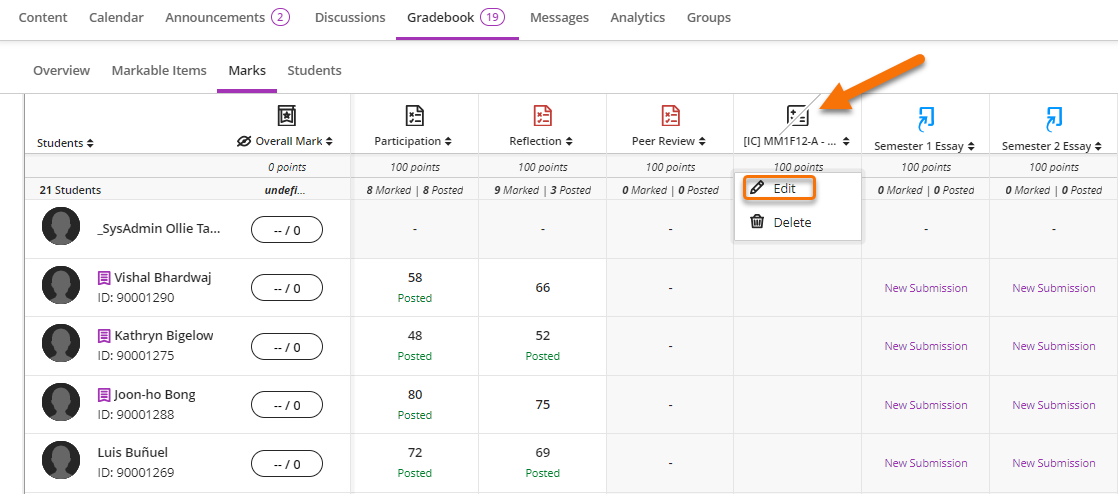
In Marks, find the relevant column and click on the icon at the top of the column. Select Edit.
A new window will open;
- Do not change the title of the column or the mark schema. Changing either of these will break the integration with RISIS and prevent marks transferring from the Gradebook.
- Leave the column hidden from students. Students won’t be able to see any calculations associated with the column and may be confused if they see a calculated mark that differs from the mark they received for an assessment.
- You can optionally leave a description if you think this would be helpful. You could for example describe any calculations that the column is doing, or you could simply leave instructions asking that users don’t change any of the settings.
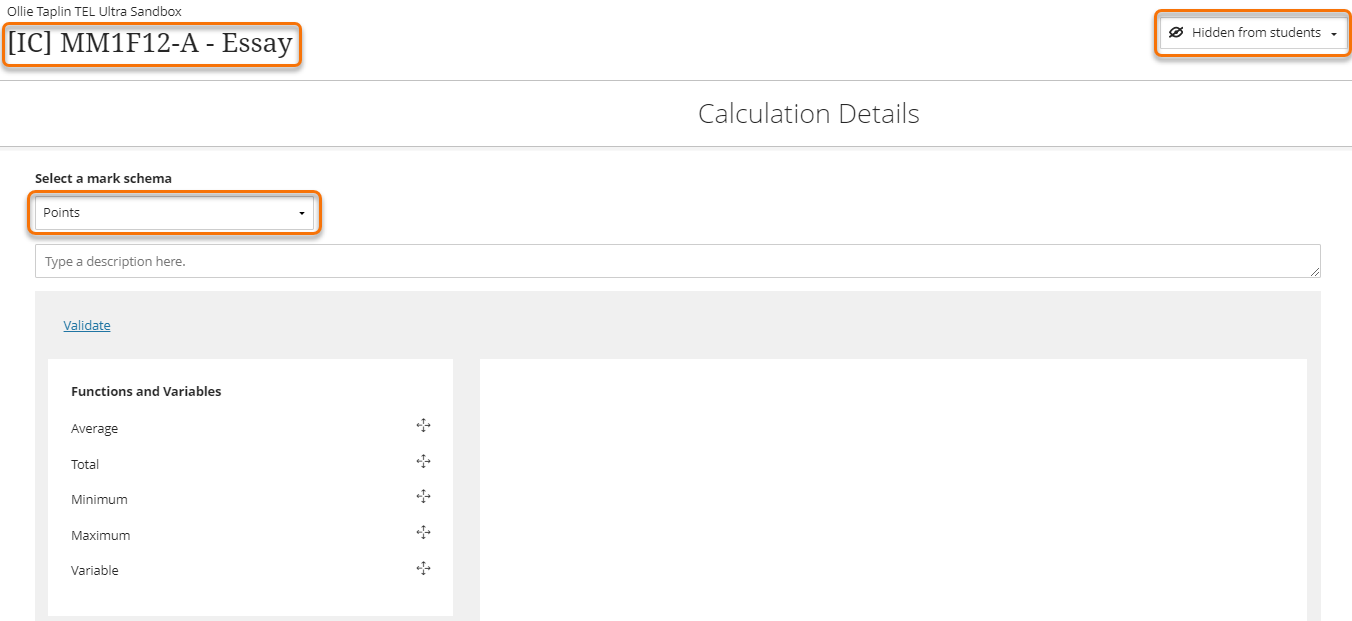
To begin mapping, click on one of the options presented in the Functions and Variables or Operators sections. This will move the selected option into the main section.
The options in the Functions and Variables section can be linked to categories or individual items of assessment within the Gradebook. For example, you could use the “Average” function to calculate an average mark from all items in the “Assignment” category. Or, you could use the “Total” function to map the total amount of marks scored over one or more items of assessment.
Click “Validate” to check if your calculation will return a valid result. Errors in the formula will appear in red text. You can use this to identify and correct the error.
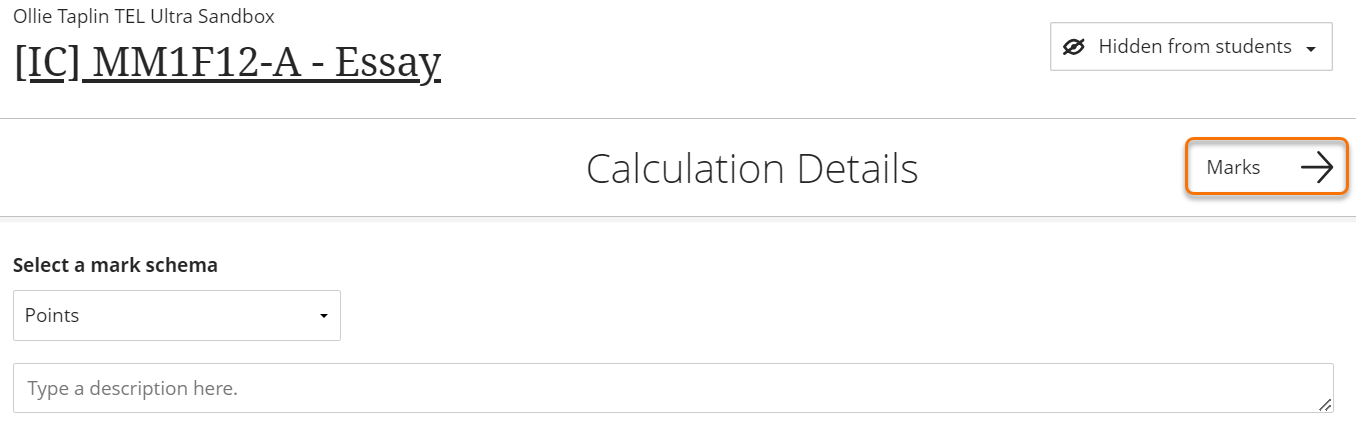
Once you have built your formulas, a Marks button will appear, allowing you to scroll to a page that will show you what marks will appear in the IC column. You can use this to sense check whether your formula is correct without having to navigate back to the Gradebook.
Examples
Mapping a single mark to an IC column
For many types of assessment, mapping a single, unaltered mark into the IC column is all that is required. To do this:
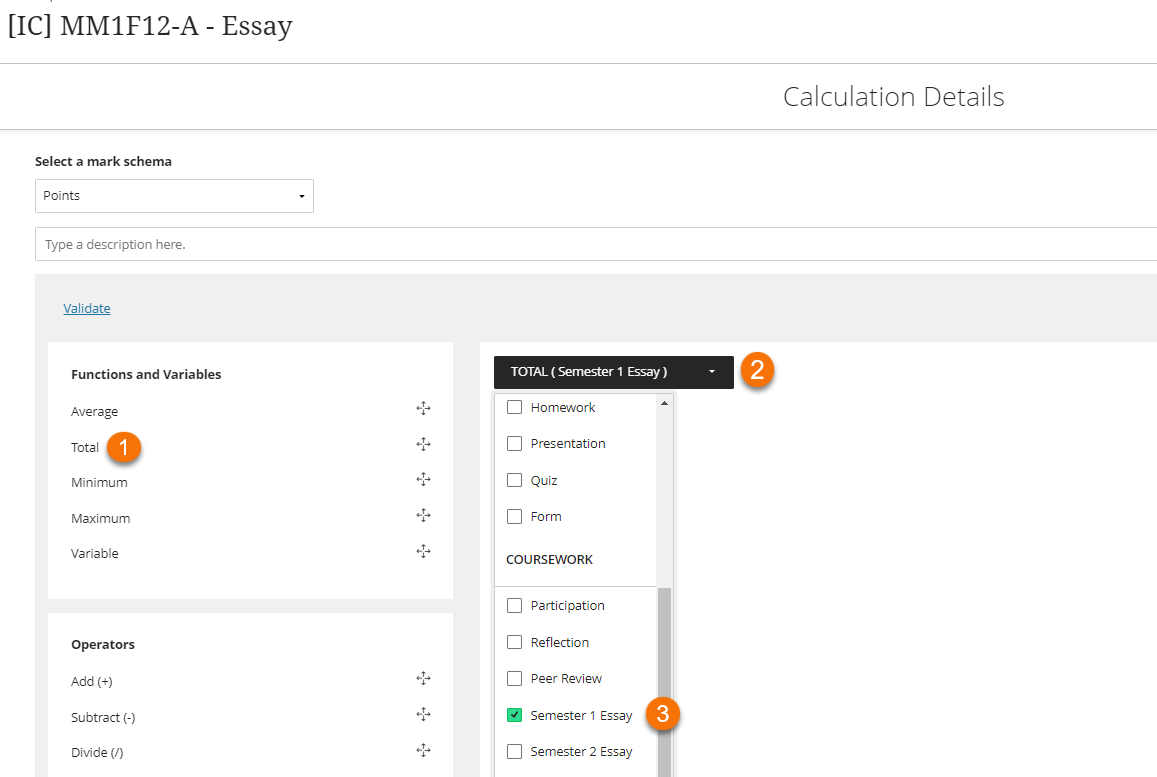
- Select Total from the Functions and Variables section.
- Total will be added to the main section. Hover over the Total box and click the drop-down menu icon.
- Scroll down to the Coursework list on the drop-down menu and select the assessment that you want to map.
In the example screenshot below, you should see that we have mapped the results of Semester 1 Essay into the IC column.
Mapping multiple marks to an IC column
For certain assessments, such as a Multipart or Flexible assessment, you may need to map multiple different columns to an IC column. The best way to map such assessments will be dependent on how the final mark is formulated. We will cover some examples below.
Flexible Assessment
A Flexible assessment is defined as having one entry set up on RISIS but students are offered a choice of assessment routes, which require separate Blackboard or Turnitin submission points. For example, on Part 2 and 3 English Literature modules, some students elect to undertake a placement (2000 word essay + placement report) in place of the standard assessment (4000 word essay). This would require you to map a mark from one of two available columns. To do this:
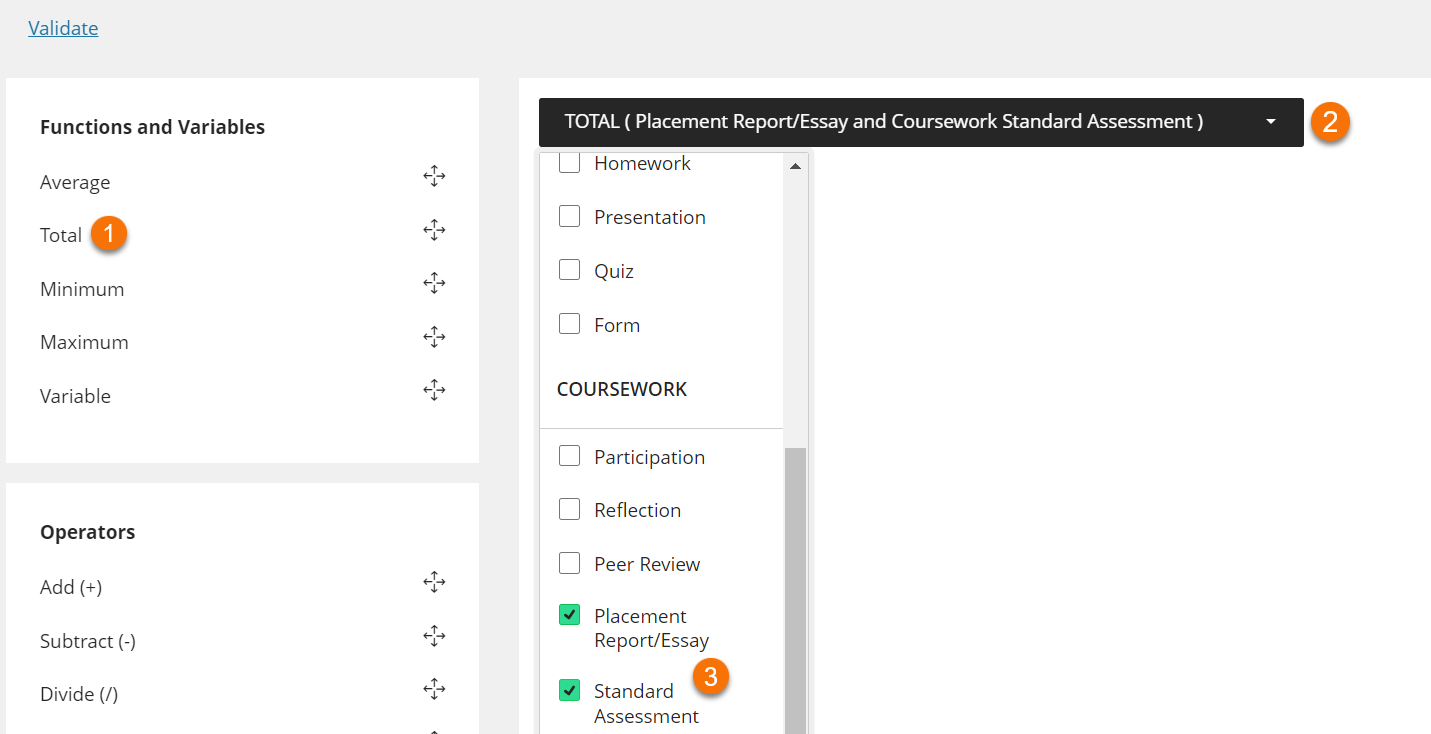
- Select Total from the Functions and Variables section.
- Total will be added to the main section. Hover over the Total box and click the drop-down menu icon.
- Scroll down to the Coursework list on the drop-down menu and select the assessments that you want to map.
In the example screenshot below, you should see that we have mapped the results of the Placement Report/Essay and the Standard Assessment into the IC column. In this case we would expect there to be only one mark for either the Placement Report/Essay or the Standard Assessment. So, this calculation will result in whichever mark is present being displayed in the IC column.
Multipart Assessments
A Multipart assessment is defined as having one RISIS entry but having separate parts requiring separate submission points. These may be all electronic (e.g. two separate Blackboard Assessments, Turnitin Assessment and a Journal) or a mixture of physical and electronic submission.
In a Multipart assessment, it is likely that the overall mark will be a weighted total calculated from the marks for each individual element. This means that you will need to use your IC column to produce a weighted total. To do this:
- Select Variable from the Functions and Variables section.
- Variable will be added to the main section. Hover over the Variable box and click the drop-down menu icon.
- Select the assessment that you want to map.
- Select Multiply from the Operators section.
- Select Value from the Operators section.
- Click on the Value box in the main section and add the weighting of the assessment as a decimal i.e if the assessment is weighted at 40%, add 0.4. If the assessment is weighted at 60%, add 0.6 and so on.
- Select Add from the Operators section.
- Repeat steps 1 – 6 for the second, or as many assessments you want to map.
In the example screenshot below, you should see that we have mapped the results of the Essay and the Individual Report into the IC column. The Essay is weighted at 40% and the Individual Report is weighted at 60%.

Excluding marks from mapping
It is possible to exclude certain marks from being included in mapping. This could be useful if an overall mark for an assessment is calculated from multiple marks with some of those being excluded from the calculation. For example, four tests with the lowest mark being excluded. In this example, it is recommended to make sure that all assessments you need to map are in the same Category.
- Select Total from the Functions and Variables section.
- Total will be added to the main section. Hover over the Total box and click the drop-down menu icon.
- Select the category you want to map. In this example we have selected all assessments in the Test category.
- Select Subtract from the Operators section.
- Select Minimum from the Functions and Variables section.
- Minimum will be added to the main section. Hover over the Minimum box and click the drop-down menu icon.
- Select the same category that you chose in step 3.

Guide last updated on January 30, 2025