Blackboard allows you the oppotunity to present audio, video and screen sharing combinations for your feedback. It uses the Blackboard Video Studio Platform.
How to record feedback
Further information
How to record video feedback
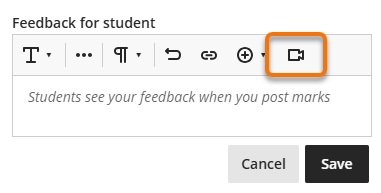
Select the video icon in the Overall Feedback editor.
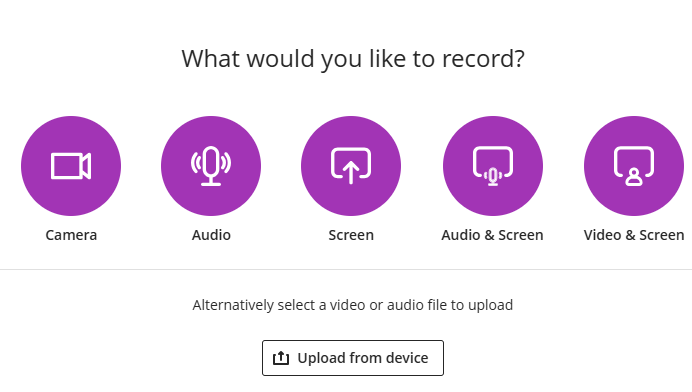
This opens the recording options menu allowing you to choose the prefered option for your feedback style – perhaps a video of you explaining the essay or a visiual walk through of your marking and feedback.
Captions for your videos are created, which can be edited, making your feedback accessible to all.
Further Information
Further detailed information can be found at the Blackboard Video Studio help pages.
Guide last updated on March 3, 2026