![]() We have switched to a new version of Turnitin.
We have switched to a new version of Turnitin.
The new version of Turnitin is being used
- for all assignments due 1st August or later – including coursework resubmissions and resit exams
- on all Blackboard courses for 2022/23.
For help with the new version of Turnitin please see Turnitin LTI Assignments
What are QuickMarks?
QuickMarks is the name used within Turnitin for frequently used comments that can be inserted into a student’s assignment. These comments can be created, saved and re-used on any assignment from an individual marker’s library of comments. They are available from the QuickMarks section of the Instructor Feedback toolbar when marking an assignment using the Turnitin Feedback Studio.
How to Access the QuickMark manager
The QuickMark Manager is the location within Turnitin that allows you to create, edit, delete and group together frequently used comments when providing feedback on students’ papers. QuickMark comments can be stored together in sets, allowing you to organise your comments for particular assignments or types of comments.
There are two ways to access the QuickMark Manager:
- From the Control Panel
- From within the Turnitin Feedback Studio when marking an assignment
Access the QuickMark Manager from Course Tools
Within any Blackboard course which has a Turnitin assignment set up, go to
- Control Panel -> Course Tools -> Turnitin Assignments
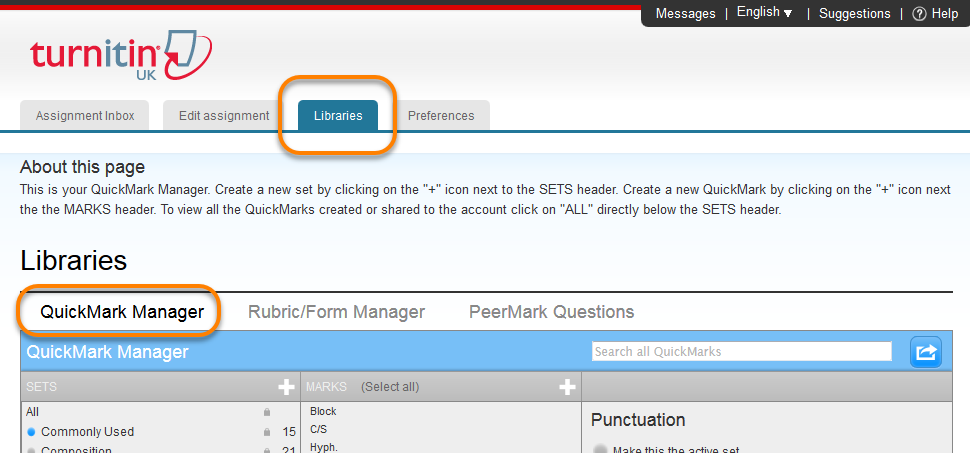
Click to go into the Assignment Inbox for any Turnitin assignment on the course. Click the Libraries tab.
QuickMark Manager is the default option under Libraries.
Using the QuickMark Manager
QuickMark sets are lists of frequently used comments that have been saved and grouped together so that they can be re-used when marking papers, helping to save time.
A bubble Comment you make on a paper can be saved for future use in a QuickMark set.
There are some existing default sets of QuickMark comments that tutors can use or add to. Alternatively, tutors can create their own custom set for a particular assignment or requirement.
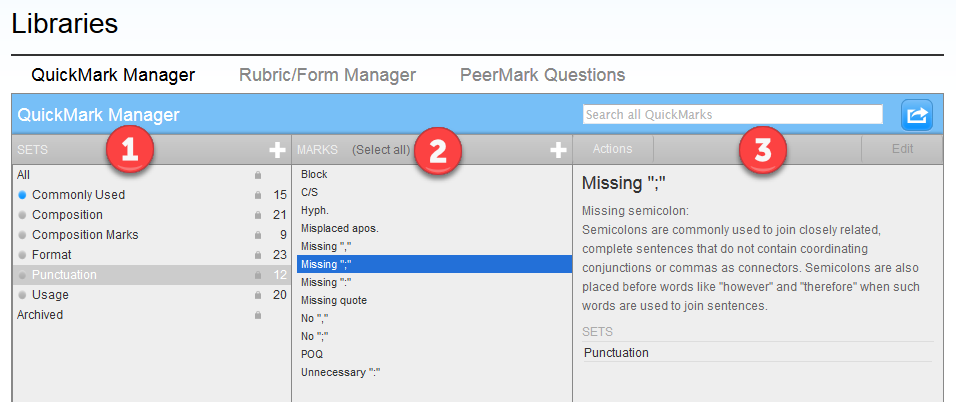
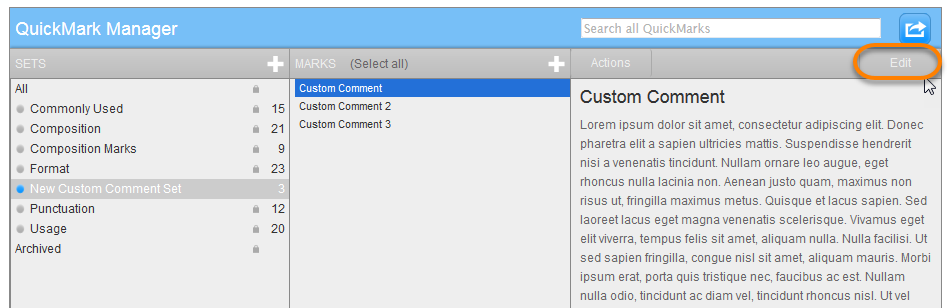
The QuickMark Manager window is divided into three columns:
- SETS: Shows the list of all QuickMark Sets available to you
- MARKS: Shows the list of QuickMarks within the set highlighted in SETS
- Shows the details of the specific QuickMark highlighted in MARKS.
Creating a new QuickMark set
To create a new QuickMark set:
- Click the Plus sigh next to SETS
- Enter a Title for the set and press Save

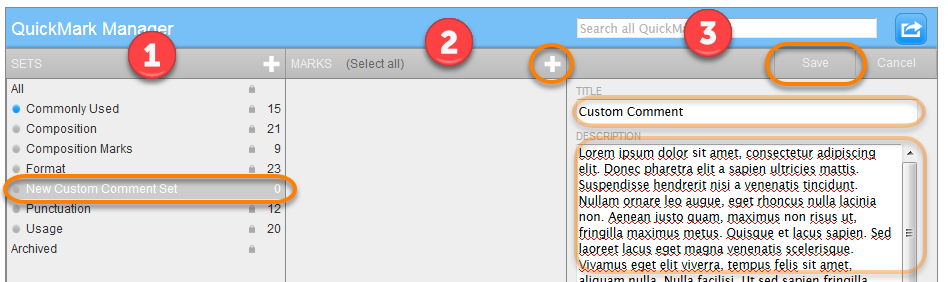
Adding a new QuickMark Comment to a set
You can create your QuickMark comments directly into a new set in preparation for marking an assignment, where you know what kinds of comments you are going to need ahead of time.
- Select which set you want to add a comment to under SETS
- Click the Plus icon under MARKS
- Enter a Title and Description and when you’re done press Save
Selecting a default Set for marking
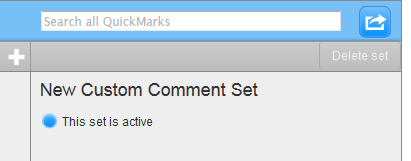
Click on the title of a Set to highlight it, you can then make it your own default Marking Set. You can do this by clicking on ‘Make this the active set’ link.
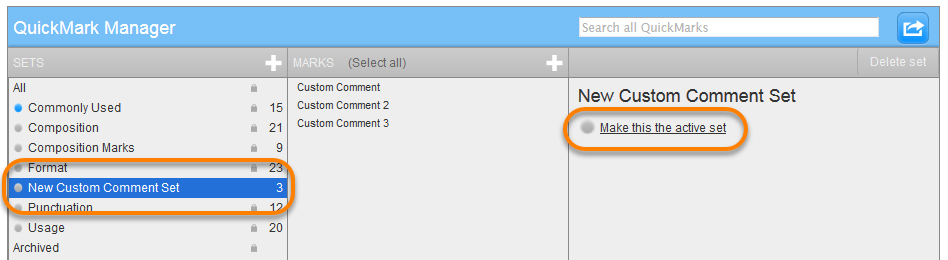
A blue bullet beside the title of a set shows you which one is currently your default, When highlighted the default set will have the a ‘This set is active’ comment instead of ‘Make this the active set’.
Managing existing Comments
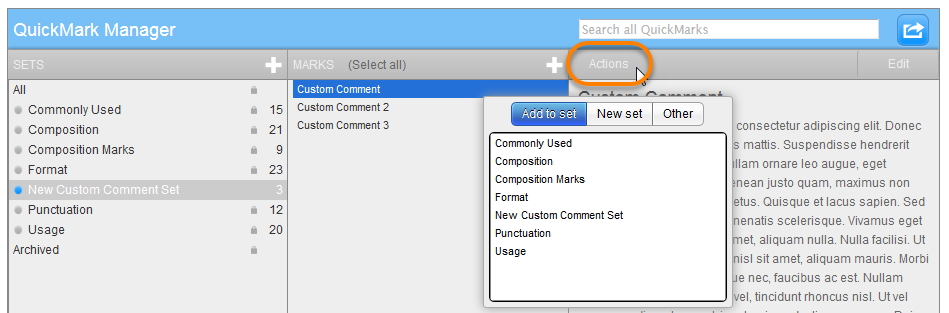
Click on the title of a comment to highlight it and click the Actions button; you can then:
- Add to Set
Copy the comment to an already existing Set
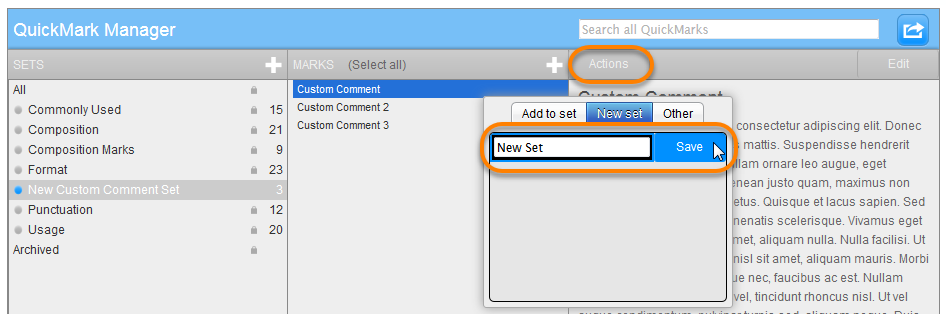
- New Set
Create a New Set and copy the comment into it.
You will need to give the new Set a Name and then click Save.
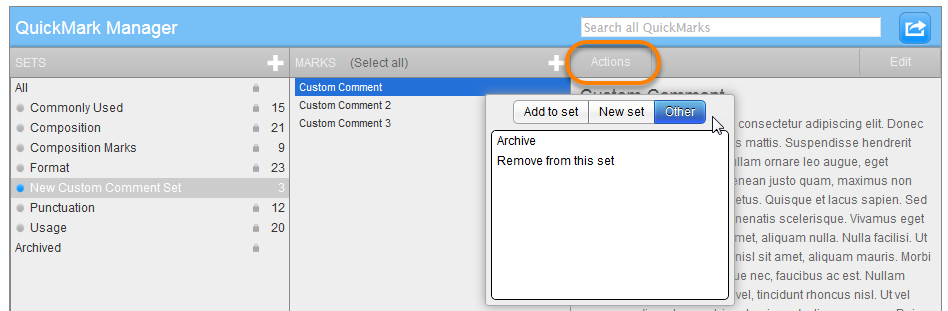
- Other
Archive – Move the Comment into the ‘Archived’ Set
Remove from this set – Delete the comment from this set
- Click Edit
Allows you to edit the comment’s title and description
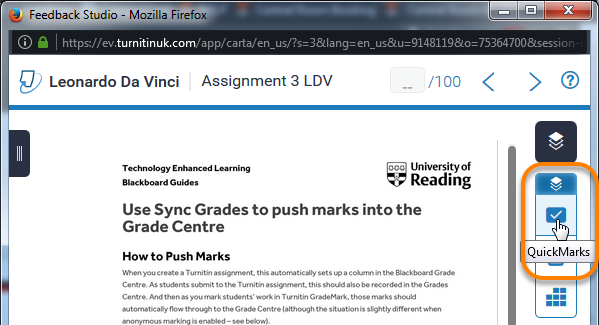
Using the Feedback Studio QuickMark Manager
You can access the QuickMarks while marking by clicking on the blue tick box on the right-hand side panel.
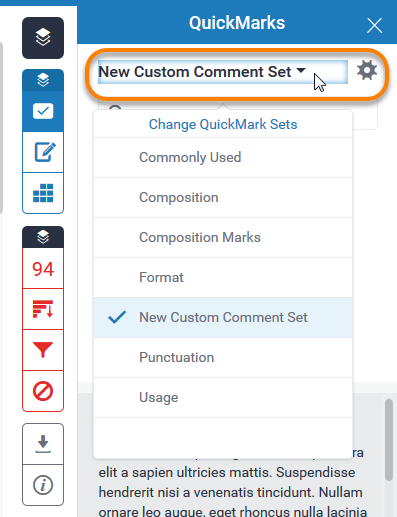
In the Panel that appears you can select which Set you’d like to use from the drop-down menu. Your default set appears selected every time you open a new assignment.
While you are marking an assignment through the Feedback Studio, you can click the Manage QuickMarks gear icon to go to the QuickMark Manager.
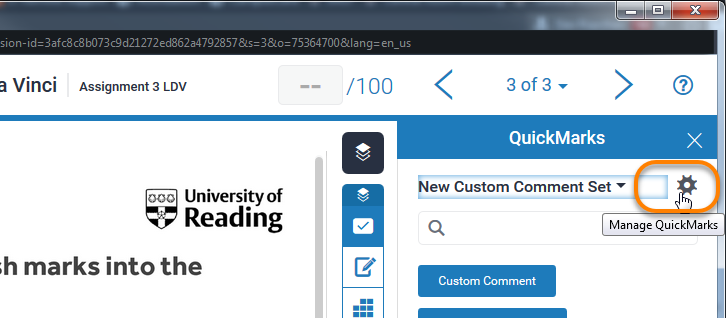
This gives you access to the same features as if entering from the Libraries tab, but the interface is different.
Creating a new Set
Open the Menu in the top right and then choose Create New Set then give the list a name and Save.
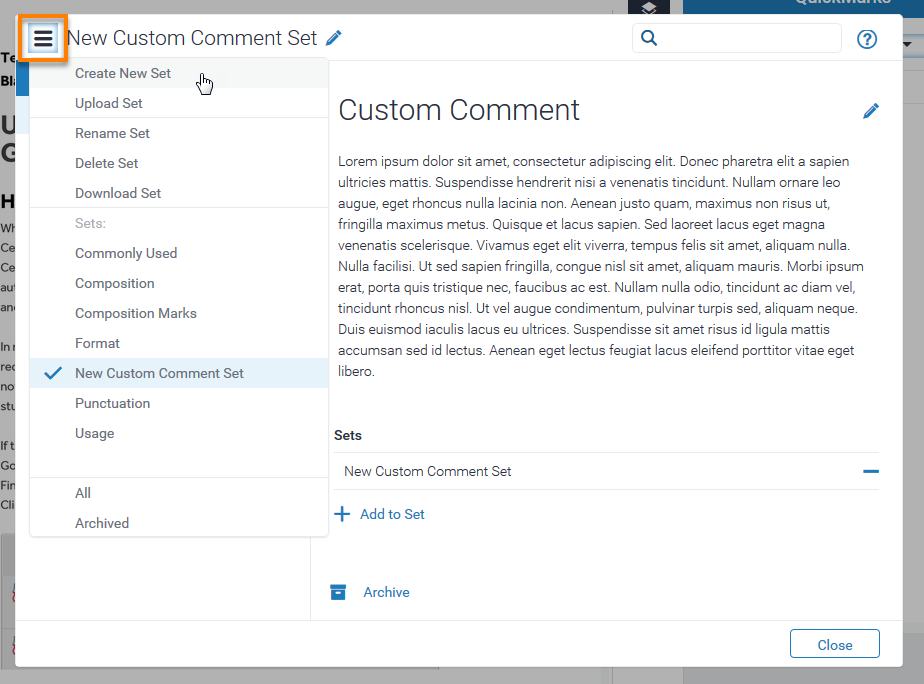

After you create the new Set you will need to go back into the Menu and choose it from the list to be able to edit it.
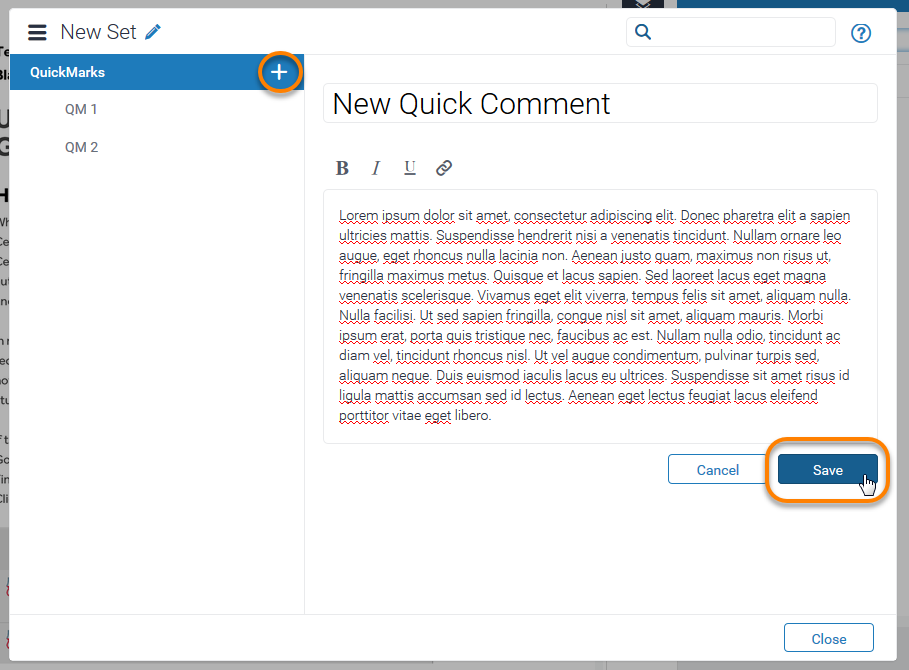
Adding a new QuickMark Comment to a set
Click the name of a set to select it, click the Plus sign next to ‘QuickMarks’, Type in the title and description and then press Save.
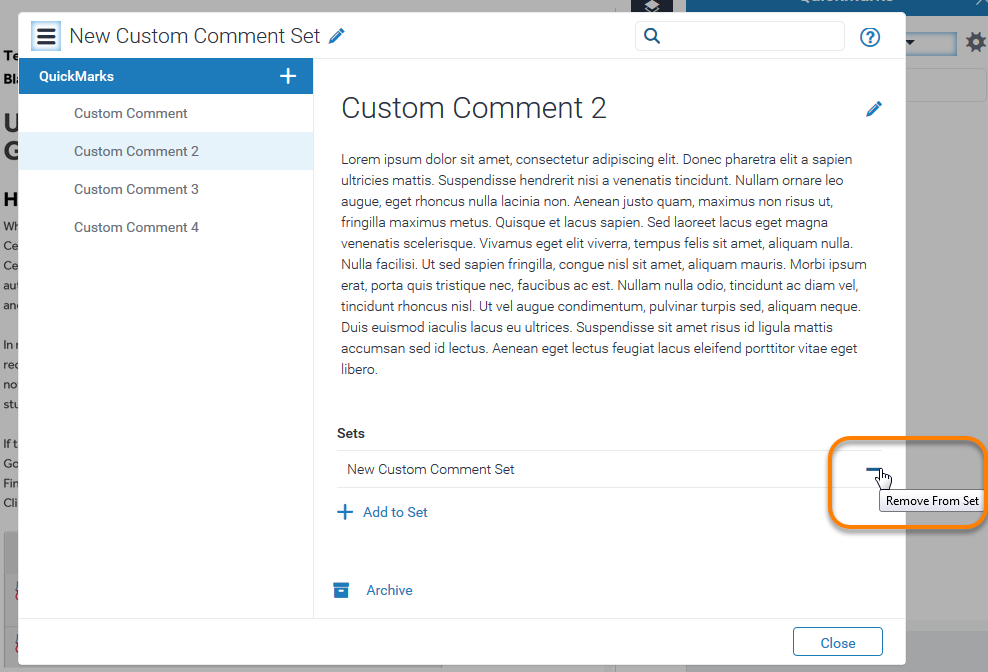
Managing Existing Comments
Click on a comment to select it; you can then:
- Add to Set
Copy the comment to an already existing Set – Highlight the Comment and choose the Add to Set option underneath it, then choose a Set to add it to.

- Remove from a Set
Click the minus Remove from Set icon “-“ to the right of the Set’s name to remove it.
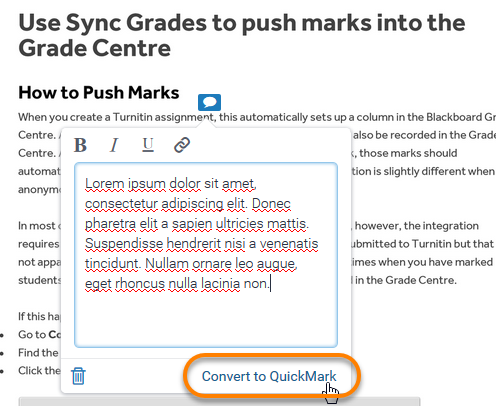
Create new QuickMark Comments when marking
To add a new QuickMark, click on the paper and select the Comment speech bubble icon.
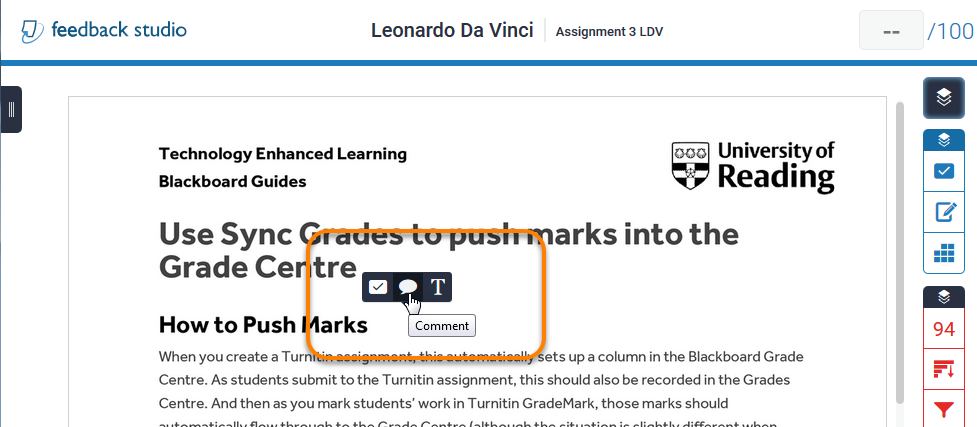
Once you’ve typed the comment, click on Convert to QuickMark.
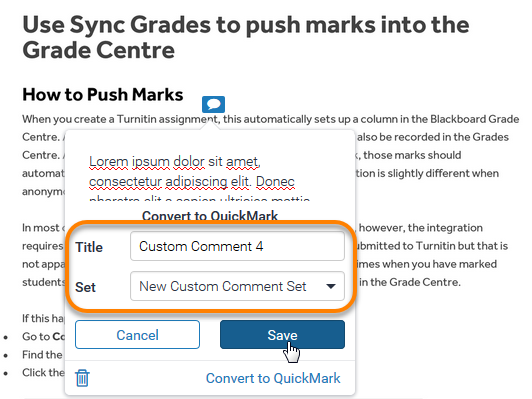
You’ll need to give the comment a Title and select a Set to put it in.
Once done, click Save.
After that you’ll be able to find it in the panel along with the rest of the comments in that Set.
Page last updated on September 5, 2022 by andyturner
You must be logged in to post a comment.