Introduction
The Date Management tool allows you to change all dates within your Blackboard course. It can be used to change:
- the date when a content folder or item becomes available,
- due dates for Blackboard assignments and tests.
Please be aware that the tool does NOT work with Turnitin assignments.
The Date Management tool allows you to shift all such dates either forward or back by a number of days (e.g. by 365 days).This tool can be used to adjust dates:
- when setting up your course for the next academic year
- or if you need to extend deadlines or the availability of time released content in a current course.
It also allows you to review and change the dates for individual items in one place, so that you are not obliged to shift all dates by the same number of days.
Enabling the Date Management tool
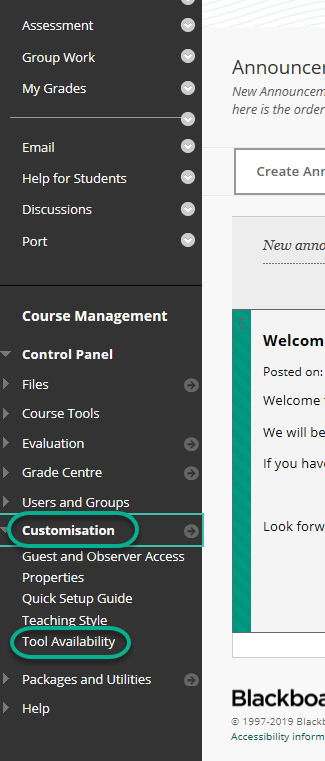
Go to Control Panel > Customisation > Tool Availability.
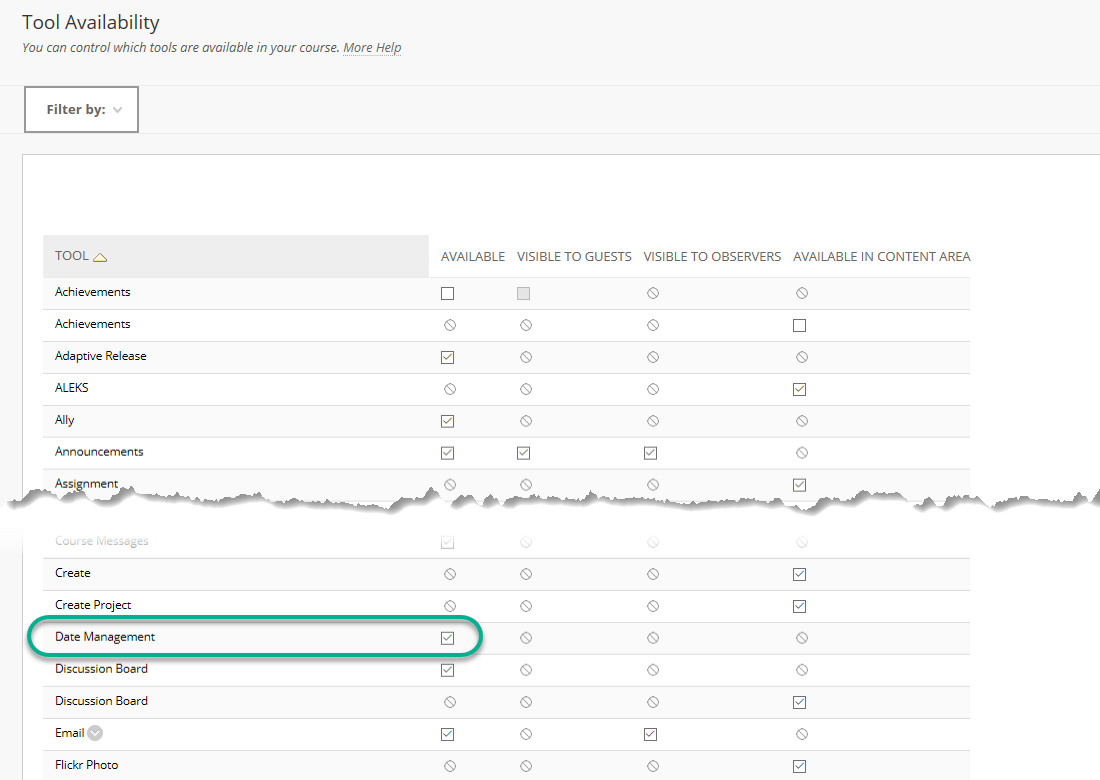
Scroll down to Date Management and tick the box; press Submit.
Using the Date Management tool
To find the tool, go to Control Panel > Course Tools > Date Management.

To adjust all dates on the course
We do not use Blackboard ‘Course Start Dates’, so the first option on this screen is not applicable.
Tick Adjust by Number of Days, then enter the appropriate number of days in the ‘Shift all dates by’ box.
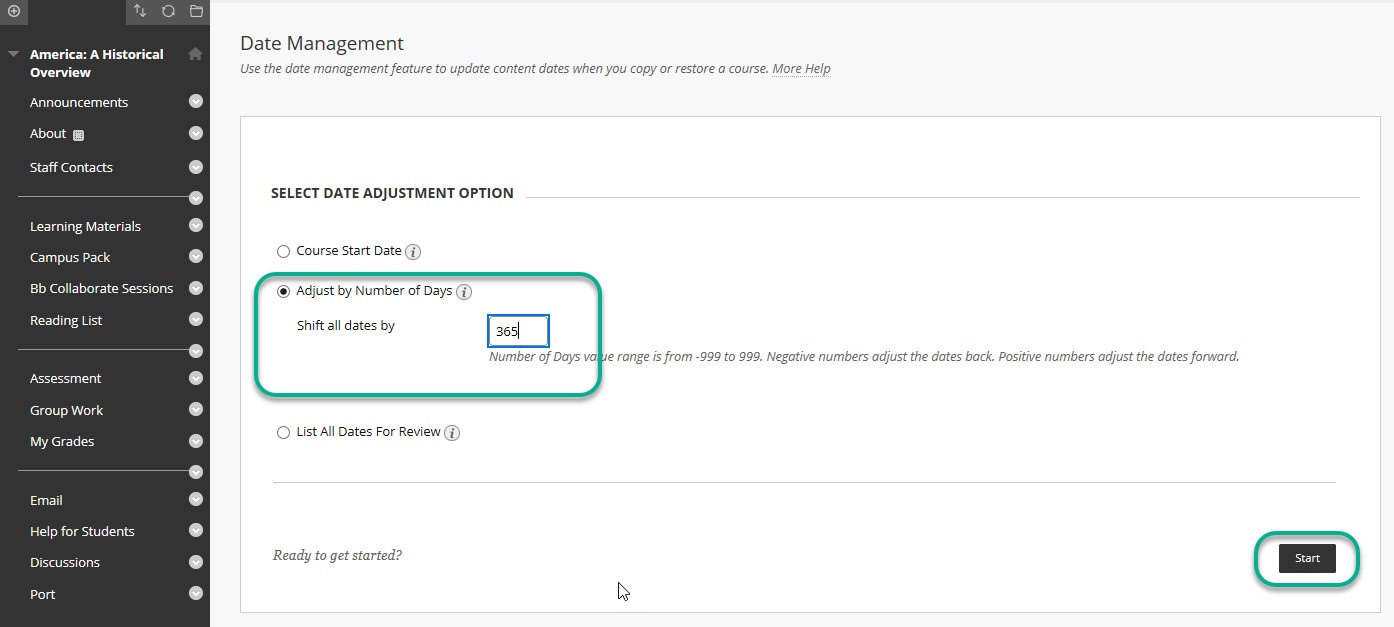
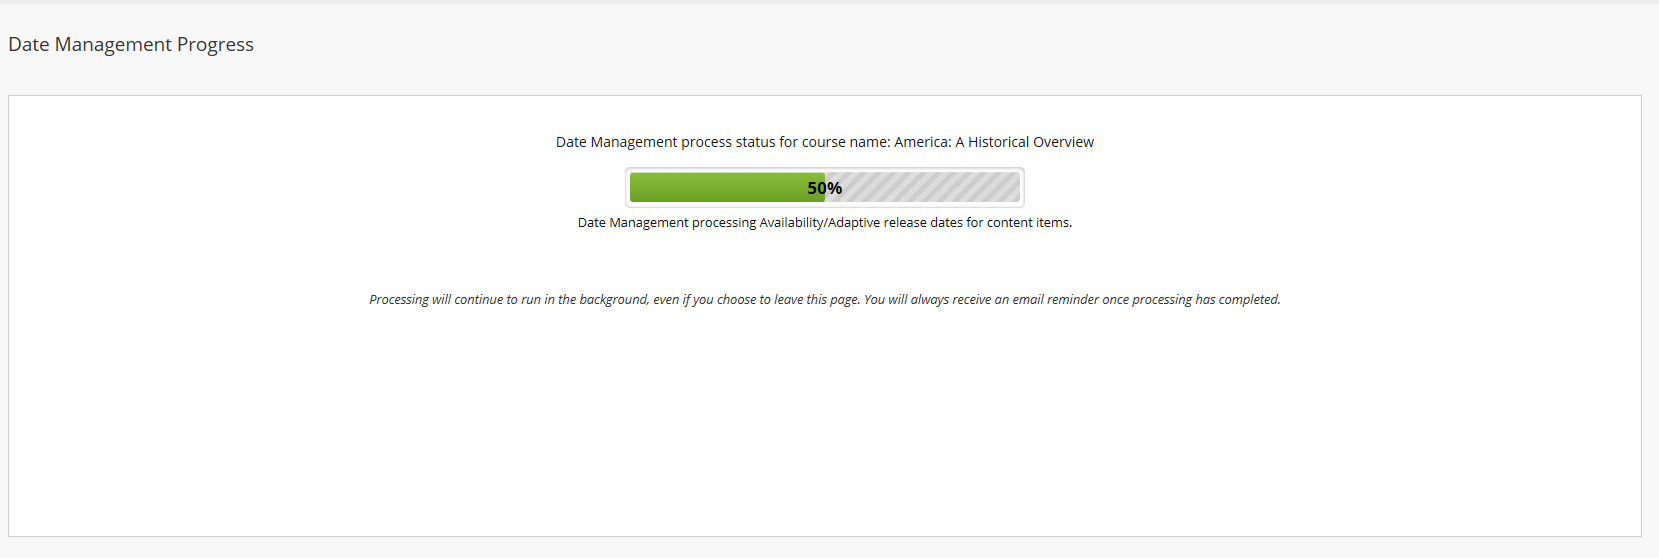
Press Start to begin the process. A status indicator bar is shown on screen.
By clicking ‘Start’ you will have changed the dates on the course and these dates will have been applied to the content.
After this point, you will only be able to revert the dates back using the Adjust Dates option on the Date Management Review page, shown after clicking ‘Next’ once the date management process has been completed.
If you are unsure about what dates need to be changed or what content will be affected, use the ‘List All Dates For Review’ option.
You will be notified on screen when the process is complete, and will also receive an email listing all of the changes applied.
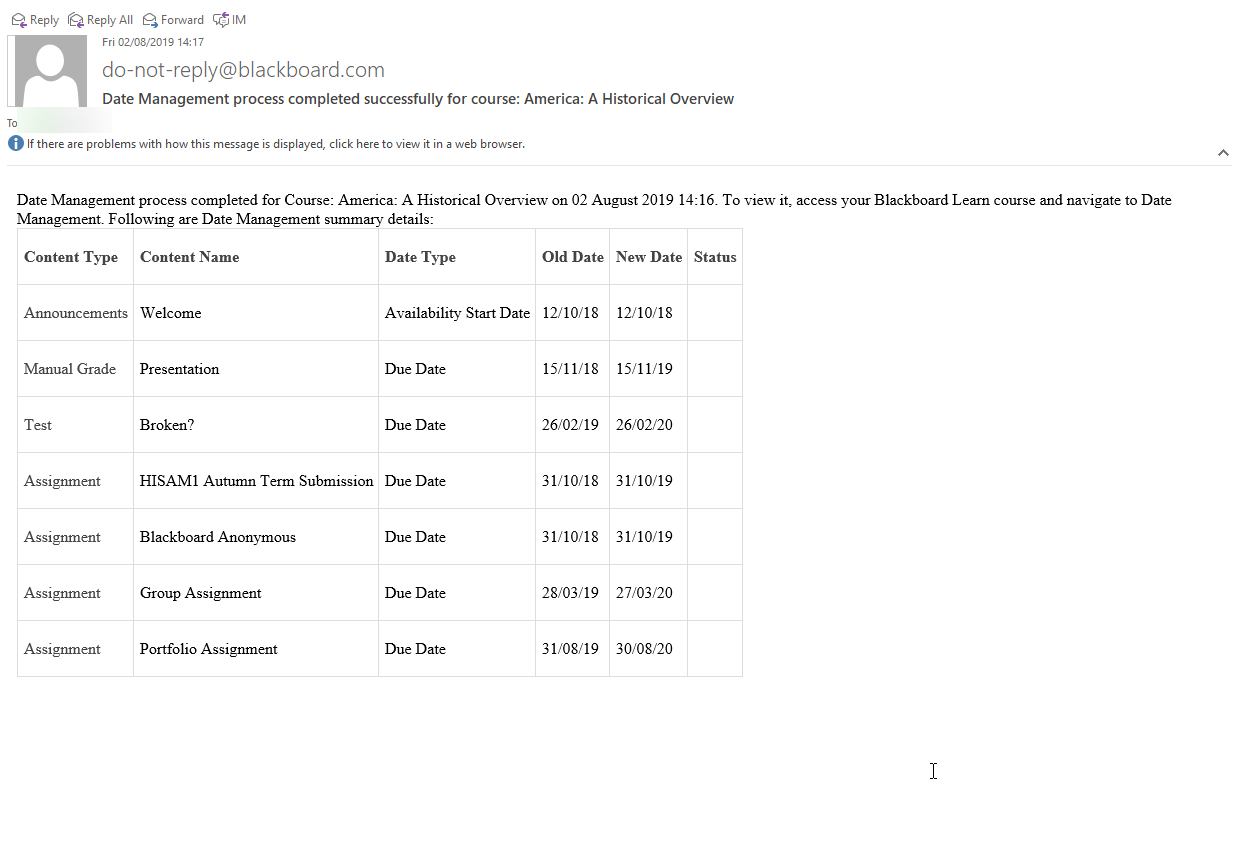
Press Next to review – and if necessarily adjust – the changes.

All of the course dates that have changed are listed on the Date Management Review page. From this page you can choose to adjust individual dates.
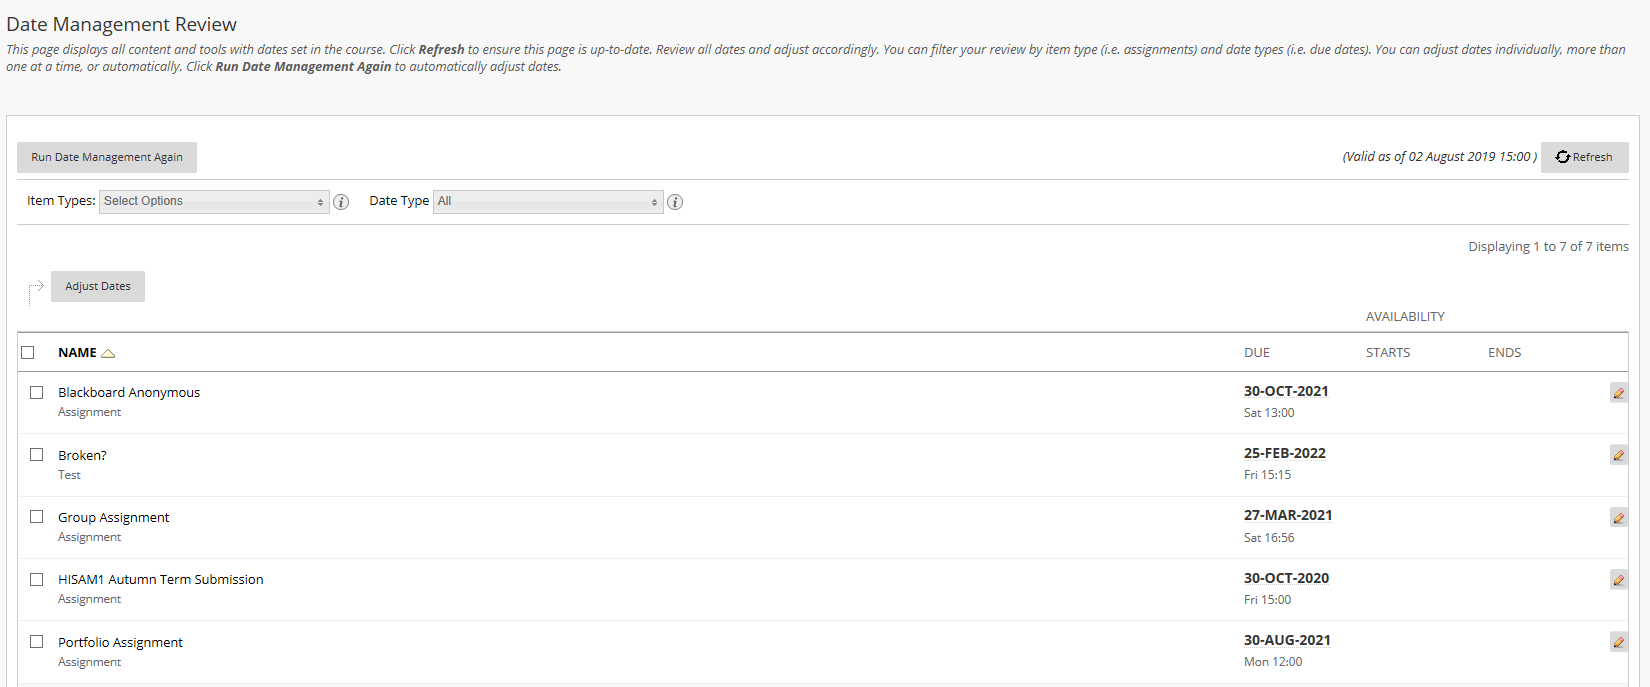
Change dates for a single item
Click on the Edit Dates button (pencil icon) to edit dates for an individual item.

Use the calendar option that appears to adjust the date, and press the Submit button (green tick icon) to save the amended date.
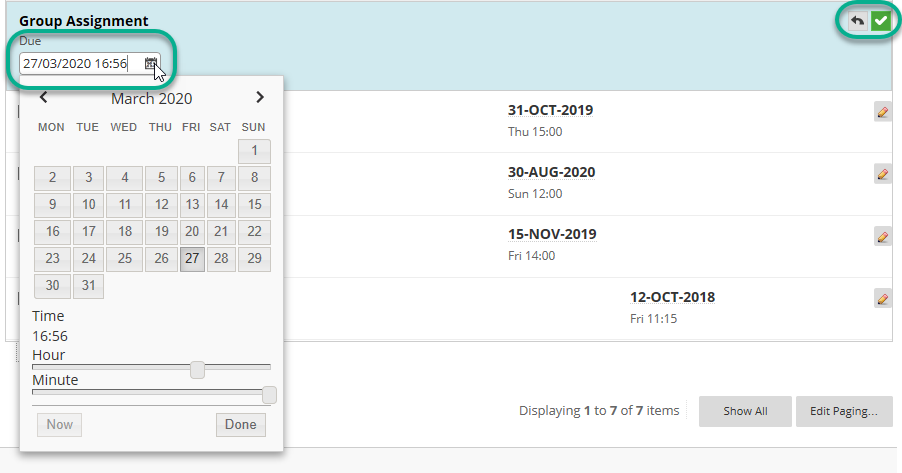
Change dates for multiple items
To adjust the date for multiple items at the same time, tick the boxes beside the titles of the items and then press Adjust Dates button.

Enter the number of days’ adjustment to make, then press Go to apply these.

The changes will be confirmed on screen with ‘Updated’ shown next to the item that has been changed
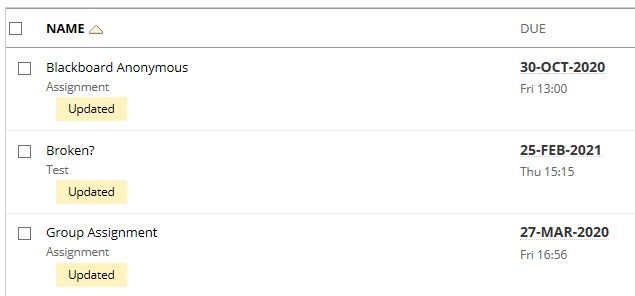
Change dates by content type
You can use the Select Options menu to narrow down the content on your course by type e.g. Assignments, Content Folders, or Tests.

Then select individual or multiple items to adjust, and proceed using one of the options described above.
Review existing dates and adjust the date for specific items
If you want to see what items have dates before applying a new date, or if you only need to adjust the dates for a subset of items on a course, from the Date Management page, select List All Dates For Review.
Using this process means that you can see the dates and items affected before making changes.
Click Start and the Date Management process will run. Once completed, click Next.

A list of the current dates for items on the course are shown on the Date Management Review page, You can then adjust the dates for items as required using the options described in this guide.
Content items with the same name

The Date Management tool does not show you the location of items, so if you have two items of the same type, on the same course, with the same name, there’s no way of telling which is which. The only workaround for this is to rename one or both of the content items before running Date Management.
Page last updated on September 1, 2021 by andyturner
You must be logged in to post a comment.