How to update course content
Introduction
When you need to update a file which is attached to a content item in Blackboard – for instance if uploading a revised version of a PowerPoint presentation or handout – you do not need to delete the original file, you can simply overwrite the old file with the new.
This not only saves time, but has a number of other advantages
· It avoids having multiple versions of a file within the course Fileshare
– reducing confusion for staff
– eliminating the unnecessary use of server space
· It automatically updates any existing links to the file, from any Blackboard course.
How to overwrite a file – in a Blackboard content area
Go into the area of your course where you have put a link to the file e.g. ‘Course Documents’, ‘Lecture Notes’.
Click on the arrow next to the filename, and choose Overwrite File.

You will be prompted to browse for the file you wish to upload.
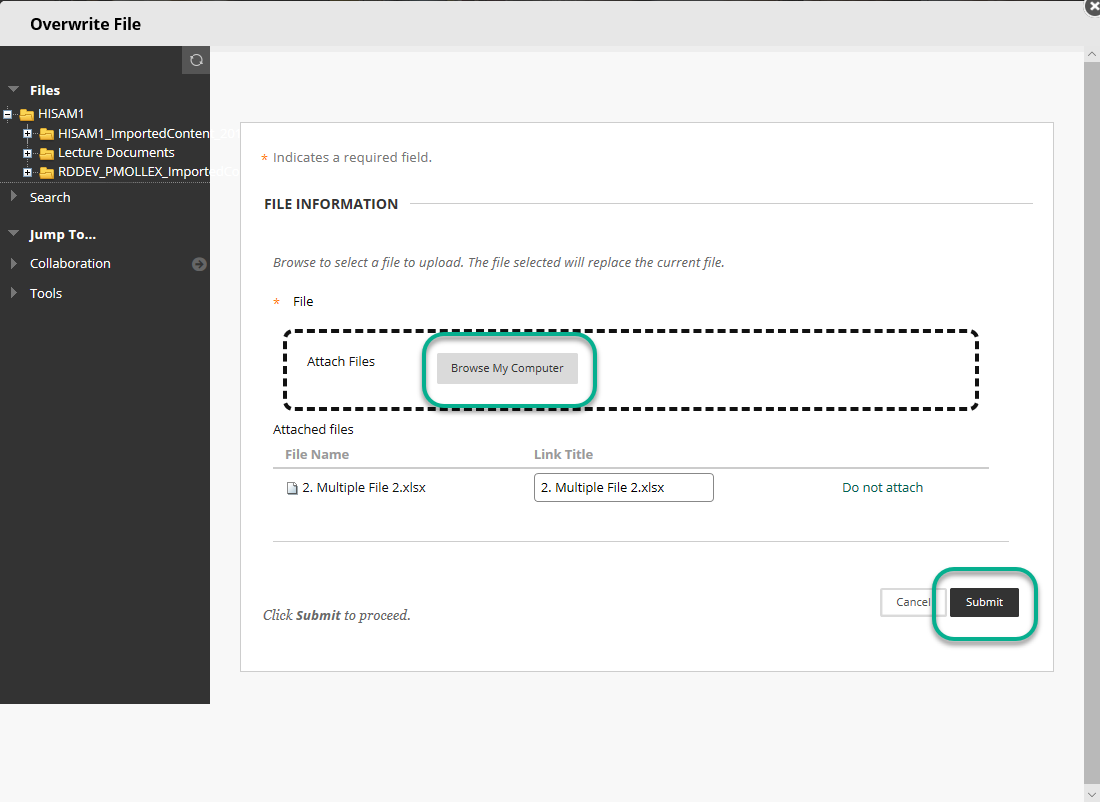
Locate the file and press Submit. The old file will be overwritten by the one you have just uploaded.
Help! I have uploaded a new file, but nothing has changed There are two reasons why this might appear to be the case. 1. Clicking on the link opens the old version of the file In this case the most likely explanation is that the old version is cached on your computer. With a PDF, which opens inside your browser, you can simply press F5 to refresh the screen, and the new version should then display. With a Word document, the refresh function is not available, so you may not see the new version until you restart your computer. 2. Nothing has changed on screen Regardless of the filename of the newly uploaded file, the link displayed on screen will remain the same. Even though we uploaded a file with one name, the origional name is still displayed. This is not a bug although, clearly, it could be confusing and/or annoying. What is displayed on screen is not actually the filename, but the ‘Link Title’. To edit this, you will need to Edit the Item to which your file is attached.Then, under ATTACHMENTS, you can then edit the Link Title.
Tip: When you create a new content item with a file attached, rather than simply accepting the filename as the ‘Link Title’, edit that field to something · meaningful for your students · which will not become out-of-date e.g. Outline of the course instead of Outline of the course 2015-16.docx
How to overwrite a file – in the Blackboard Fileshare
When you upload a file to your course, it is stored in the course’s area within the Blackboard Fileshare (Content Collection). You can overwrite a file in the Fileshare, and any links to that file will automatically be updated to display the new version.
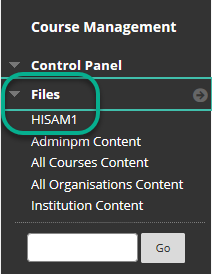
To view the Fileshare, expand Control Panel > Files then click on the first link (which shows the Course ID)
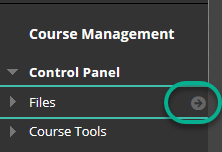
Or simply click on the small right-arrow to open the course area within the Fileshare.
You will see a directory listing of all of the content files which have been uploaded to the course.
Click on any column heading to sort the files e.g. by Name, or by Date.
To overwrite a file, hover over the filename and click on the editing arrow.
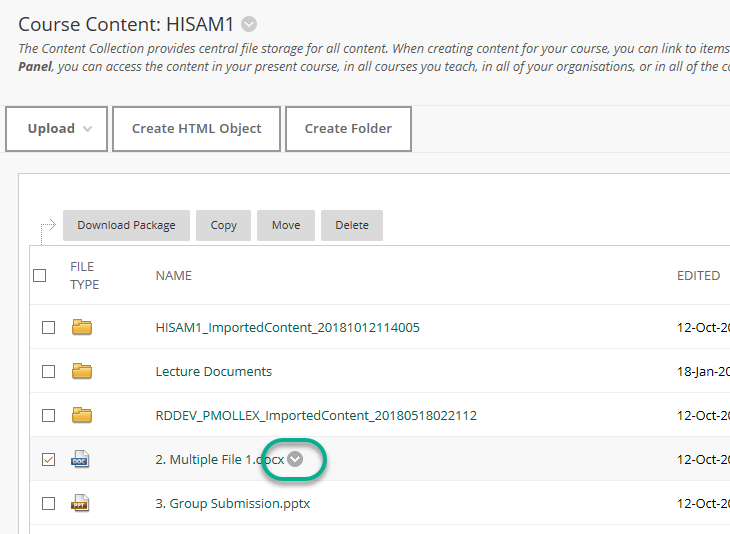
Then choose Overwrite File.
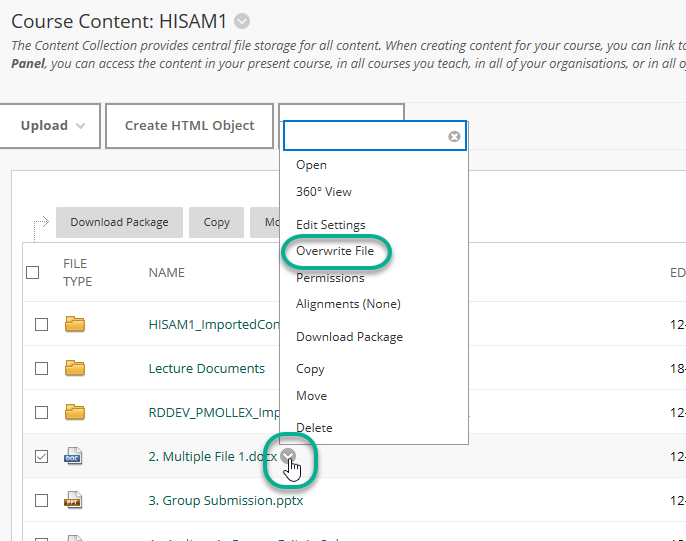
Browse for and upload the new version of the file.
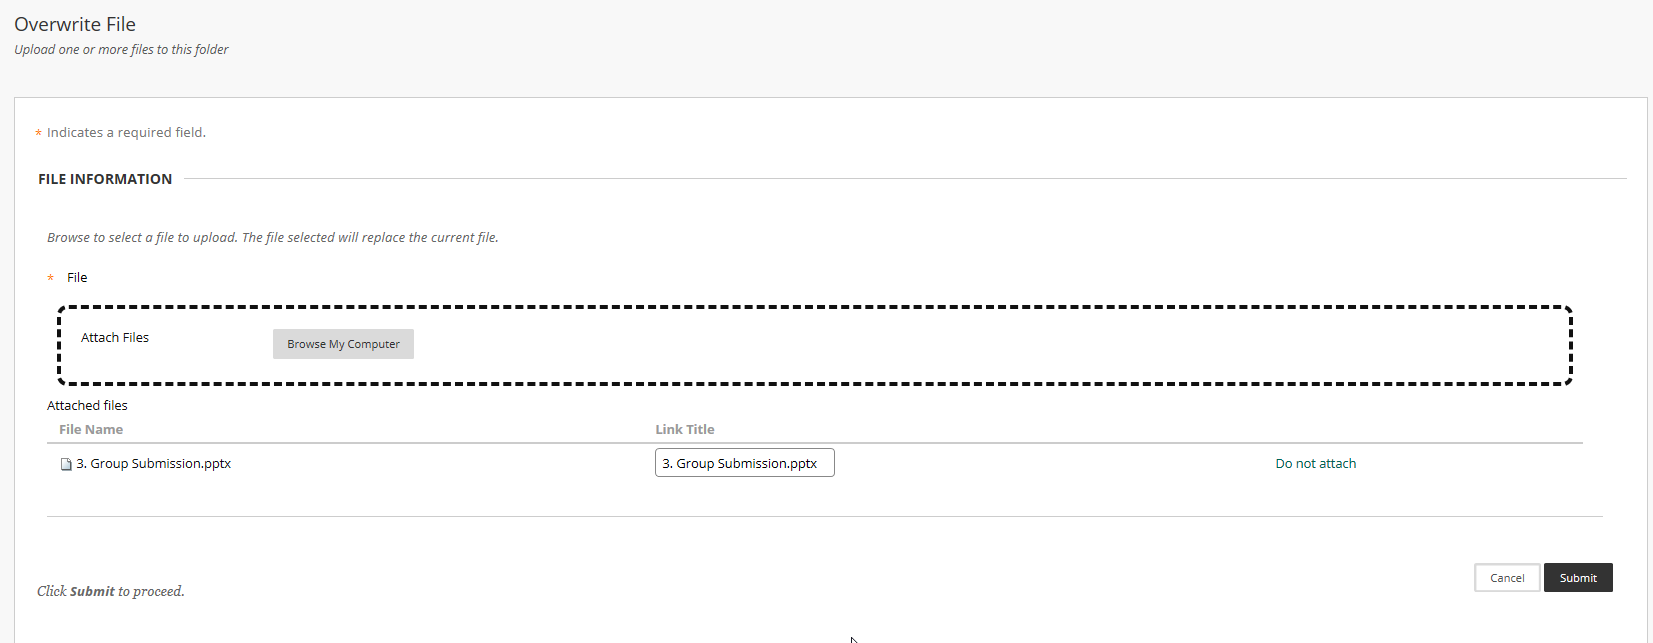
You will see a green ‘Success’ message, confirming that the file has been overwritten.
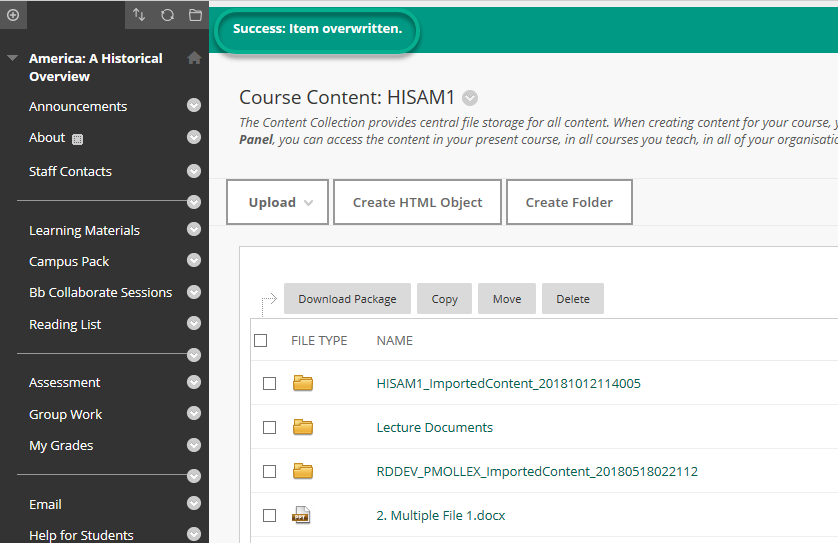
Although the file has been updated (as confirmed by the date and time in the ‘Edited’ column), you will notice that the filename has not changed.

This is not a bug although, clearly, it could be confusing and/or annoying.

To edit the displayed filename, click on the editing arrow, then Edit Settings.


You can now edit the filename.

As with any system, you should not edit the file extension (e.g. docx, pdf,  jpg).


Changing the filename will not break any links to the file – when linking to course files, Blackboard uses a persistent URL which is independent of the displayed filename.
Further help
Please see additional guides on content delivery located on the Support for Staff tab in Blackboard.
Page last updated on August 21, 2019 by Peter Moll
You must be logged in to post a comment.