There are several Teams meeting types; the guidance below relates to using ‘Scheduled meetings’ for live online sessions.
Before setting up ‘Scheduled meetings’ for live online sessions, please see How to make live online sessions available to students for information about:
- What to tell students.
- Naming conventions for sessions.
- Features of Teams meetings.
Please note:
- Live online sessions can be scheduled via your Outlook calendar (option 1) or from your Teams calendar (option 2). Instructions for both options are given in this article.
- You will not invite specific students to the calendar event, you will simply create the meeting instance and copy the meeting ‘join’ link from your calendar, for display in Blackboard.
- Students who join the meeting via a link will have a ‘temporary’ meeting status. Once the meeting has ended, they cannot download meeting assets and will see a ‘read-only’ historical view of chat (any subsequent chat, after leaving, will not be visible to them). You should provide any meeting assets via Blackboard to ensure all students have access.
- It is not recommended to ‘record automatically’ (enabled from the Meeting Options). If using ‘record automatically’, the recording owners become the meeting organiser and the first person to join the meeting. If requiring use of ‘record automatically’ you should also enable the meeting lobby, to ensure you are the first person to join the meeting and subsequently become the only recording owner.
Option 1: Schedule the sessions via Outlook calendar
- Go to your Calendar in Outlook.
- Click on New Meeting.
Give the meeting a name which will be clear and meaningful to students.
The name should reflect the language used in the timetable to describe the session, to help students identify the relevant live online session – for example Workshop, Seminar group.
You should include the module code in the name. - Click on Recurrence or Make Recurring
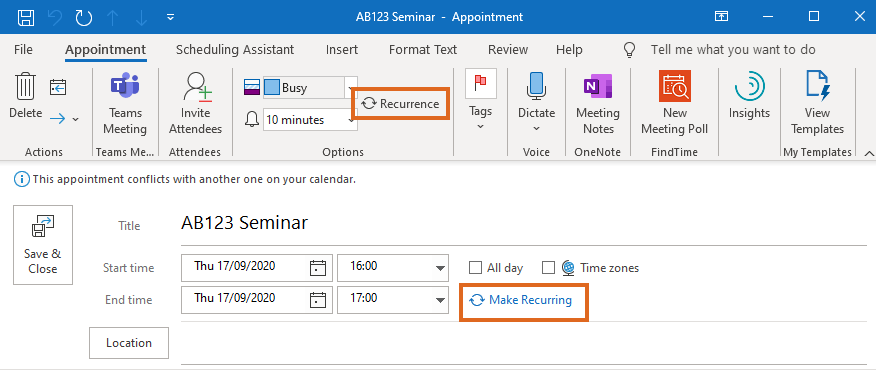
Set the day and time for the session, and the date on which the last meeting will take place. - Click on Teams Meeting.
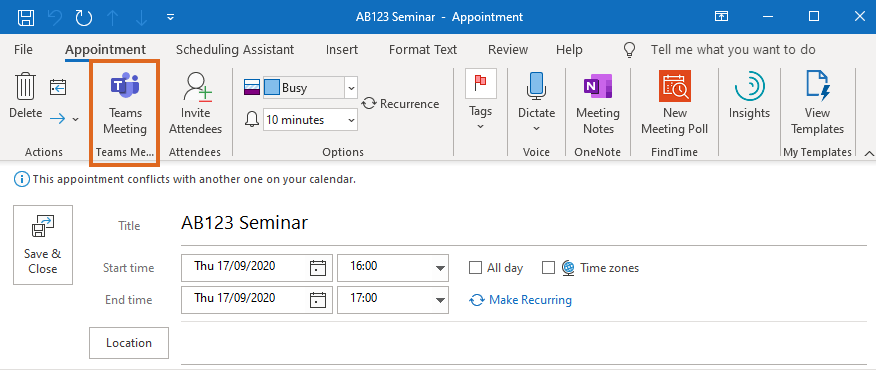
- Click Invite Attendees.
As noted above, you should not invite individual students to this type of session.
However, in order to access all Teams options, you need to invite at least one person to the meeting.
If you are the only member of staff who needs to attend, simply add yourself as a Required attendee. - Press Send when done. See ‘Edit the Meeting settings’ and ‘How to make sessions available to students’ below.
Option 2: Schedule a session via Teams calendar
- Go to your Calendar in Teams.
- Click on New Meeting or you can choose ‘Schedule meeting’. **Coming soon Do not select the ‘Webinar’ meeting option (see information about the suitability of different Teams meeting types for teaching and learning scenarios).
- Give the meeting a name which will be clear and meaningful to students.
The name should reflect the language used in the timetable to describe the session, to help students identify the relevant online session – for example Workshop, Seminar group.
You should include the module code in the name. - Add Required Attendees.
As noted above, you should not invite individual students to this type of session.
However, in order to make this Calendar event a Teams meeting, you need to invite at least one person to the meeting.
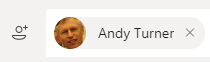
If you are the only member of staff who needs to attend, you can add yourself as a Required attendee.- Type in your email address
- Teams will say “No results found”
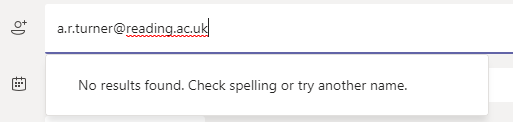
- But when you move to the next field on the screen, you will appear as an attendee.
- Set the day and time for the session.
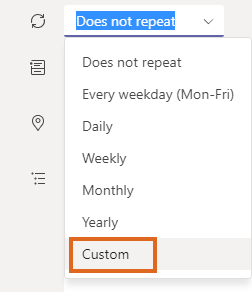
- From the drop-down list next to the Recurrence icon, select ‘Custom’.
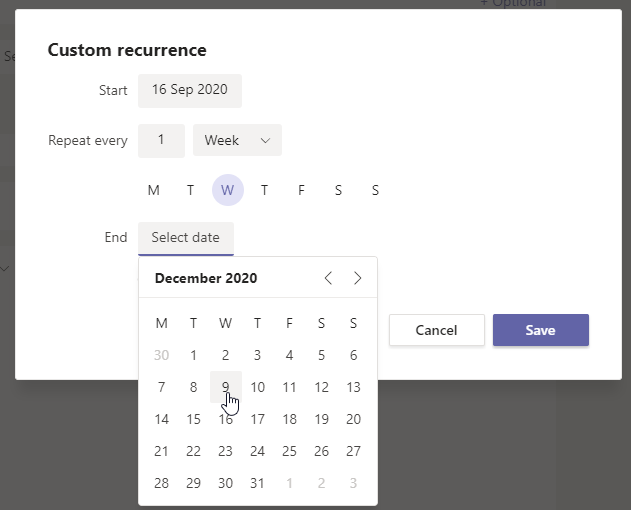
- Now select the date on which the last meeting will take place, and press Save.
- Press Send when done. See ‘Edit the Meeting settings’ and ‘How to make sessions available to students’ below.
Edit the Meeting settings
You will want to configure the session so that students join as attendees rather than presenters.
- Open the Calendar event in either Outlook or Teams.
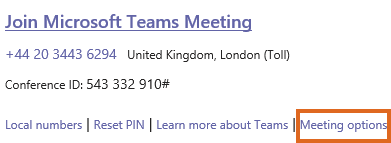
- Click on Meeting options.
- The Meeting Options open in a web browser.
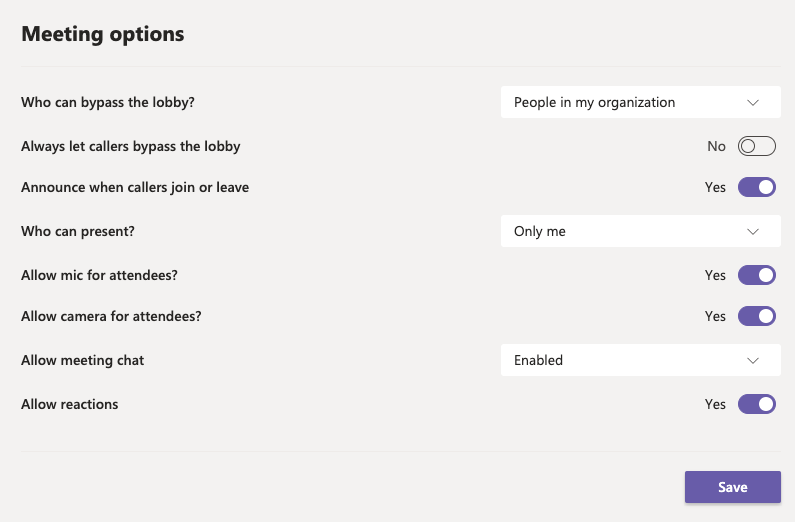
Who can bypass the lobby? From the drop down list select People in my Organisation. This will allow access to UoR accounts only, they will be able to join at any time if signed into Blackboard or any other university account (see below; Make sessions available to students). - Always let callers bypass the lobby? Leave setting disabled, unless using the ‘record automatically’ option.
- Announce when caller join or leave? Enable setting; a small notification will appear during your session when attendees join or leave.
- Who can present? From the drop-down list select ‘Only me’ (or ‘Specific people’ if other staff members will be presenting).
- Record automatically? It is not recommended to ‘record automatically’ (enabled from the Meeting Options). If using ‘record automatically’, the owners of the recording are the meeting organiser and the first person to join the meeting. If requiring use of ‘record automatically’ you should also enable the meeting lobby, to ensure you are the first person to join the meeting and subsequently become the only recording owner.
- Allow Meeting chat? It is good practice to leave this enabled, however you can restrict chat to ‘in-meeting’ only if required (students can access ‘read-only’ record of the chat once the meeting has ended). Chat can be disabled during the meeting if required.
Make sessions available to students
- If you have created a recurring series of events, the link to the Teams meeting will be the same for each session.
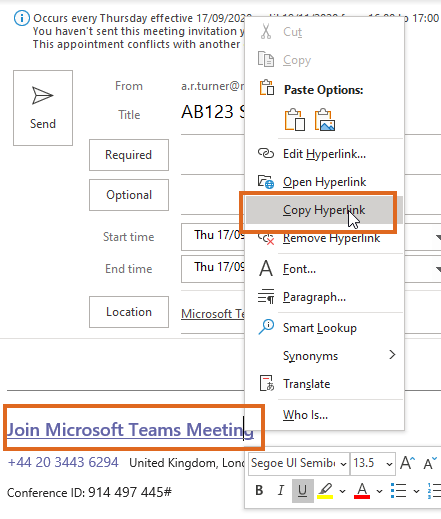
You will need to copy and paste this link on your Blackboard module, so it is visible to your students. - To capture the meeting URL, open the meeting in your Outlook or Teams Calendar.
Right-click on Join Microsoft Teams Meeting then Copy Hyperlink.
- Now go to your Blackboard course and use the URL to create a Weblink in an appropriate area of your course.
Use the same name as you used when creating the event in Teams / Outlook.
Communicate session details to students
- Inform students of where they can find the link to each week’s session.
You can do this in various ways – for example by showing students where to go in an introductory screencast. - Direct students to this DTS page for help with using Teams and the TEL Support for Students site for additional student guidance.
Page last updated on July 15, 2025 by emmaherrod
You must be logged in to post a comment.