There are two main ways you can present files and Videos to students, directly upload into a weekly folder or create an Ultra Document in the folder to upload and contextualise the materials.
- Presenting Files and Videos present in an Ultra Document
- Presenting Files and Videos directly on the Course Content
Document
Course Content
For either option you can:
- upload your content from your local computer (or drag and drop)
- use Batch Edit to make the file(s) or Document visible/invisible to students
Presenting files and Videos in an Ultra Document
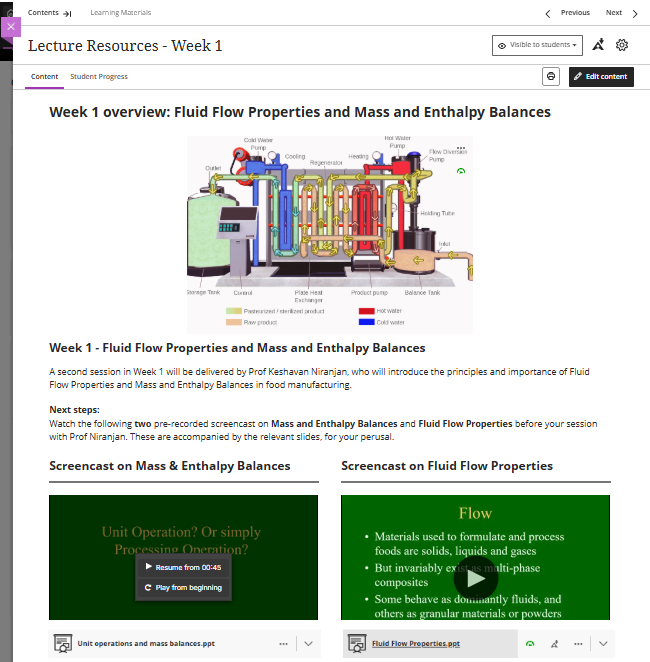
Documents are a WYSIWYG space where you can add text, files, videos and images in a magazine layout. Documents will appear as one item on the course content.
- Documents are created via the purple plus sign add content menu – click create
- From the Create panel select Document
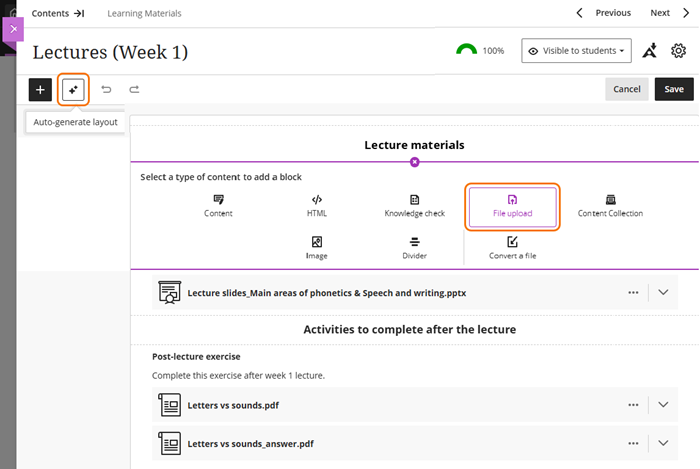
- Use various blocks to add content (text editor, html editor, file upload, image etc.) or drag and drop your files on to the screen.
- For videos first upload them to YuJa. In a content block insert the YuJa video via the Content Market.
- Once you have added your files and videos you can use the Auto-generate layout AI Design Assistant tool to create an attractive, accessible layout.
For details information on how to create documents, including converting files to Documents and using AI layout Generator see our Guide: Create an Ultra Document.
When to use Document
- If you have a large number of files (videos and images) in your folder, Documents can be use to organise and frame the resources.
- Documents allow you to add framing text around your materials indicating to students exactly how you intent them to be used.
- Documents have additional features such as knowledge checks to help make the content more interactive.
- The formatting in documents allows you to make accessibility alterations directly in Blackboard as directed by the Ally tool.
- With the layout capabilities and AI Design Assistant auto generate function Documents can be made attractive and clear very quickly.
- It is possible to convert a word or pdf file into a Document as a quick way to upload resources you may used in class.
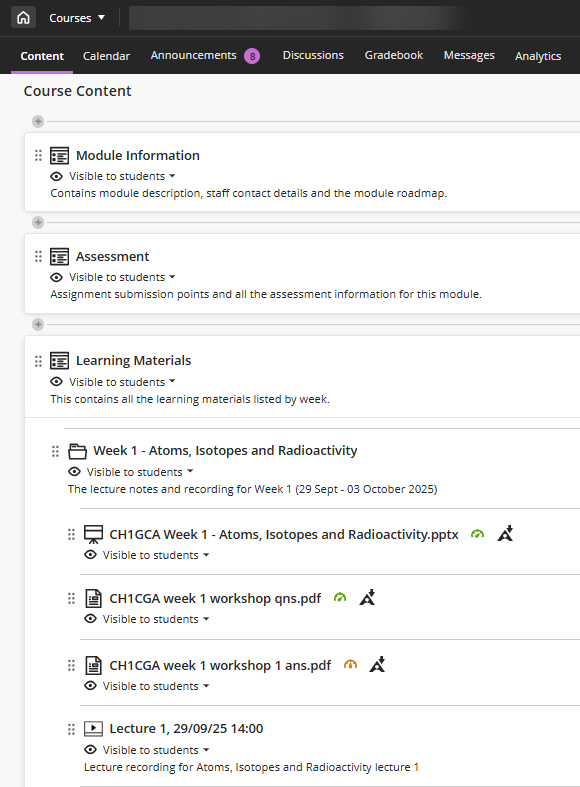
Presenting files directly in Course Content
It is possible to use the Add Content menu to Upload or Copy content directly to the Course Content. Use the course template to place the files inside a weekly folder so that they are easy for your students to locate.

When to upload into folder
If you only have a few files you wish to share and do not need to add any framing text adding them directly to the Course Content in the weekly folder will make them easy to locate.
Creating a Document which just contains one or two files and no framing text or knowledge checks increases the number of clicks for a student to access the resources without adding any value.
Guide last updated on February 6, 2026