You can use Achievements to help keep students motivated by providing recognition for completion of formative gradable activities in your course
The Achievement tab is not visible to students until an achievement has been created in the course.
What is the Blackboard Achievement tool?
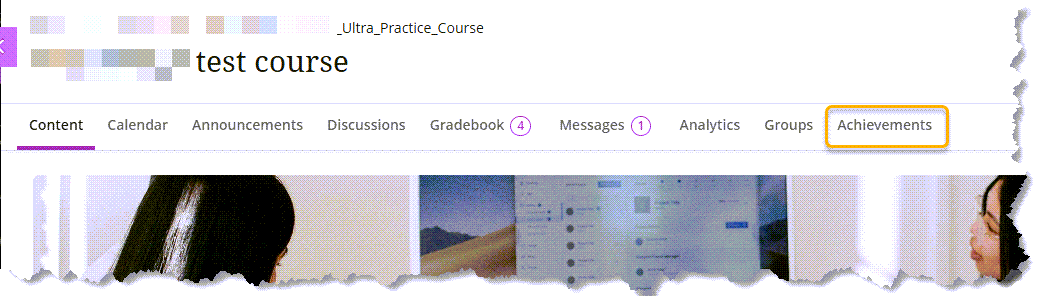
The Achievements tool is an option in your course to create badges aligned to set criteria against graded items. The tab for both staff and students is available at the top course menu. However, students will only see this once an achievement has been created in the course.
- Course badges are only seen within the Course and designed only to be used in Blackboard. (They are not micro-credentials, certificates or open badges.)
- Students only see the badges they have obtained and not anyone elses.
- Badges cannot be edited once published or awarded retrospectively.
- Be careful to review all details before publishing a badge to students.
Create an Achievement
Instructors have permissions to manage Achievements and create course badges.
Create an Achievement
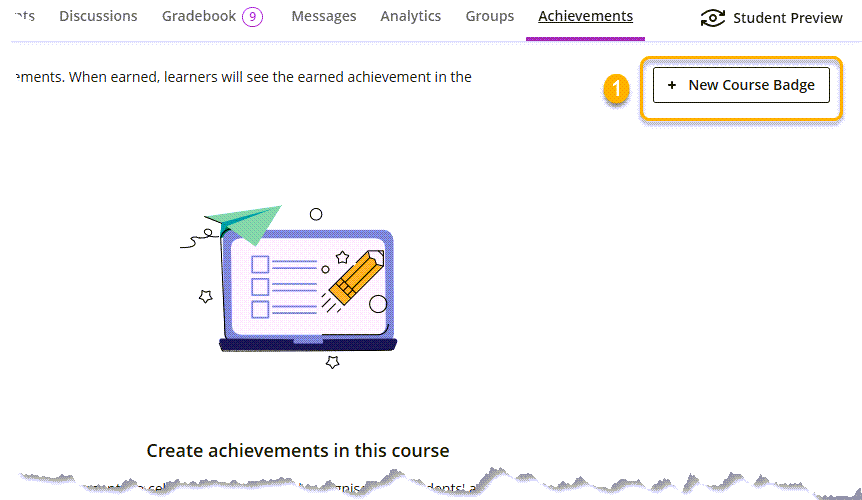
Step 1: Go to the Achievements tab and select + New Course Badge.
Step 2: On the course badge creation page, you can set the title and description for the badge. The description is limited to 500 characters.
Step 3: Select one of the images to represent the course badge. A set variety of icons are offered covering a range of learner expectations. Step 3a: Allows you to create your own customised image badge
Step 4: Under Performance, select a Markable item from the course. Then, set the expected level of performance for the student to earn the badge using Requirement. You can add additional requirements by selecting ‘Add performance criteria’.
- You must set at least one performance criterion for the course badge.
- Students must meet all criteria to be awarded the course badge.
To remove a criterion, select the trash can icon.
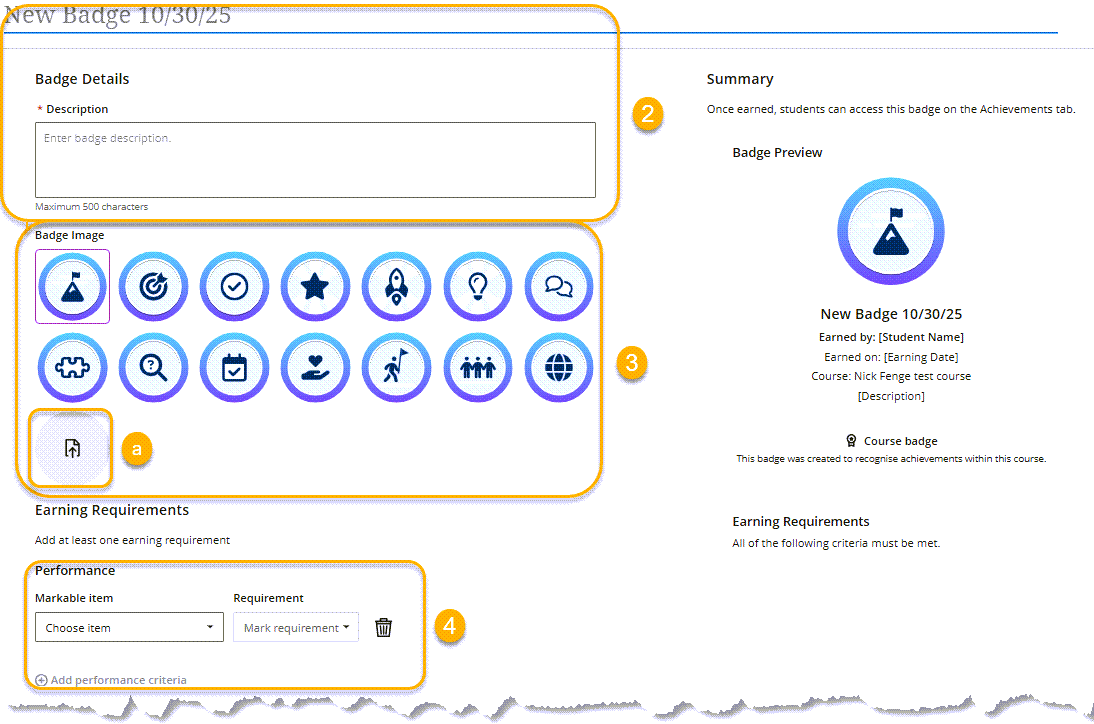
The Summary section shows how the course badge will appear to students.
Select Publish or Save Draft to finish. (Chose Save Draft if you need to continue working on the details of a badge.)
Customised Image Badges
In Step 3a above, you can create your own customised image badge on selecting the icon you can choose from three options:
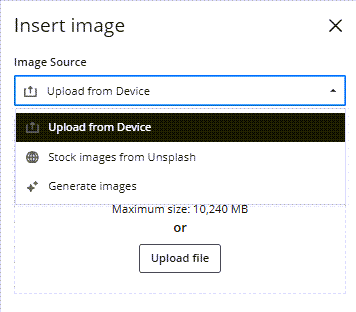
Upload from Device
Here you can add your own sourced images from your media files, by drag and drop or selecting the ‘upload file’ button. (ensure you have copyright permission to publish the image)
Stock images from Unsplash
Unsplash images give you access to a library of images, allowing you to search from a keyword and finding an appropriate image.
Generate images
This uses the Blackboard AI Design Assistant function therefore, before using this tool ensure you have familiarised yourself with the practical and ethical considerations in the ‘Getting starting with Blackboard AI Design Assistant‘ guide. You can create an AI image from a keyword or prompt , however there is no method to add any attribution and acknowledge the use of AI.
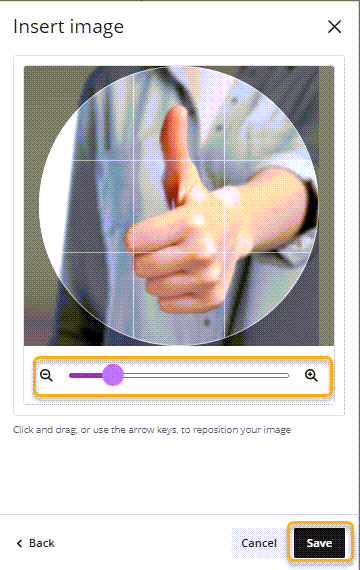
Framing your chosen image
Once you have selected your image and selected the ‘Next’ button, you can frame your image using the size slider and move the image into the centre of the badge frame (it can only be a round frame). When you are happy with the image select the ‘Save’ button.
Your new custom badge will appear in place of the upload icon in Step 3a to allow you to add to your achievement.
Editing Badges
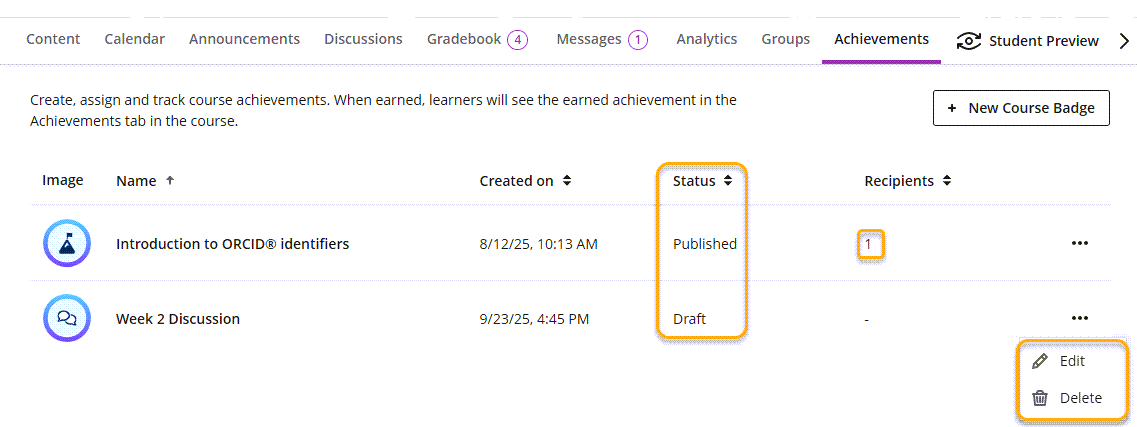
- You can edit course badges that were saved as draft by going the three-dot menu and selecting Edit in the dropdown.
- Important: Published course badges can’t be edited and can only be deleted by selecting Delete from the three-dot menu’s dropdown.
View recipients of Achievements
The recipient count appears for each course badge in the Achievement tab. It shows the students who have earned the badge.
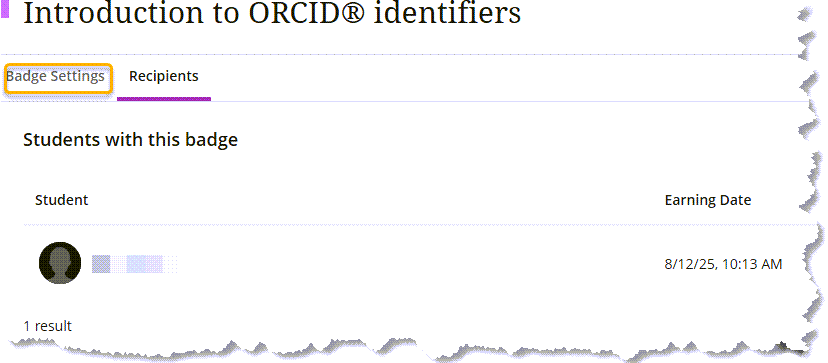
- Select a badge to review the details of the recipients in the Recipients tab. The Recipients tab shows the date and time the recipient earned the badge.
- To review the settings for the badge, select the Badge Settings tab.
Guide last updated on October 30, 2025