Pass/Fail modules can be set up in RISIS and a Mark Schema created on Blackboard Ultra courses to allow for the Mark Approval and Transfer tool to be used. Numerical marks transferred to RISIS will be automatically converted into the appropriate P or F mark.
Create a Pass/Fail schema
Step 1: Navigate to the Gradebook and click the cog icon to open the Gradebook settings menu.
Step 2: Click on Manage mark schemas in the Gradebook setting panel – the Mark Schemas page will open
Step 3: Click on Add (a) – a pop-up window will appear, enter the name (b) and Click Add (c) to start your schema.


Step 4: Create the schema by setting the Mark name (d) and Mark range (e).
Remember to select the appropriate pass mark for undergraduate and postgraduate taught programmes.


Step 5: Once you have completed the schema, click Save (f).
Applying a Pass/Fail Schema to a Blackboard submission point
Custom schemas can be used to display marks in alternative ways, in this example as a P or F. In order to ensure that your marking will display the correct value, you will need to ensure that the schema is applied to any assessments that you create.
Step 1: Click the submission point that you want to apply the schema to. The Content and Settings menu will open.
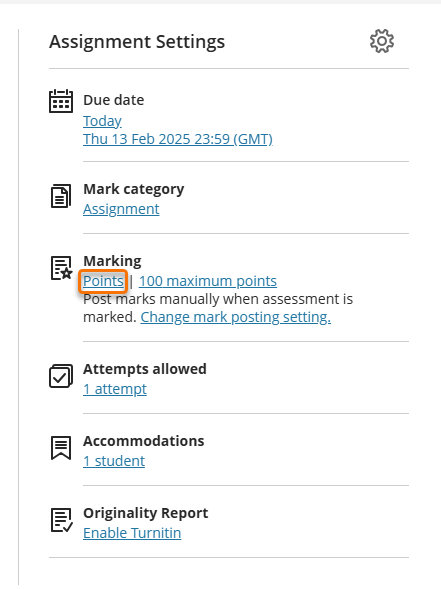
Step 2: Click the Points link, found in the Marking section of the Assignment Settings panel.
Step 3: The settings side-panel will open. Click to open the “Mark using” drop-down menu (a). You should see an option with the name that you chose when you created the schema (b). Click this option.
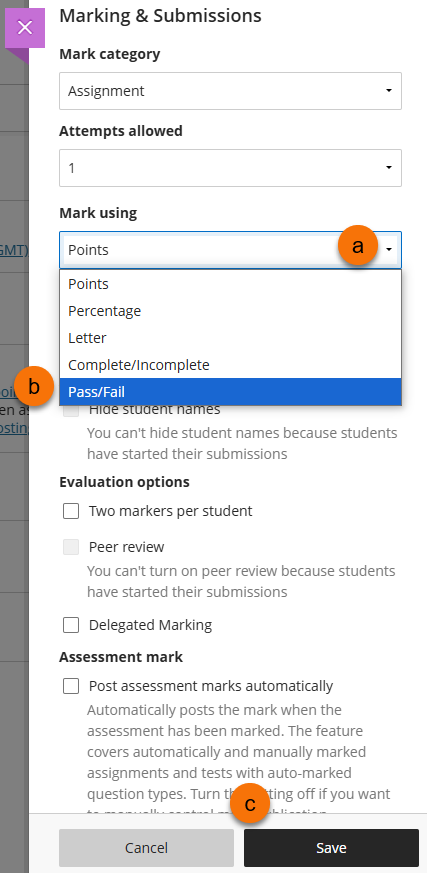
Step 4: Select any other settings that are relevant to the assessment and click Save (c).
Applying a Pass/Fail Schema to a Turnitin or Gradescope submission point
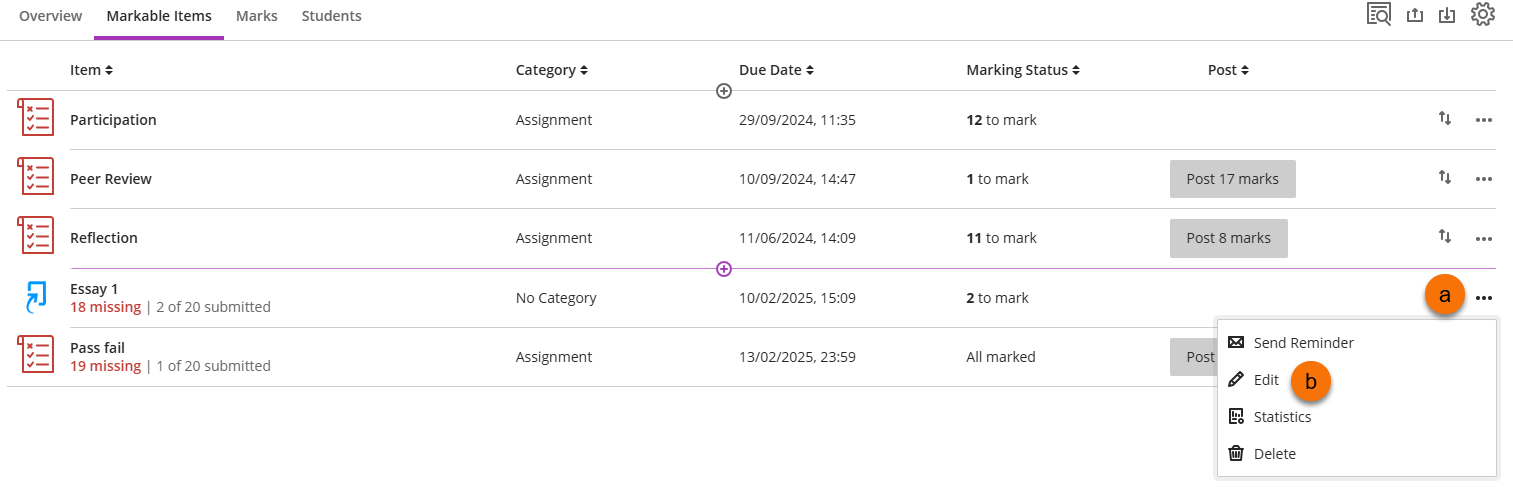
Step 1: Navigate to the Markable Items view of the Gradebook and click on the three-dot icon (a) for the relevant assessment. Click Edit (b). The Edit side-panel will open.
Step 2: Click to open the “Mark using” drop-down menu (c). You should see an option with the name that you chose when you created the schema (d). Click this option.
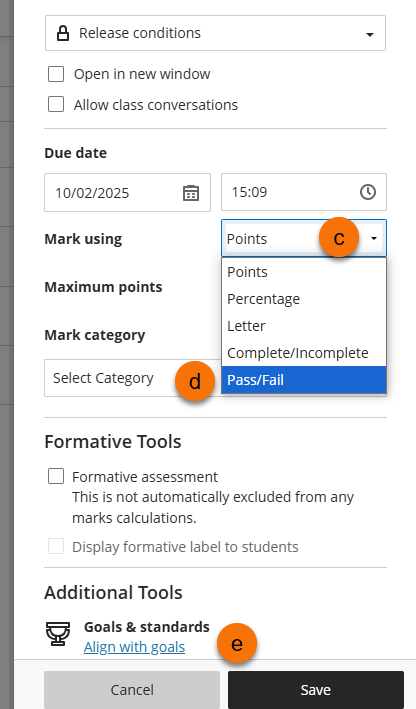
Step 3: Edit any other settings as necessary and click Save (e).
Guide last updated on February 17, 2025