Introduction
With the Senior Programme Administrator or Programme Administrator role you can enrol yourself or a colleague on any Blackboard course in your School.
If you need to enrol colleagues on a large number of courses, you can make use of the Batch Enrol function.
Batch-enrol: how to do it
This option is only available from the System Admin tab, not from within a course.
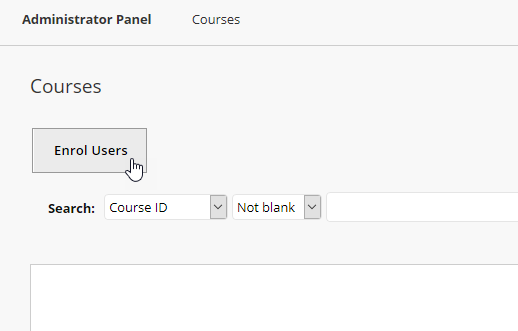
Go to Admin >Courses and click on Enrol Users.
This allows you to upload a file and process multiple course or organisation enrolments at one time. The file can be created easily in Excel, but it must be correctly formatted to work:
- The file must have one record on each line of the file
- Each record in the file must be in the following field order:
Course ID*, Username *, Course Role, System Availability, Course Availability - The first two fields must be completed, the others are optional. But ‘Course Role’ is vital if you are enrolling staff users.Valid course roles are:
EE External Examiner
B Course Builder
CBS Course Builder with Stream
G Marker
M Mentor
P Instructor
PR Periodic Reviewer
S Student
T Teaching Assistant
TAS Teaching Assistant with Stream
U Guest
NON_UoR Non UoR Staff
If you don’t enter anything in the Course Role field, Blackboard will assume that the user should be enrolled as a student.
- Needless to say, if you get the Blackboard Course ID or Username wrong, the import will fail – or, even worse, you will enrol the wrong users on the wrong course.
The easiest way to create your file is in Excel.
The spreadsheet should look like this
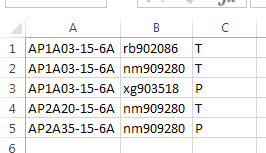
Note that
- There is no header row
- You can use this method to enrol multiple users onto a single course or multiple courses; or one or more users onto multiple courses; and to enrol staff with different roles on different courses.
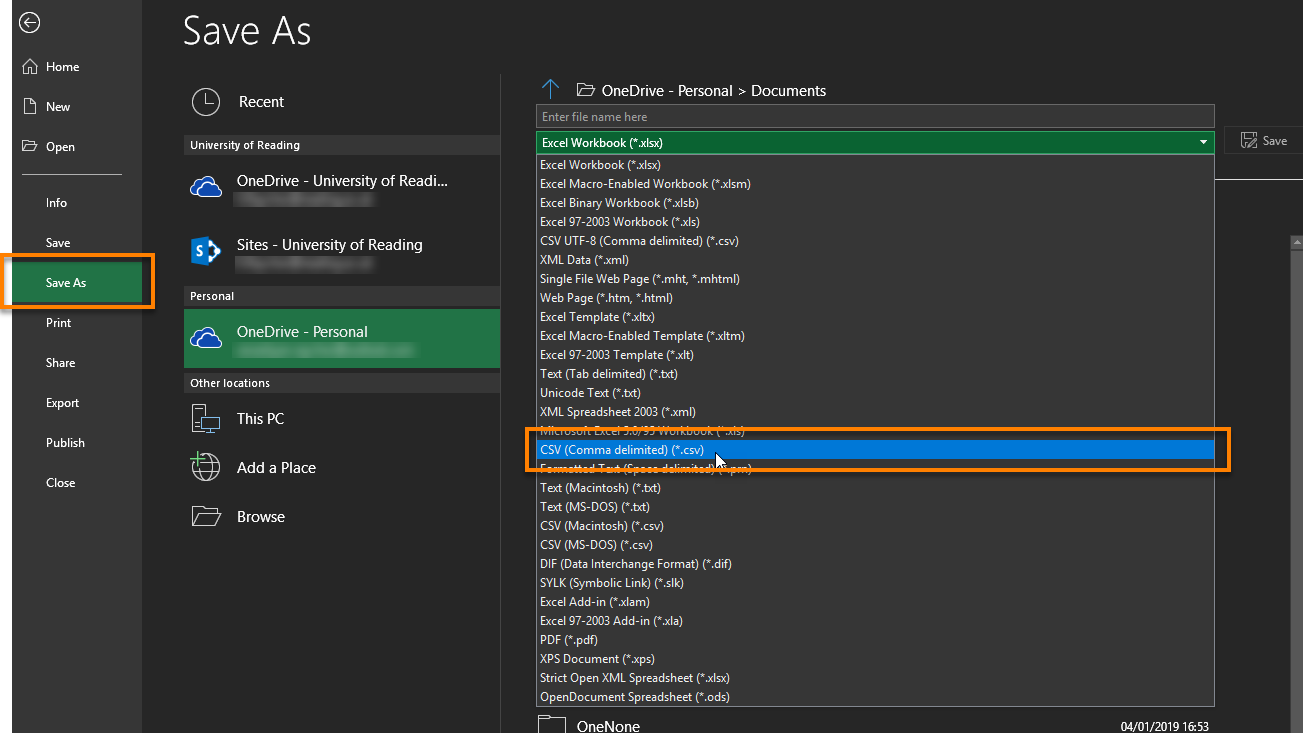
- You should save the file as a CSV file – in Excel choose File > Save As and select CSV from the Save as type drop-down list.
- On the Blackboard Enrol Users screen, click on Browse to locate and upload your CSV file.
You do not have to specify a ‘Delimiter Type’ as Blackboard should be able to determine this.
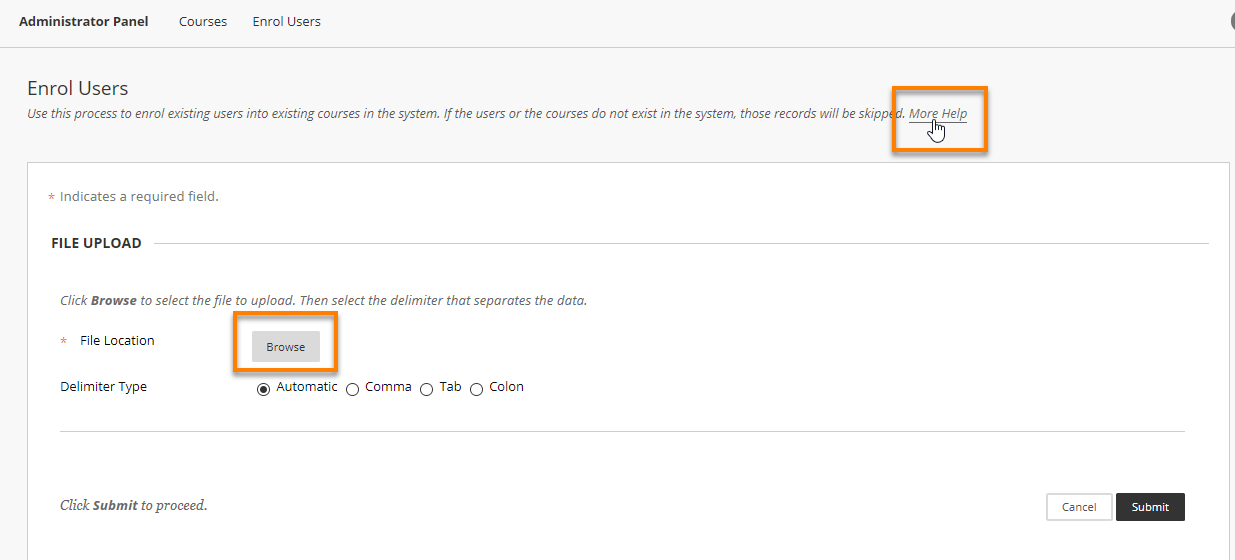
- If in doubt, before you attempt to upload a file, click on More Help to open a Blackboard help page in a new window.
- When ready, press Submit.
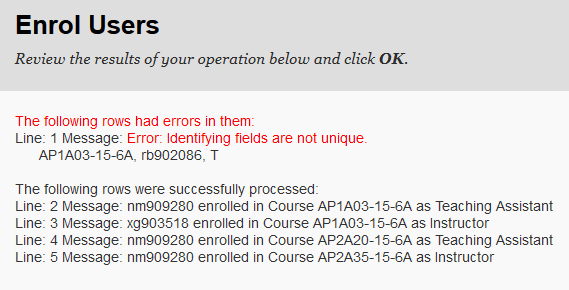
- You will see a screen recording the success of the Batch Enrol process. Any errors are shown in red, and Blackboard normally provides sufficient information to diagnose what caused the problem (most likely a data entry error in Excel).
Please note that the message “Error: Identifying fields are not unique” simply means that the user in question was already enrolled on this courses.
Tips
1. Identifying Relevant Blackboard Courses
In order to run a batch enrolment, you will need to know
- the exact Blackboard Course ID for every course you wish to enrol users onto
- the IT / Blackboard username of all users you wish to enrol.
Here is a suggested way to obtain a list of Blackboard Course IDs.
Go to System Admin > Courses
To find courses for the 2019/20 academic year, change the Search settings to
- Course ID
- Starts with
- Date Created After 01/05/2019
This may not be 100% accurate, but should pick up most course copies requested in advance of the main course rollover.
Courses will be listed by course code, but if desired you could click on the ‘Date Created’ or ‘Term’ column heading to reorder the results.
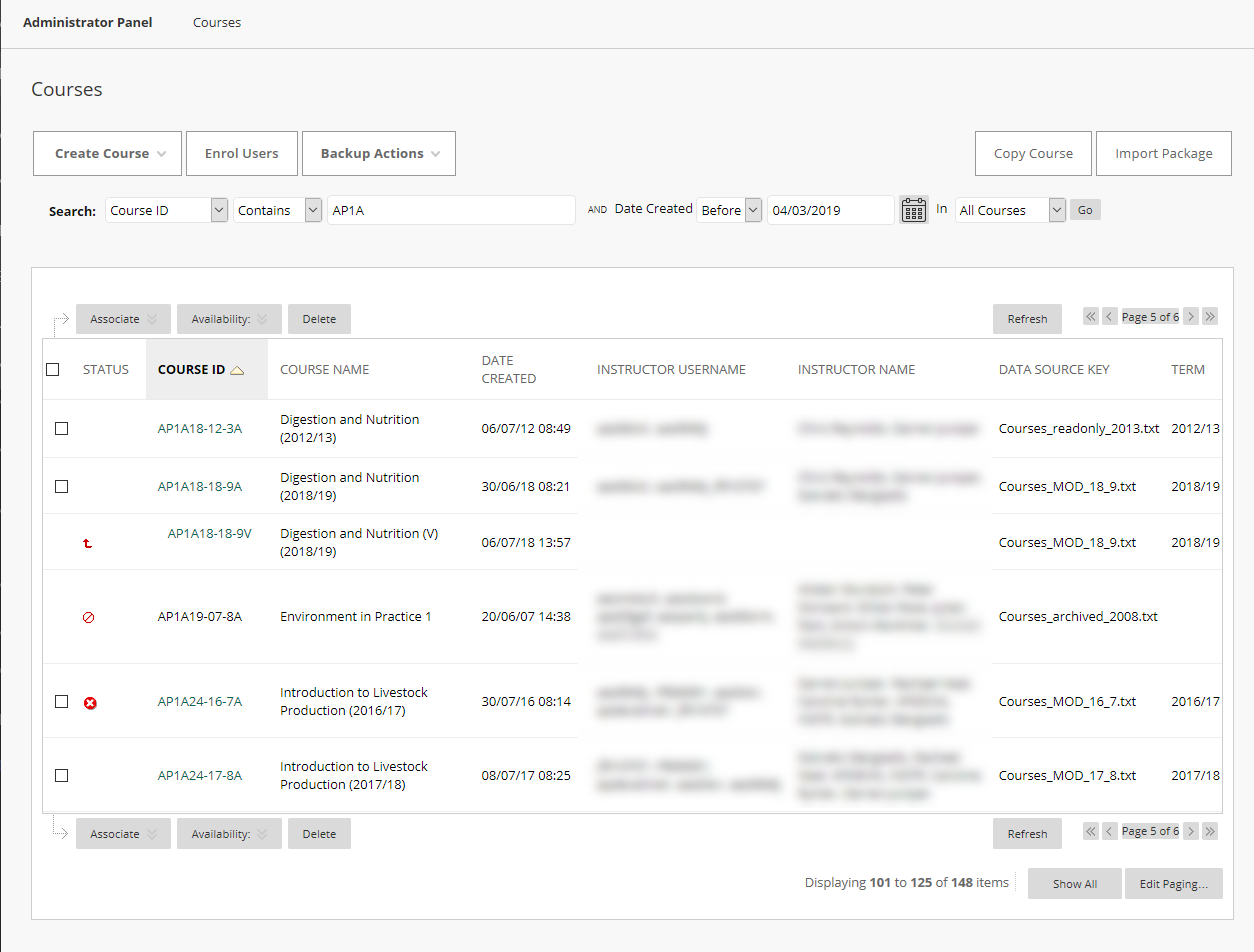
Alternatively, you could search for
- Term
- Starts with 2019 (or 2018 as appropriate)

leave Date Created to the default settings i.e. Before today’s date

2. Preparing your Excel file
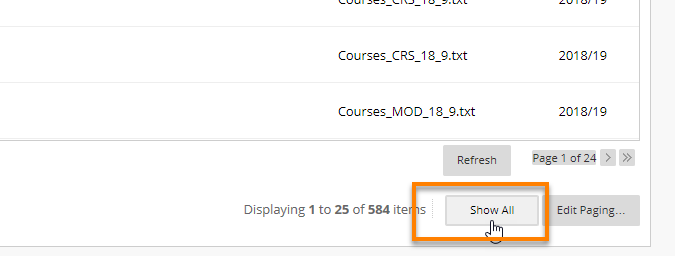
When you have the courses in the desired order, scroll to the bottom of the page and click Show All.
Using your mouse, highlight all of the search results.

Then right-click or use Ctrl+C to Copy.
Open a new Excel workbook.
From the menu choose Paste > Paste Special.
This should result in the courses list being displayed in a manageable way, with each Blackboard field in a separate column.
Ultimately you will only need the Course ID column.
But having the data in this way will enable you to identify which courses you require.
For instance, there is no point in enrolling users onto a Disabled Blackboard course (this probably means that the course did not run).

And into the second term of the academic year, if you find courses marked Unavailable, with no instructors, then you can probably assume that this course is not being used in Blackboard.
Such courses can be deleted from your list.
Once you have the definitive list of courses, either copy the Course ID column into a new workbook, or just delete all the other columns.
You need to end up with a spreadsheet with three columns, showing Course ID, Username and Course Role.

You can enrol multiple users onto multiple courses, using just one spreadsheet e.g.
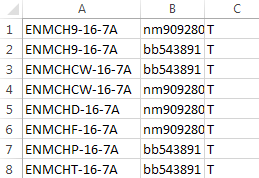
Remember to save the file as a CSV file, not an Excel spreadsheet.
Removing spaces from your Excel file

When you paste a list of course codes into Excel from Blackboard, you might find that there are trailing spaces at the end of each cell. These can be difficult to spot, but if not deleted are sufficient to make the Blackboard batch enrolment fail.

To remove unwanted spaces, you can use the Excel TRIM function – see https://support.office.com/en-gb/Search/results?query=trim+function
Page last updated on September 10, 2021 by taralehane
You must be logged in to post a comment.