Introduction
A Stream Channel is the equivalent of a YouTube Playlist. It allows you to organise your videos e.g. by topic. This can help you manage your videos, and make it easier for your students and colleagues to locate relevant content.
A Channel helps you organise your videos. It does not directly control who has access to the videos. However, when you create a Channel in Stream it must be linked to a Group.
For 2020/21 DTS are creating Stream Groups based on the membership of Blackboard courses. So if you are organising your learning materials into Stream Channels, you will easily be able to associate each Channel with the appropriate course Group.
Please note
- You can create multiple Channels for a single Group. So you could organise your course content by topic, by teaching week, by type of activity (like putting files into separate folders).
- You cannot link a single Channel to multiple Groups. But having uploaded a video to Stream, you can add it to multiple Channels (or Groups).
- You can embed a Channel in much the same way as you would embed a single video.
How to create a Channel
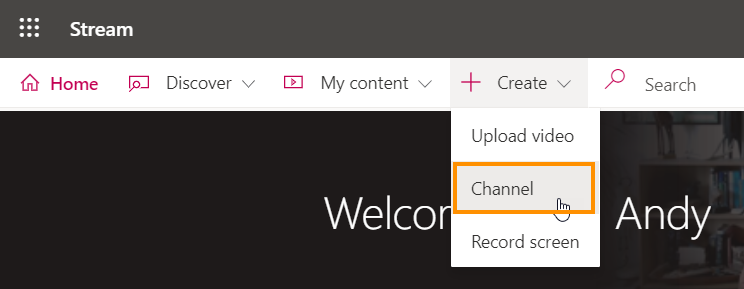
Go to web.microsoftstream.com and click on Create > Channel.
The ‘Create a channel’ screen is displayed.
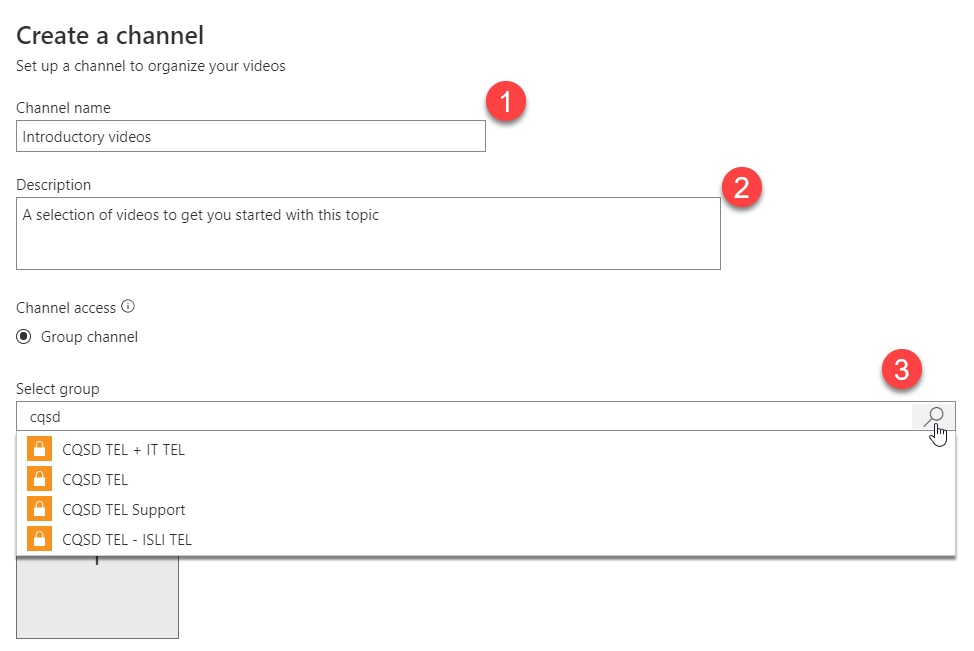
- Enter a name for the Channel.
- Optionally, enter a description for the Channel.
- Select the Group with which this Channel should be associated.
* Start typing into the box then press the Search icon (magnifying glass) to list matching Groups.
* Select the required Group from the list.
If you wish, you can upload a custom image for your Channel.
When done, press Create.
How to share a video with a Channel
Go to My Content > Videos.
For the video you want to share, click on the Add to group/channel icon.

From the drop-down list select Channels.
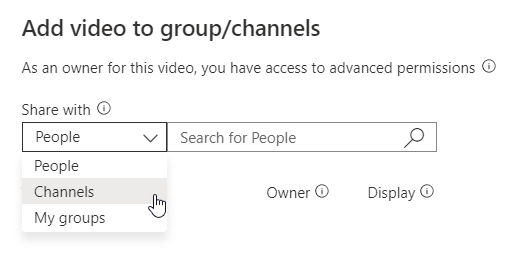
Then start typing in the search box and click on the magnifying glass to find matching Channels.
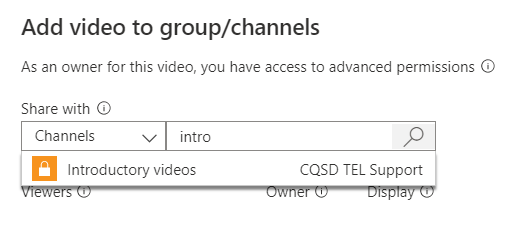
Select the required Channel.
If you wish, you can search for and select another Channel.
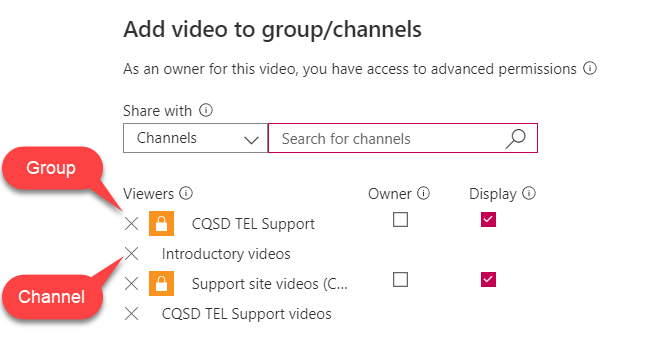
For each share, the screen displays
- The Group associated with the Channel
- below that, the Channel name.
When done, press Save.
An alternative route is to go to My Content > Videos, then select Update video details to view and edit all of the permissions for this video.

Page last updated on September 15, 2020 by andyturner
You must be logged in to post a comment.