Why do I need to do this?
When a new course is created in Blackboard it is always set up as unavailable. In the Courses list it will be labelled (Private).
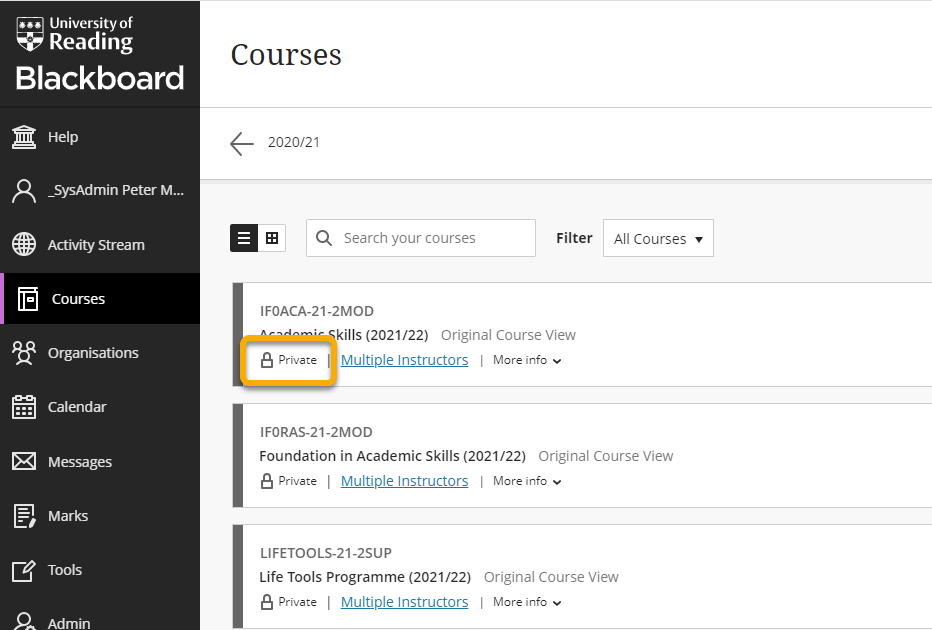
Instructors and other staff can access an unavailable course, but students cannot.
This is quite deliberate. It prevents students being frustrated by being given access to empty course spaces. It prevents students from accessing incomplete or out-of-date course sites which you are still in the process of developing. It also gives lecturing staff control over what students can see, and when.
This guide will show you how to set a course to Available, so that students are able to access it.
How to do it
From the Courses page
On the Courses page, in the ‘more options menu’ for a course, you can select Open Course to make the course available to students.

Use the padlock icon
Go into any content area of your course and you will see a padlock icon, top right.
Just hover over the icon and click on Make Available.
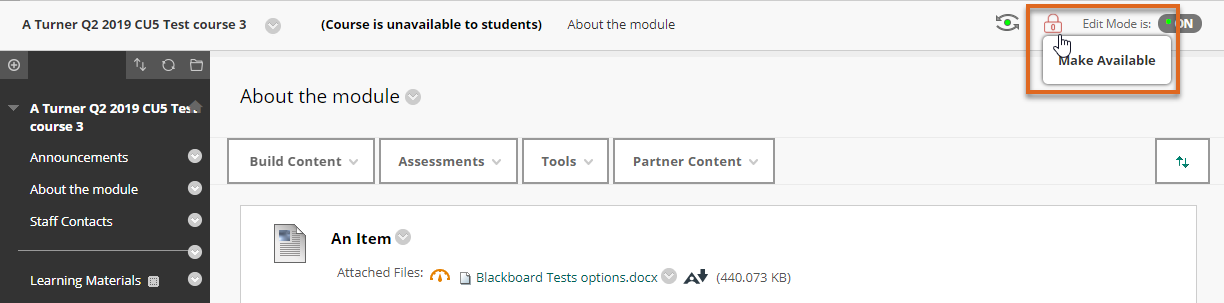
The icon will change as shown, to indicate that the course is now available.
![]()
This icon only appears in content areas e.g. ‘Learning Materials’ and ‘Assessment’. It does not appear on the ‘Announcements’ page.
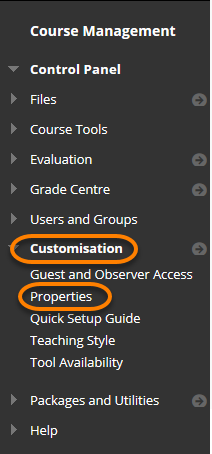
Via the Control Panel
Step 1
In your course go to
Control Panel > Customisation > Properties
Step 2
On the Properties screen go to Set Availability.
Next to Make Course Available, choose Yes.
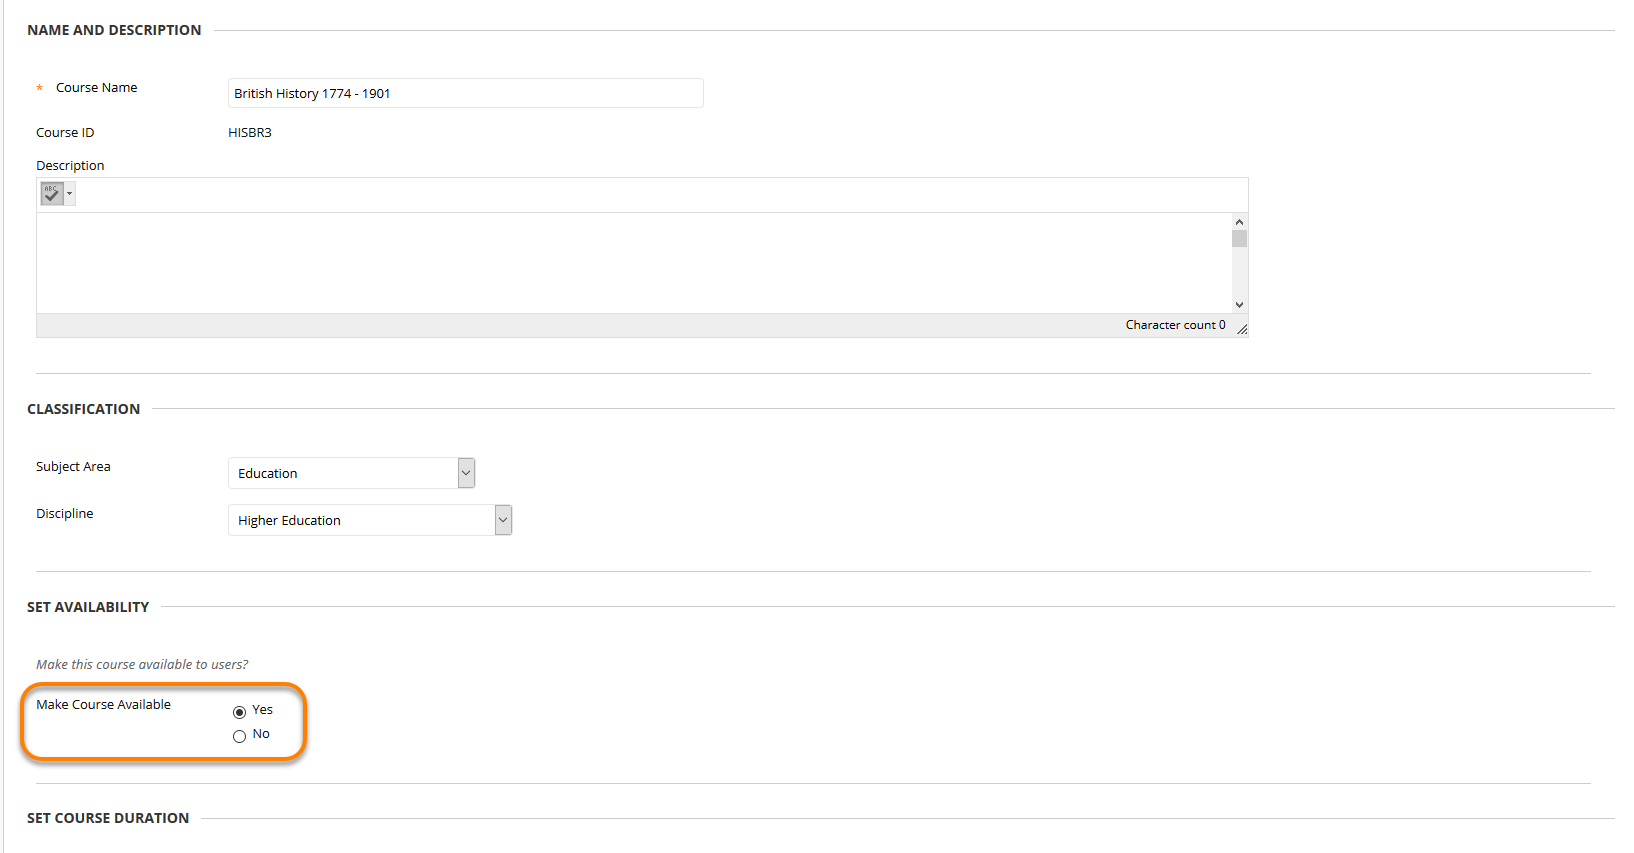
Click Submit.
Page last updated on September 1, 2021 by andyturner
You must be logged in to post a comment.