Introduction
Reusable Objects allow you to store in a central location (the Blackboard Content Collection) pieces of content which you regularly use on a variety of Blackboard courses. Moreover, you can update the Reusable Object in the Content Collection and the content will be updated in every course where it has been made available.
Reusable Objects are thus a good way to maintain and update content which needs to be made available on multiple courses – perhaps even on every course in a Department or School – but which might need to be updated at various points during the academic year. Examples might include Health and Safety guidance, School and Support Centre staff contact details, or information from central teams such as Careers and the Library.
How to create a Reusable Object
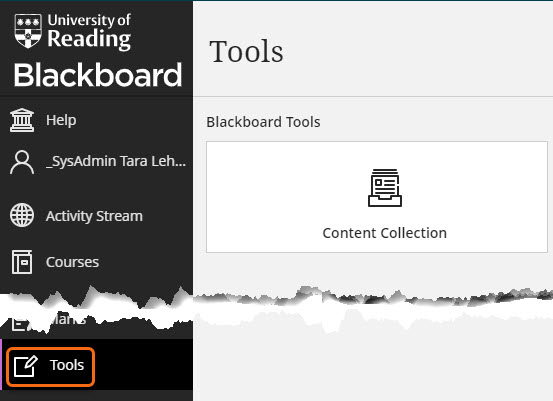
First go to the Content Collection via Tools in the Blackboard menu.
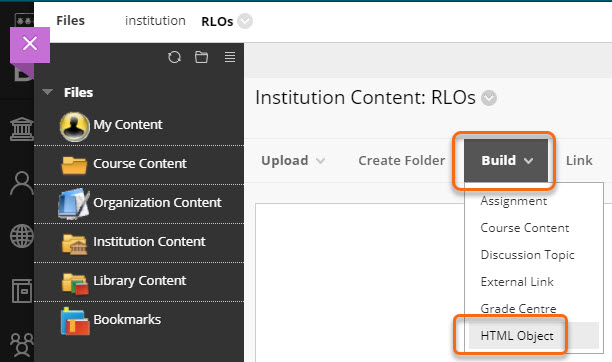
Although you can create a Reusable Object anywhere in the Content Collection, they are best saved in a suitable area within the Institution Content area. Not all staff have write access to their School’s folder in the institutional fileshare – if you require access to create Reusable Objects, please speak to your DTL, or staff in the Student Support Centre.
In any area where you do have write access, you will see Build listed as a menu item. Click here and then – for most purposes – on HTML Object.
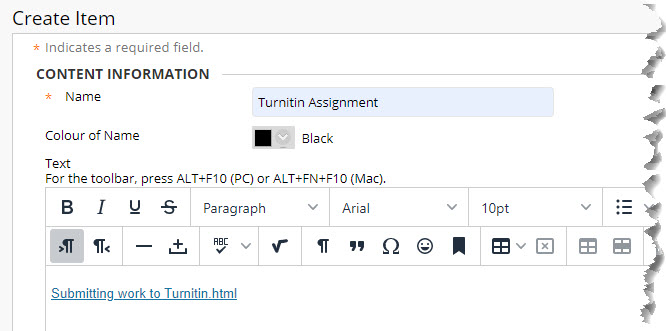
The familiar Blackboard editing screen will appear. Create your content item just as you would within a course.
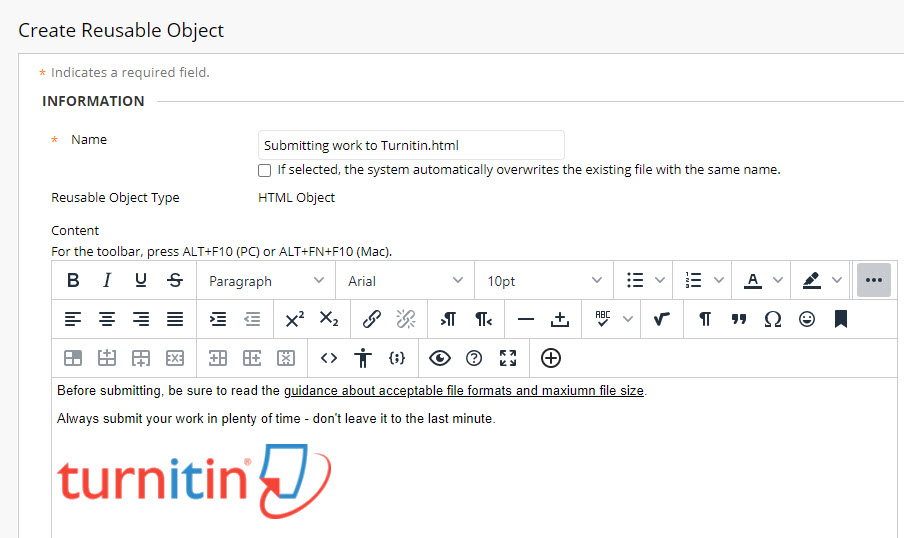
Press Submit when done.
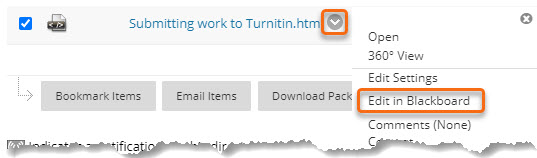
The item will be saved as an HTML file in the Content Collection.
When you need to edit the Reusable Object, simply select Edit in Blackboard from the contextual menu.
Inserting the Reusable Object into a course
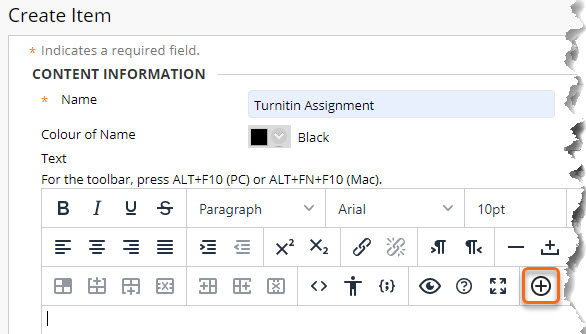
Create an Item in your course as usual. To insert content from a Reusable Object, click on the Add Content (plus sign) icon.
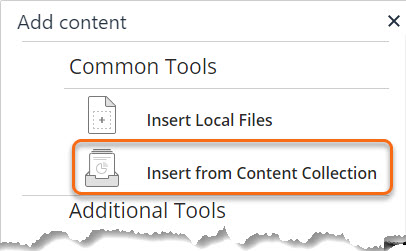
A new window opens. Click on Browse Content Collection.
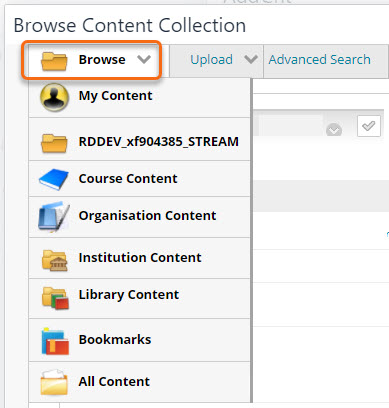
Browse to the area where your Reusable Object is stored.
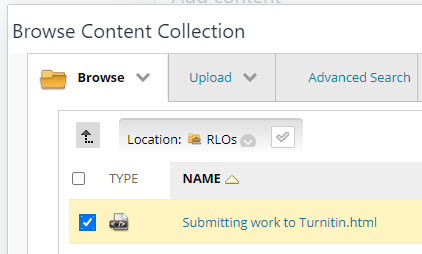
Once you have located it, tick the checkbox nest to the filename, then press Submit.
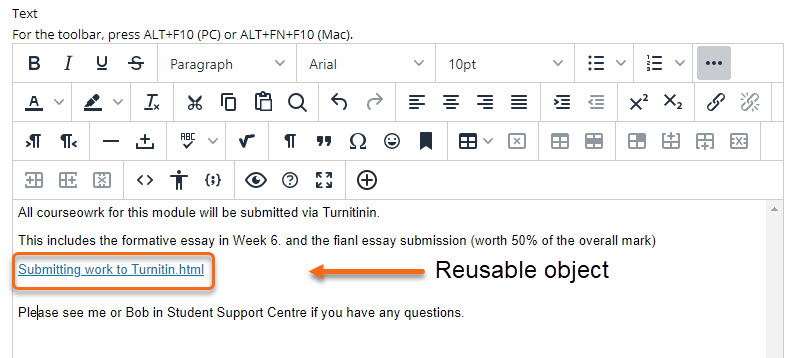
The inserted content will appear as a link within the editing area.
However, when you submit, the full content is displayed on screen.
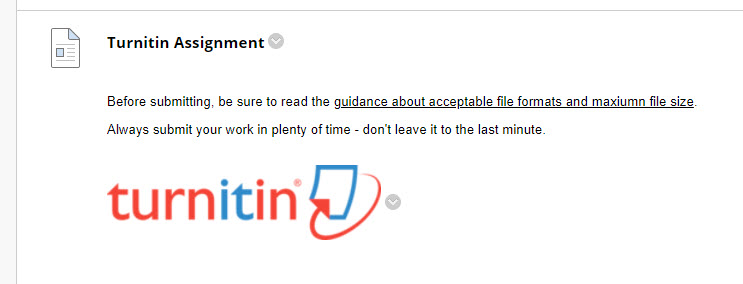
You can include your own text – customised as appropriate for each specific Blackboard course – both before and after the generic content included in the Reusable Object.

The great advantage of using Reusable Objects in this way is that, when you need to update the content, you do this just once, in the Content Collection – and the information is immediately updated in all courses where that Reusable Object has been inserted.
You could in fact insert multiple ‘placeholder’ Reusable Objects within your courses at the start of the year, and expand and update the content within them as the year progresses.
Page last updated on August 9, 2021 by Sev Raychev
You must be logged in to post a comment.