It is possible to set up a blackboard discussion to be used as a space where students can upload files and access one another’s files. Groups have separate channels within a discussion and cannot see the other groups’ discussions, instructors can see all groups. The students respond to a discussion using the full text editor with all the formatting and attachment options. They can attach the contribution or cut and paste it into the text editor.
Before creating the Discussion please create the Groups Set for the groups you wish to set up the file exchange for.
Create a Discussion for use as a file exchange
Decide on a good place on the Template for students to access the file exchange, this could sit on top of the Learning Materials or Assessment sections if it is something that is going to be used throughout the year.
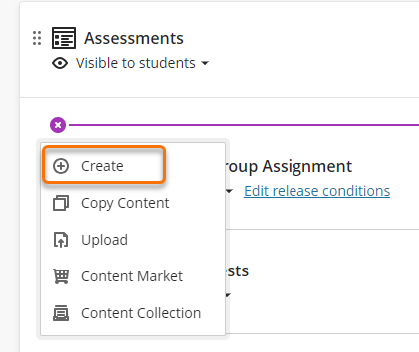
- Click on the purple plus sign and select Create from the add content menu.
- Select Discussion form the Create Item panel.
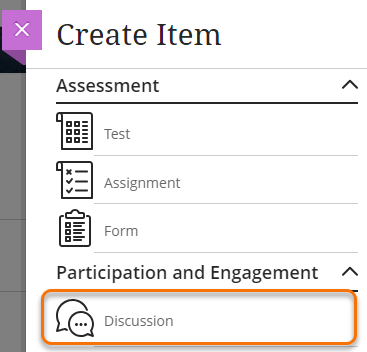
The New Discussion screen will open.
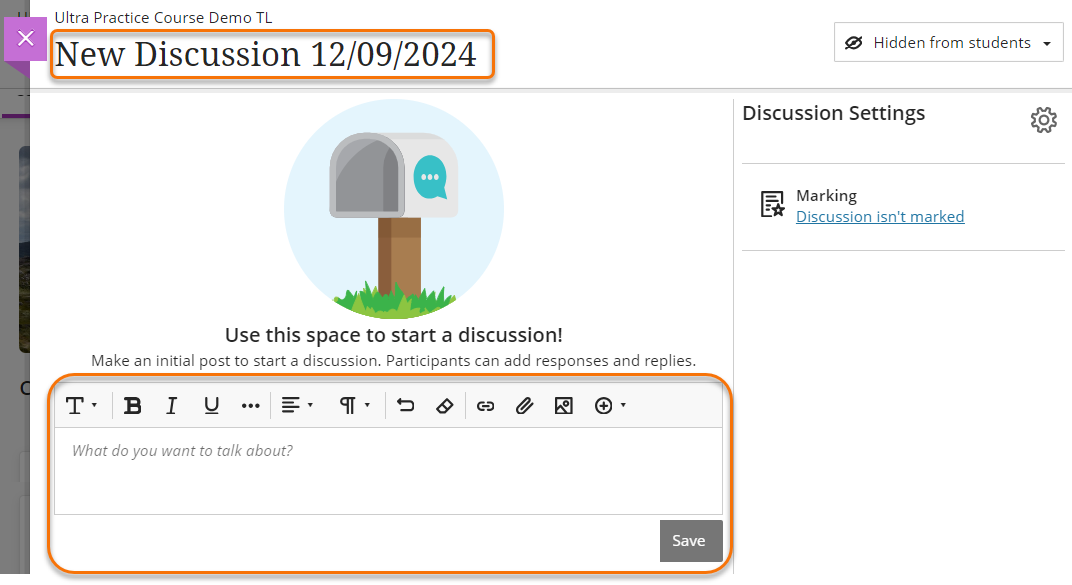
- Rename the discussion to something meaningful e.g. “Seminar Group File Exchange”.
- Add a prompt or instructions on how you expect this space to be used.
Key settings
When using the Discussion feature for a groups file exchange leave all the options that limit students ability to view, post or edit.
Do select Display on Course Content page.
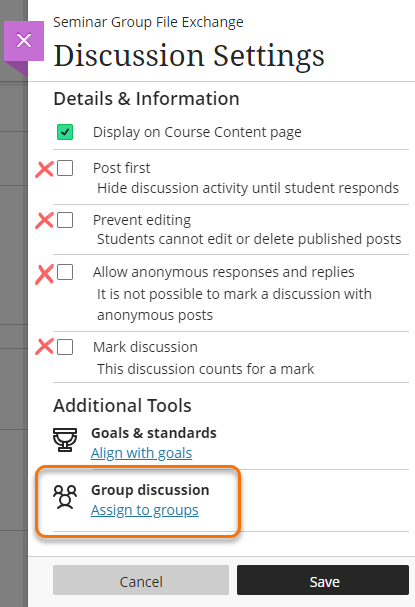
Assign Groups
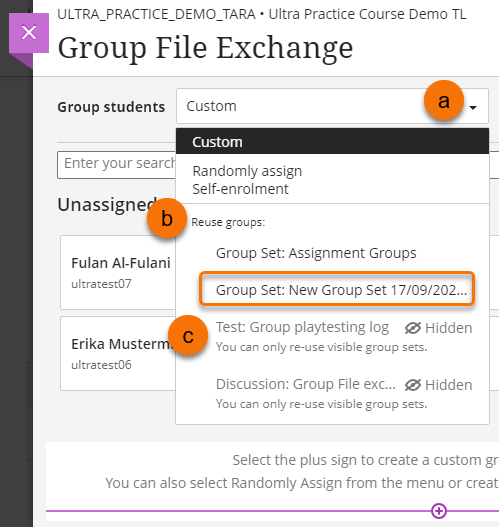
It is recommended that you create your groups first, see our Creating Groups guide for more details. Once the groups have been created, you can use the Reuse Groups function to associate the groups with the Discussion.
- In the group students field click on the down arrow icon (a) to reveal the menu.
- All the Group Sets on the course will be listed under Reuse groups (b). Group Sets contain a set of groups.
- Only groups that are visible to students will be available to select and assign to the discussion. You will not be able to select Hidden groups (c).
Select the Group Set you wish to assign to this Discussion.
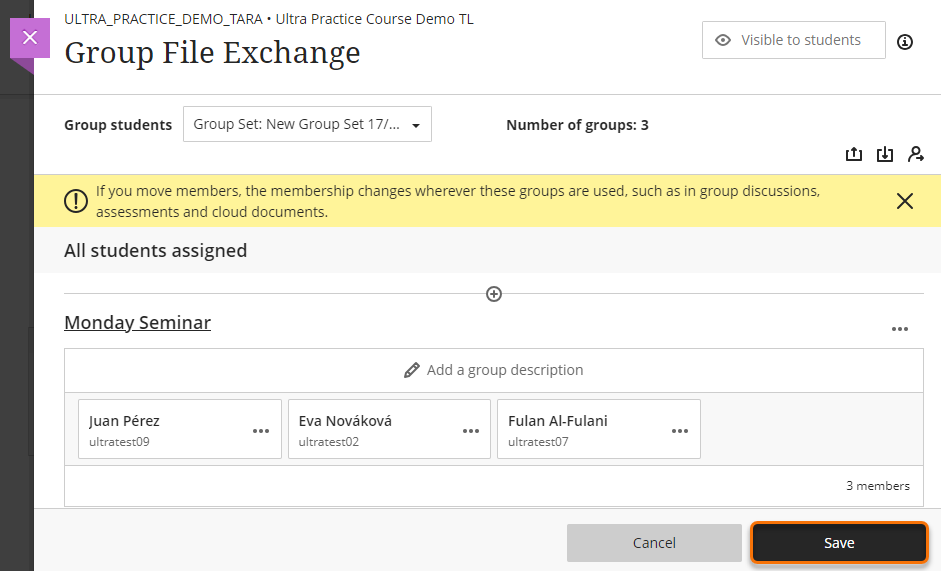
Once you have selected the Groups Set it will open and show the individual groups in the set.
When you have located and opened the correct Group Set click Save.
Student View
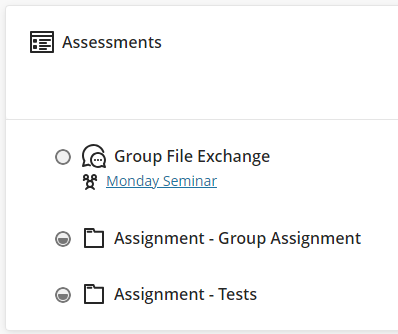
The students will be able to see the Discussion link plus a link underneath that sends them directly to their Groups area.
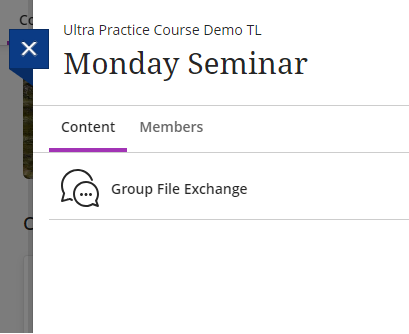
In the groups area for that group they will be able to see,
- all assessments, discussions, journals etc. that have been assigned to that group.
- and the members of the groups, via the members tab.
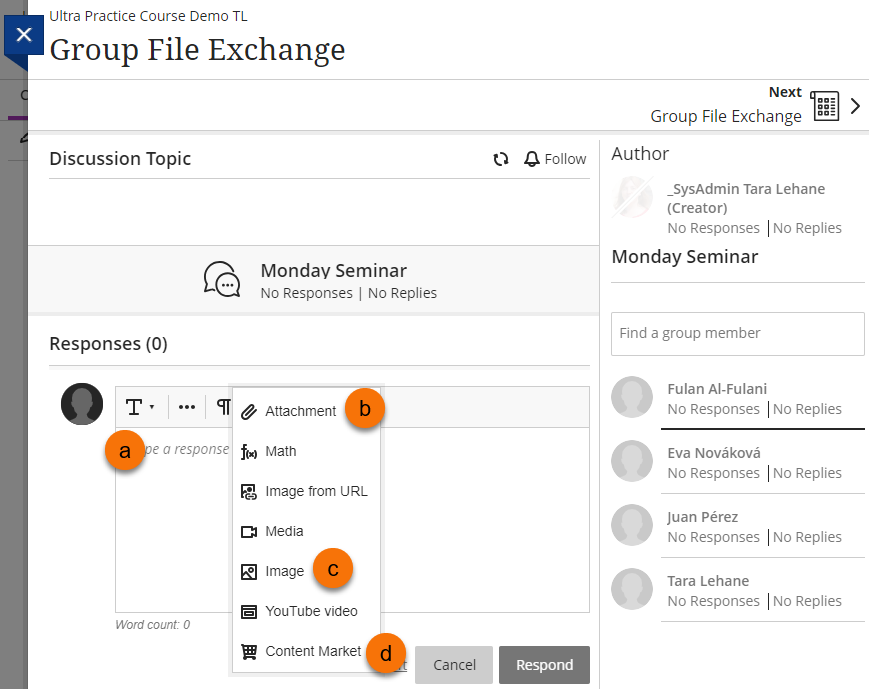
When students open the discussion they will be able post and view posts from their group members.
In a post students will have the full text editor and will be able to
- Type text and insert links in that text (a)
- Attach files (b)
- Insert images (c)
- Insert YuJa videos via the Content Market option (d)
Guide last updated on October 1, 2025