Introduction
This guide is relevant to the following modes of submission: Electronic Document (Group Work)
It also covers
Physical Entity Submission (Group)
Set Up Groups
If you have not already done so, create the Groups which will be submitting to this assignment.
See:
Blackboard: Creating multiple manual enrol groups for your course
Blackboard: Creating random enrol groups for your course

The Groups must be set as Available i.e. when setting up your Groups, make sure you select Yes for ‘Group is visible to students’.
Set up submission point
1. Integration will create a Blackboard Assignment in the ‘Assessment’ area of your course.
The assignment name will take the format
[IC] Module code-occurrence letter – RISIS Assignment Title
e.g. [IC] MM1F12-A – Group Project
If you need to change the assessment

·         Title

·         Deadline

·         Points Possible

you should do this in both RISIS and Blackboard.

At a future date it should be possible for such updates to be transferred automatically from RISIS to Blackboard, but that functionality is not yet available.
You will need to configure this assignment
a. to ensure that the settings are correct
b. to add instructions for students.
c. to allocate it to the correct groups
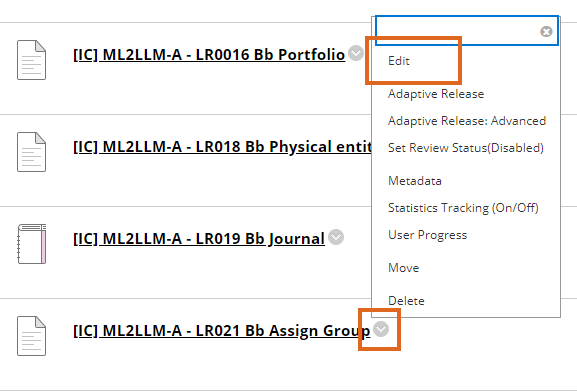
2. Locate the assignment and choose Edit.
3. Add Instructions.
4. Check the
a. Due Date and time
b. Points Possible
5. Attach a Rubric if required.
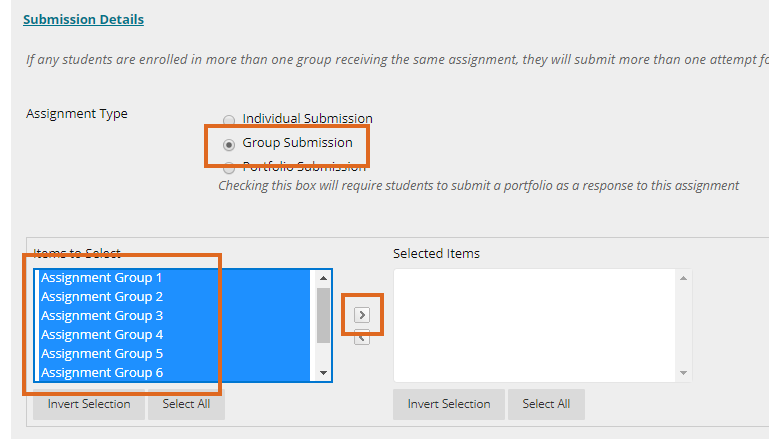
6. Under Submission Details check that Assignment Type is set to Group Submission.
7. Select the Groups which will submit to this assignment.
8. Under Grading Options, if required tick Enable Anonymous Marking, and set the date on which anonymity will be removed.
9. Under Display of Grades check that
a. ‘Display grade as’ Primary display is set to Score
(or Pass/Fail/RN if this was selected in RISIS)
a. Include in Grade Centre grading calculations is ticked
b. Show to students in My Grades is unticked
i.e. grades will be hidden from students until you choose to reveal the Grade Centre column, once marking is complete.
10. Under ‘Availability’
a. check that Make the Assignment Available is ticked
b. check and if necessary edit
i. Display After date and time
ii. Display Until date and time
Default settings

Schools which have a single on-time and post-deadline submission point:
Display After date and time =  due date-time as set in RISIS, minus 4 calendar weeks

Display Until date and time:  None


Schools which have separate on-time and post-deadline submission points:
Ontime assignment

Display After date and time =  due date-time as set in RISIS, minus 4 calendar weeks

Display Until date and time:   due date-time as set in RISIS

Post-deadline assignment

Display After date and time =  due date-time as set in RISIS
(i.e. same as the ontime Display Until date and time)

Display Until date and time:  None
Page last updated on September 5, 2022 by andyturner
You must be logged in to post a comment.