Introduction
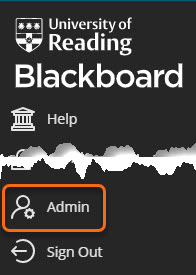
If you have been granted the Senior Programme Administrator or Programme Administrator role in Blackboard you will see the Admin option of the Blackboard Menu.
This gives you the ability to manage courses and users within a Blackboard ‘Domain’ (normally a School, in some cases a Department). In particular, you can enrol yourself and other users onto courses, and remove users who no longer need access to a course.
Student enrolments

The vast majority of Blackboard courses are linked to RISIS – this included standard RISIS module/programmes in Blackboard, and Shared Courses, which combine enrolments from two or more modules/programmes.

Student enrolments flow through automatically to Blackboard from RISIS as part of an overnight process (at the start of the academic year there may be up to 48 hours’ delay).Therefore, except on non-RISIS courses and Organisations,  you should not have to manually enrol students. If they do not appear on a Blackboard course, there is probably an issue with their RISIS record, and you should investigate this first, before raising an IT support ticket.
Removing users from a course

This can only be carried out by those with the Senior Programme Administrator role.

See Removing Users from Blackboard Courses and Organisations.
Enrolling yourself on a course
You do not have to add yourself to a course in order to enrol other users.
But you do need to be enrolled on a course in order to access course content, the Grade Centre, and work submitted to Blackboard or Turnitin assignments.
The most appropriate role for support staff is Teaching Assistant.
Please retain the ‘Instructor’ role for academics teaching the course.
For guidance on the various course roles available, see our guide Course roles in Blackboard.
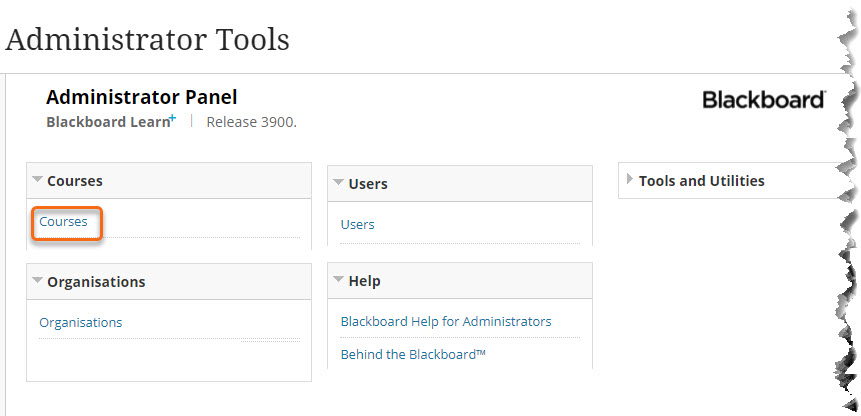
Enrolling users on a course from the Admin panel
Go to Admin and click on Courses.
The course search defaults to Course Name, but you will probably want to change this to Course ID, so you can search by module or programme code.
Type in the course code or name and press Go.

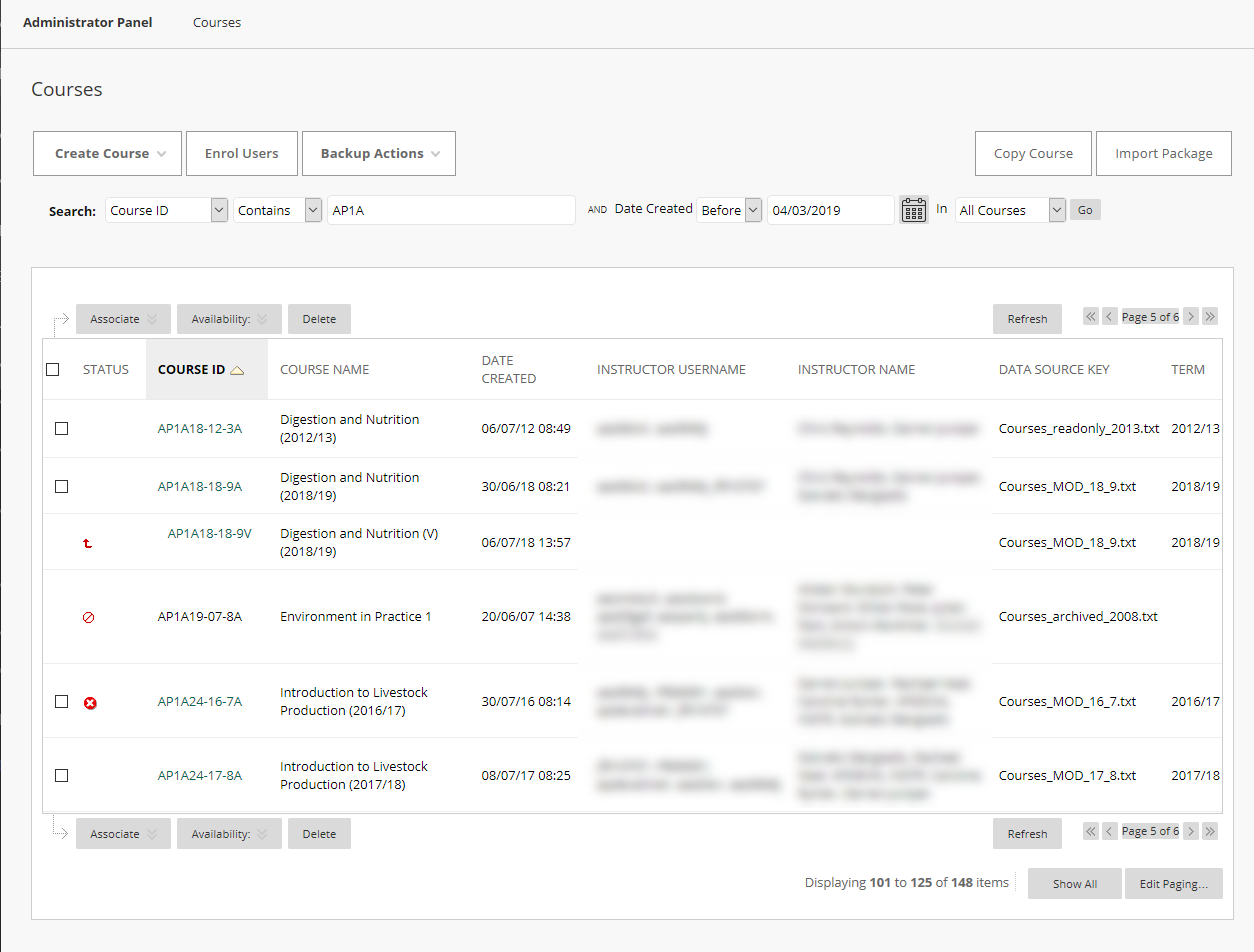
Instructors are shown by name and username.
Names greyed out are disabled IT accounts – probably denoting that the staff member has left the University.
Please note that staff who are enrolled with other roles e,g. Teaching Assistant or External Examiner, are not displayed on this page.
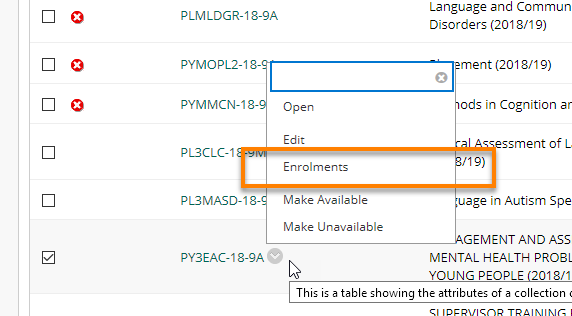
To view all users enrolled on the course, and to add or remove users, hover over the Course ID, and a small down arrow will appear.
Click on this arrow to get access to the options menu, and choose Enrolments.
The Enrolments screen shows all users enrolled on the Blackboard course, and their role within the course.
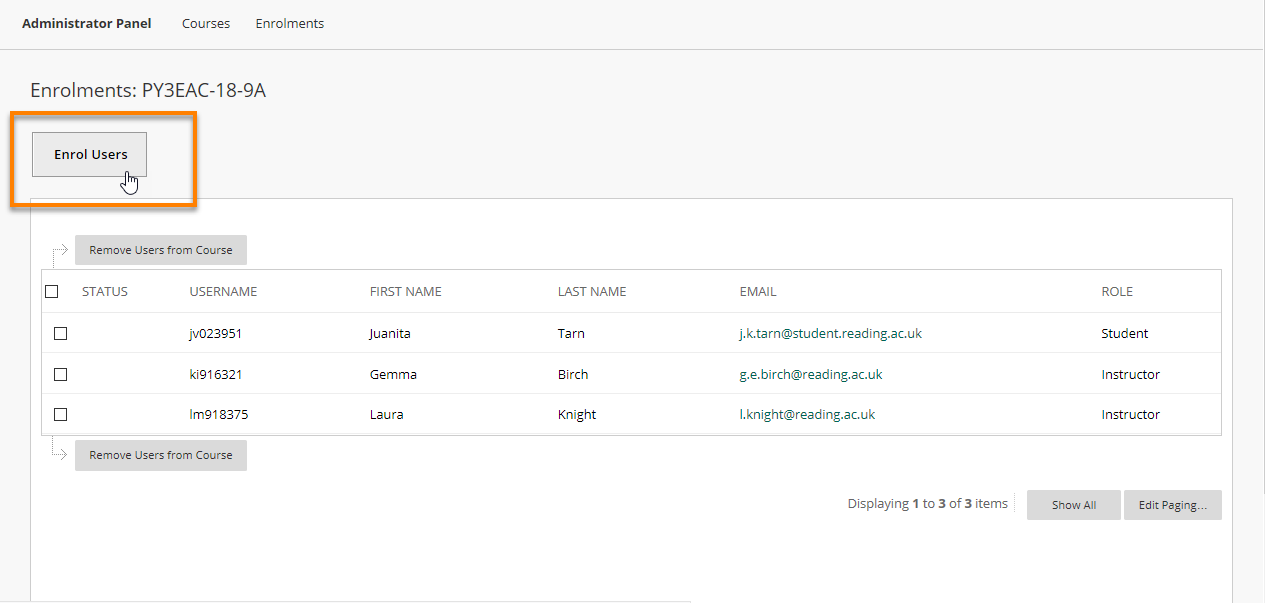
To enrol yourself or other users into this course, click on Enrol Users.
Ideally, you will already know the IT username of the person who need to enrol. Type this into the Username field, select the appropriate course role from the drop-down list, and press Submit.
Do not press Browse!
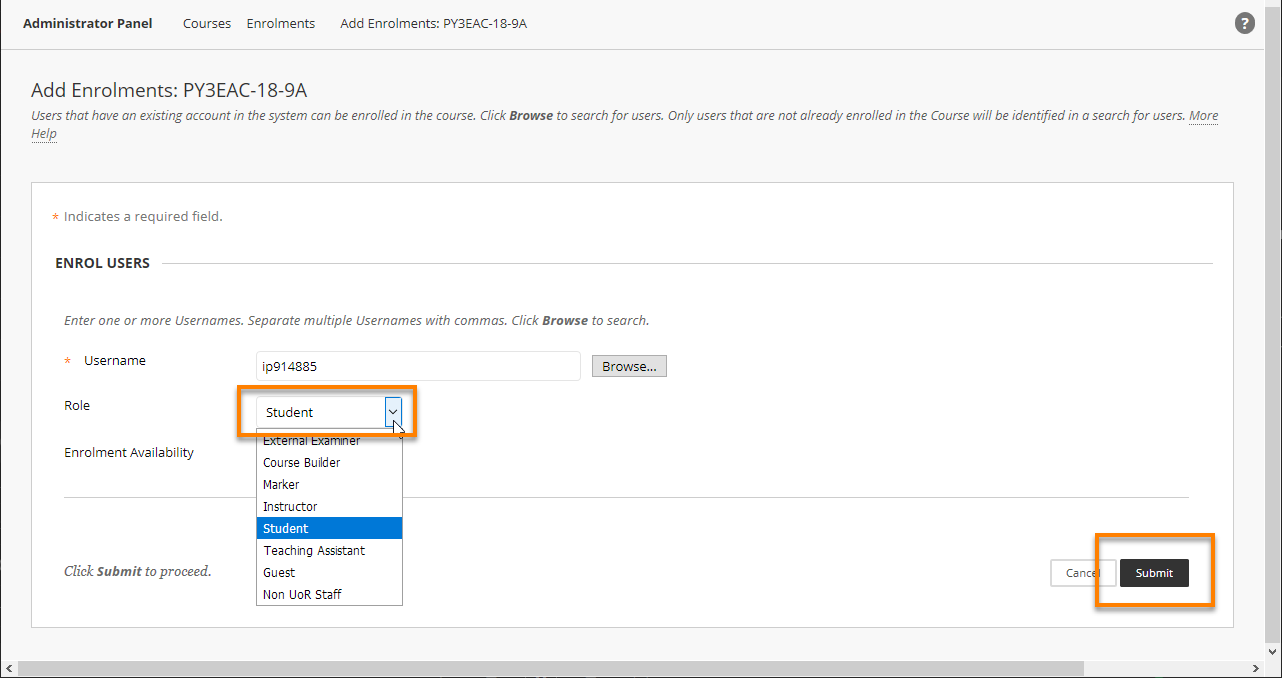
Don’t know the person’s username?

Only press Browse if you don’t know the person’s username, and need to search for them by first name, last name or email address.
Adding several users at once? You can enter multiple usernames at once. Just separate the usernames with a comma e.g. rb902086, nm909280, xg903518 If you have to add a large number of users, use the Batch Enrol tool (see below).Getting an error message? If you try to enrol a user who is already on the course, you will see a red error message at the top of the screen. Other errors would include - username not found (i.e. you have entered incorrect details) - ‘You do not have permission to enrol user’ – this message will appear if you try to enrol someone from a different ‘domain’ (e.g. from a different School). In this case, you would need to - enrol yourself onto the course - enrol the other user via the course Control Panel Please note: if you try to enrol multiple users at once, and any one of these users produces an error message, none of the users will be enrolled.
Batch Enrolling users
This allows you to upload a file and process multiple course or organisation enrolments at one time.
See How to Batch-enrol Users in a Blackboard Course.
Enrolling users from the course Control Panel
You can also enrol users directly from the course.
Search for the course you want from Admin > Courses.
Click on the course ID to enter the course.
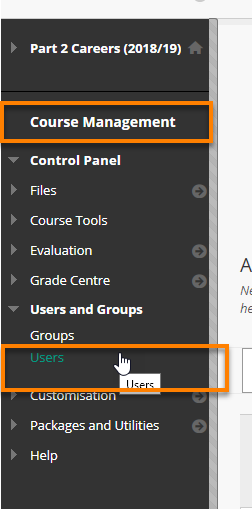
Click on Control Panel > Users and Groups > Users.
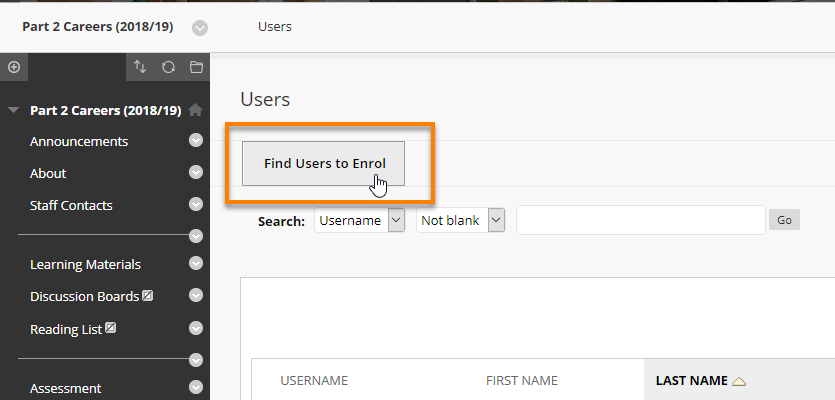
Ignore the search box. Click on Find Users to Enrol, and then follow the same procedure as described above.
Disabled users and Unavailable enrolments
When you look at course enrolments from Admin > Courses you may see these symbols next to certain user records.
![]() = Disabled enrolments: normally denotes a student who has completed or been withdrawn from the course; this status is picked up automatically from RISIS, and cannot be edited in Blackboard.
= Disabled enrolments: normally denotes a student who has completed or been withdrawn from the course; this status is picked up automatically from RISIS, and cannot be edited in Blackboard.
These users will not be visible at all from within the course, neither in the user list nor Grade Centre,
![]() = Unavailable enrolment: the user’s enrolment on this course has been set as Unavailable in Blackboard; you, or any Instructor or Teaching Assistant on the course, can edit the user’s enrolment to set it as Available again.
= Unavailable enrolment: the user’s enrolment on this course has been set as Unavailable in Blackboard; you, or any Instructor or Teaching Assistant on the course, can edit the user’s enrolment to set it as Available again.
Enrolment Availability
From Admin > Courses
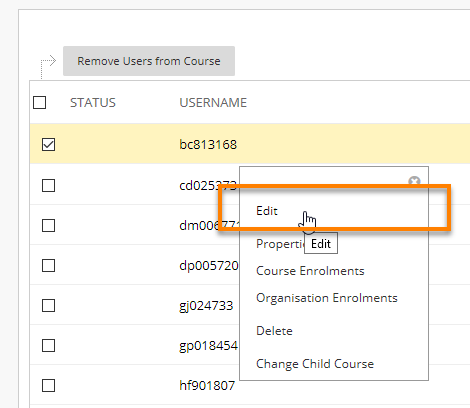
Call up the course and go to Enrolments.
Find the user whose enrolment status you want to alter and choose Edit.
Change the Enrolment Availability to Yes or No as appropriate.
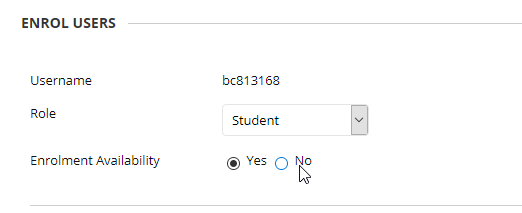
Press Submit to save your changes.
From the Course Control Panel
Go to Control Panel > Users and Groups > Users.
Find the user whose enrolment status you want to alter, and choose Change User’s Availability in Course.

Change the status under Available (this course only) to Yes or No as appropriate.
Press Submit to save your changes.
Page last updated on August 9, 2021 by andyturner
You must be logged in to post a comment.