Groups in Blackboard Ultra allow you to facilitate student collaboration through assessment and activities. Groups can also allow instructors to control content availability for specific sets of students via release conditions.
Creating groups
To begin making groups, decide which manner of group will work best for your purposes (listed below) and then navigate to the Details & Actions side menu of your Blackboard course and select Course Groups, clicking the link for View sets & groups.

You will be on the Course Groups management page, where you can create a new group set, or import groups from another course.
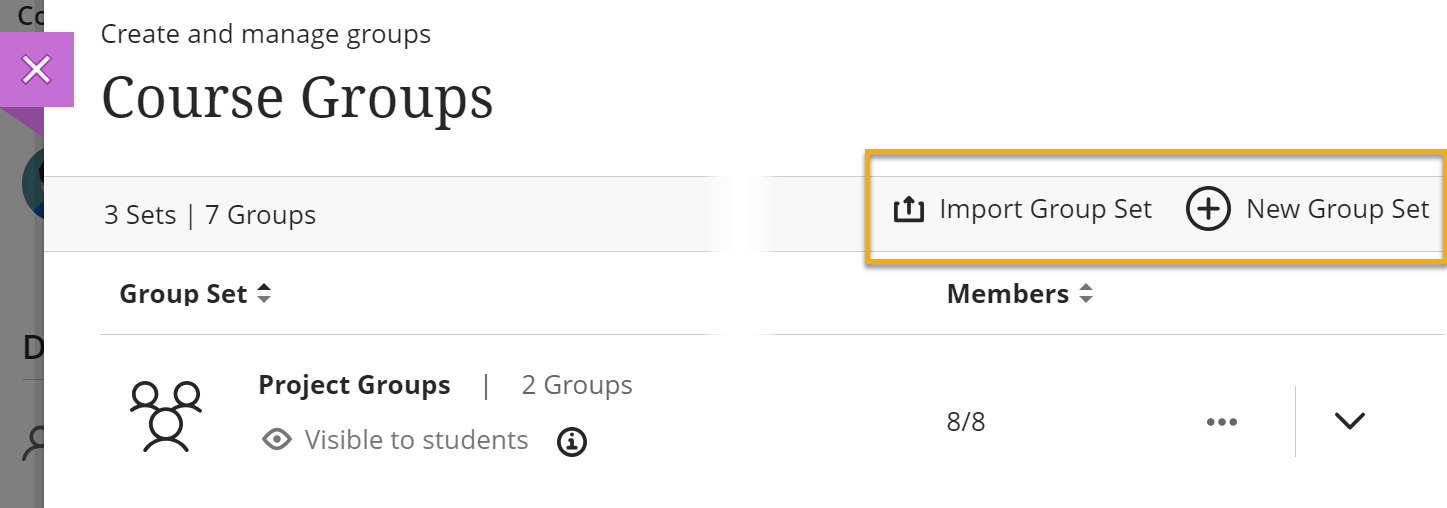
Please Note: In Ultra all the groups are Group Sets. It is possible to have Group Sets with some members unassigned, therefore, you are still able to have specific groups that do not involve the whole cohort. As in original, each member can only be in one group within a Group Set.
Custom groups
A custom group allows you to create your own set of groups and manually allocate students. You may choose this option when you have specific groups for an activity or have agreed with your students what group membership they would like.
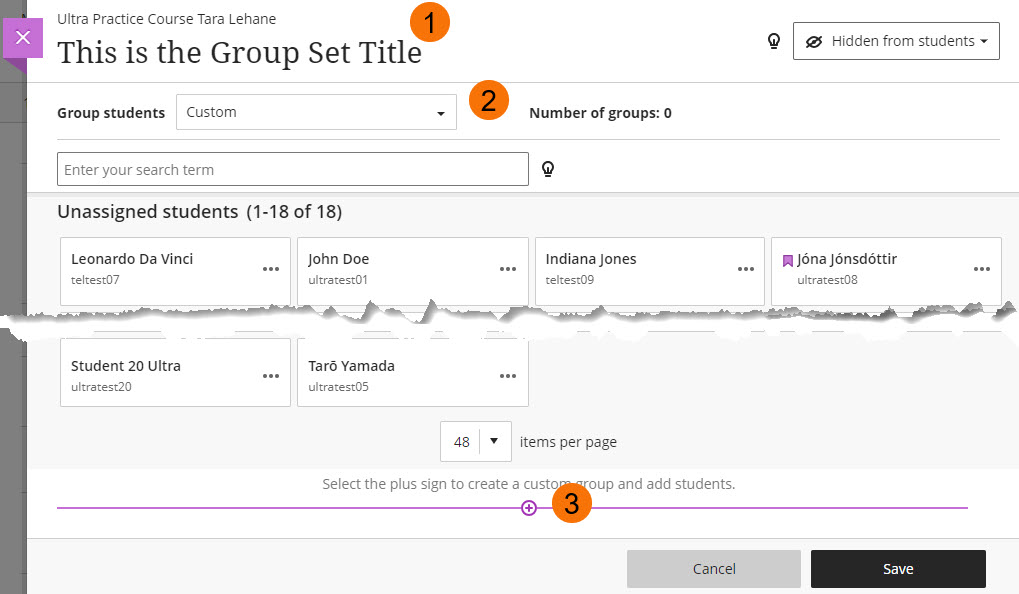
- Create a New Group Set (optional name group set)
- Select group students: Custom
- Use the plus sign to add your groups
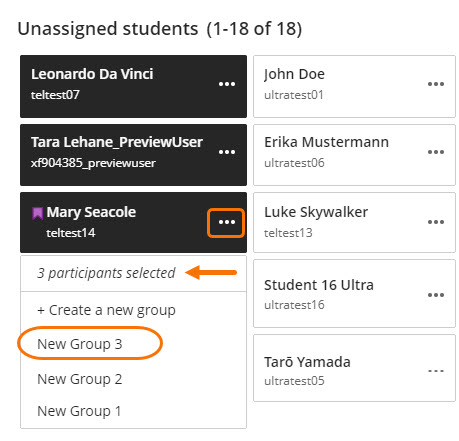
4. Return to the Unassigned students list and click on the members you wish to add to a group. Use the dot menu on one of the selected members to add them all to a group. There is also an option to create an additional group from this menu.
5. (Optional) name groups and add group descriptions
6. (Optional) make groups visible to students
7. Save groups
Random Groups
Randomising groups automatically assigns students into a group and can be allocated based on the total number of groups or group membership you require. You will have the opportunity to adjust the random group sets before finishing.
- Create a New Group Set
- Select group students: Randomly assign
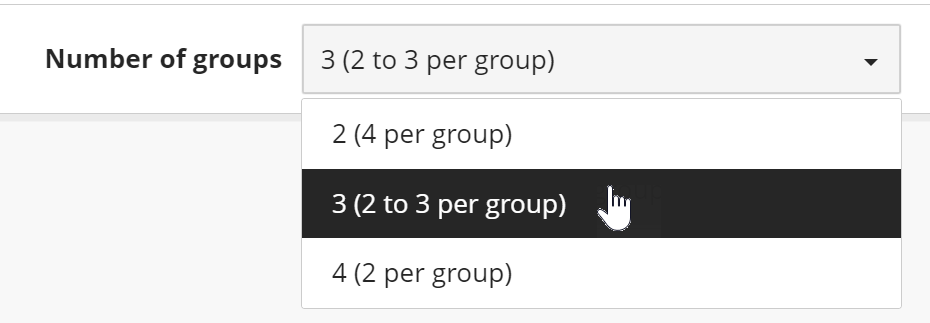
- Specify number of groups needed – Blackboard will inform you of the number of students per group
- (Optional) Use dots next to student names to reallocate students if needed
- (Optional) name group set, groups and add group descriptions
- (Optional) make groups visible to students
- Save groups
Self-enrolled Groups
This group creation mode allows you to specify the total number of groups and group membership you require, but students will need to select their group membership themselves on Blackboard. You can set date ranges on this enrolment if you choose, with any students that do not select within the closing date being automatically enrolled into a group that is not full.
- Create a New Group Set
- (Essential) make groups visible to students
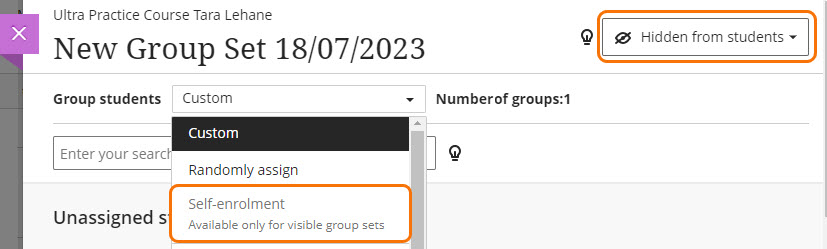
- Select group students: Self-enrolled groups
- Specify enrolment start and end dates (Optional)
- Set the maximum members per group
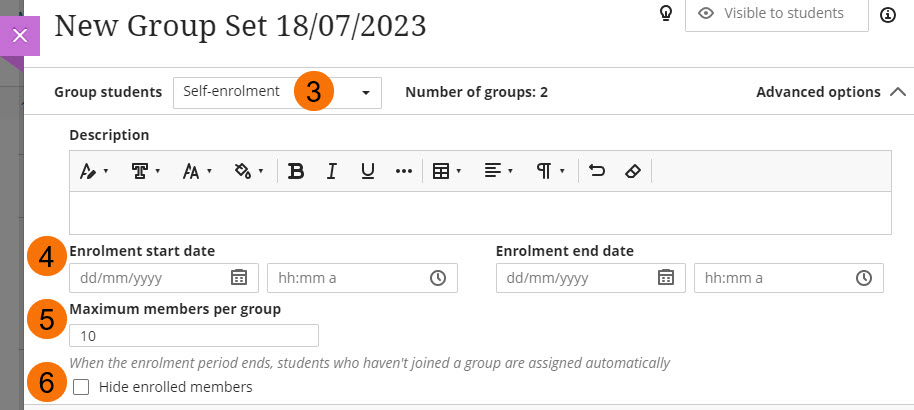
- Hide enrolled members (Optional)
- Use the plus sign to add your groups
- (Optional) name group set, groups and add group descriptions
- Save groups
See creating group sets in action: (Video)
Self-Enrol Essentials
- Make Group Visible to students to create Self-Enrol Groups
- The number of groups defaults to three. You must have a minimum of two groups. You will need to add all extra groups manually with the + button.
- An automated email announcement will be sent to all students to ask them to sign up. This cannot be edited and has limited information. You may wish to send your own text as an announcement to explain how students should sign up. You can delay the automated message with the availability from setting.
Guide last updated on June 22, 2026