- What are Course Banners and why would I use one?
- Course image requirements
- Uploading a Course Banner
- Copy a Banner from another Blackboard course
What are Course Banners and why would I use one?
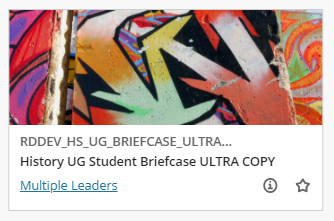
By default, Blackboard will provide a thumbnail image for your course or organisation, which displays when users view the Courses or Organisations page as tiles, rather than as a list. Please note that this stock image will not be able to be used as a course banner. You will need to upload your own image if you want to display a banner.
This image can also be set to display as a banner inside your Ultra course.
Using a relevant, eye-catching banner can:
- Improve the appearance of your Ultra Course landing page.
- Build consistency between the Base Navigation view and the actual course.
- Make it easier for students to differentiate between courses.
Course image requirements
Before uploading a banner to your Ultra Course please ensure your file is suitable.
- The image must be at least 1200 pixels wide x 240 pixels high
- Images which are smaller than this will be rejected.
- Images which are larger than this will be rescaled and/or cropped.
- When you upload your image you can specify which sections should be cropped, although the actual area that displays will be different on the Courses page and inside the course, and can also vary depending on screen size.
- Larger images will display at a higher quality – especially on a desktop PC, where the screen size can be much more than 1200 pixels.
- Avoid images with text
- Images with text don’t scale well – we recommend uploading images without any text.
- An abstract image or one where the focus is at the centre of the image is likely to work best on a variety of devices and screens.
- Filetypes
- Either JPG or PNG images are suitable.
It is now possible to search for and insert a stock images from Unsplash, these images will be the correct size but will not always work as a banner image.
For more detail see the Course Banner page on the Blackboard Help site.
Uploading a Course Banner
- Open Course Banner panel
- Insert image (from file or unsplash)
- Adjust image
- Add Alternative Text
- Turn Course Banner off/on as required
Open Course Banner panel
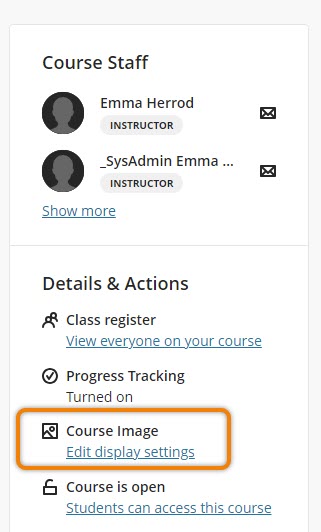
- Once you have selected an appropriate image, open the Course and select ‘Course Image’ under ‘Details and Actions‘ at the side of the page.
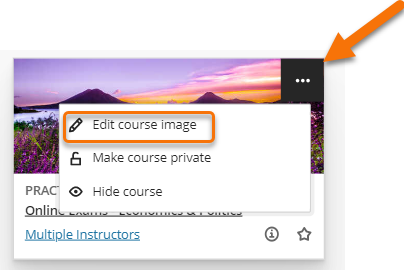
- Alternatively, you can go to the Courses page of the Ultra Base Navigation: open the Course Image panel by clicking the three-dot menu in the upper right corner of the Course card and selecting ‘Edit Course image’.
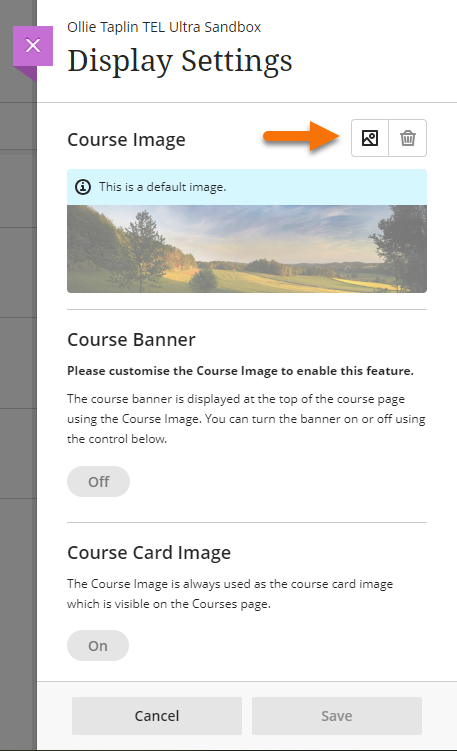
- Click the Image button in the panel that opens.
Insert Image
The “Insert image” panel will open. This page will give you three options on how to insert an image:
- Drag and drop your chosen file into the Insert image pop-up window
- Select “Upload file” to browse local files on your computer
- Select a stock image from Unsplash
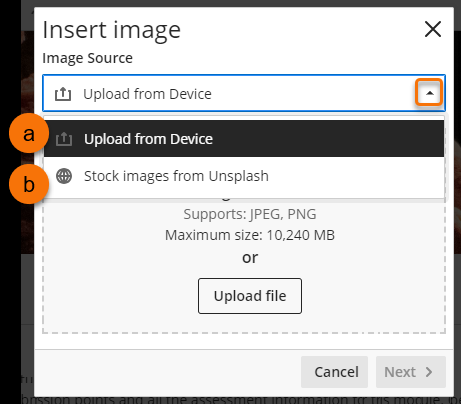
Drag and drop and Upload options are selected as default. For unsplash you will need to change the Image Source option.
Image Source options:
- (a) Upload from Device.
- (b) Stock Images from Unsplash.
For more information on inserting a stock image see our guide Insert Blackboard stock images.
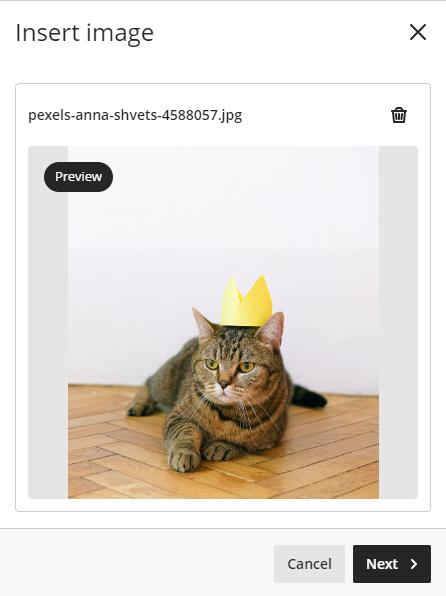
- The image will appear in preview, which allows instructors to ensure that the correct file has been selected. Click “Next” to move into the focal point settings.
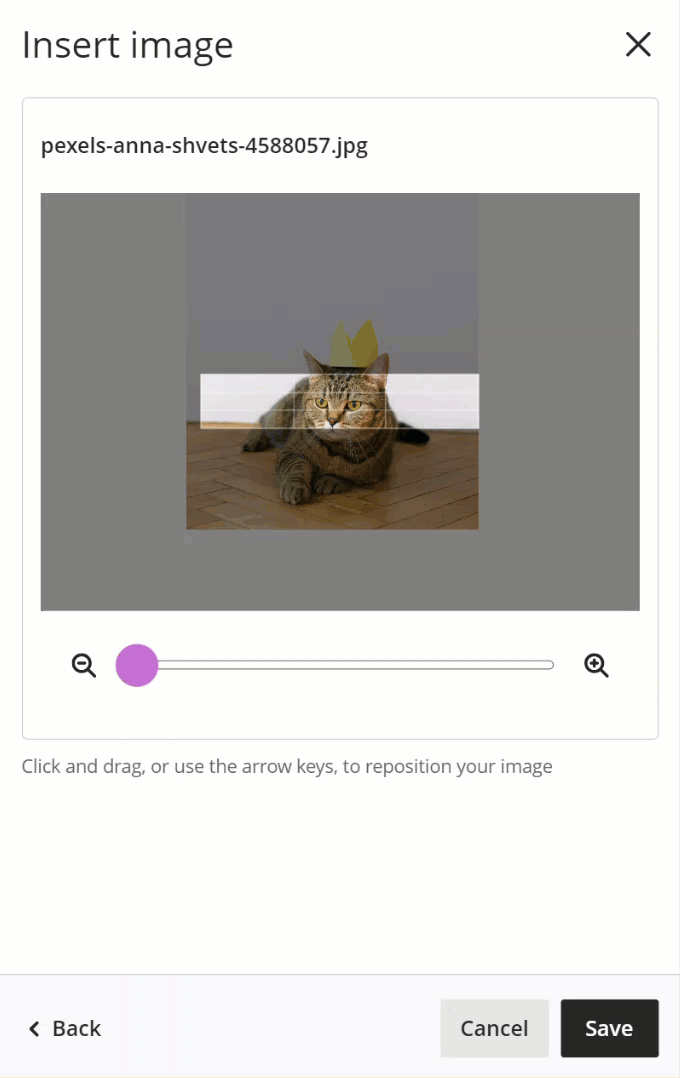
Adjust image
- You can drag the image and modify the zoom to select the image’s focal point. Click “Save” when you are happy with the image.
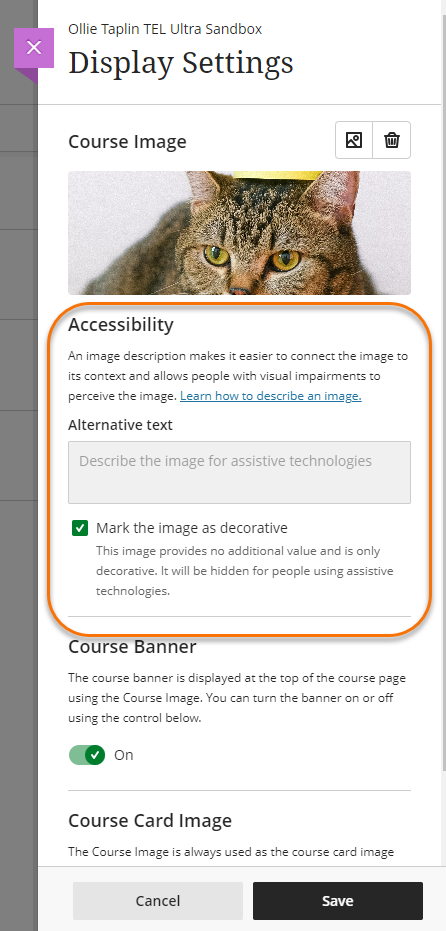
Add alternative text or mark as decorative
- You can either designate images as purely decorative or insert appropriate alternative text. Click the “Save” button when you have completed the set-up.
Turn Banner On/Off
- The image will be designated as the Course Banner by default. If you only want the image to appear as the Course thumbnail, you can switch this off by using the “Course Banner” toggle.
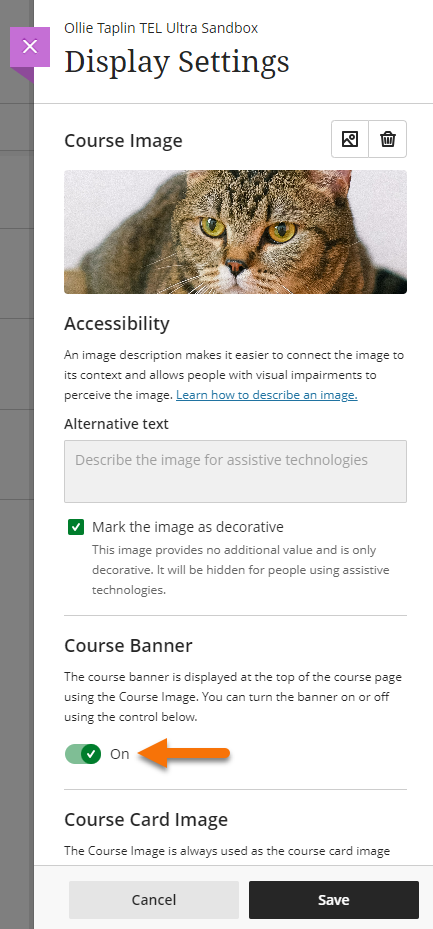
- Once you have completed setting up your Course Banner, you can edit the settings at any time by clicking the pencil icon in the upper right corner of the banner. You can also click back onto ‘Course Image’ on the ‘Details and Actions’ menu.
Copy a Banner from another course
If you have a Banner image on another course, either in Blackboard original or Ultra, you can use the Copy function to reuse that image in your Ultra course.
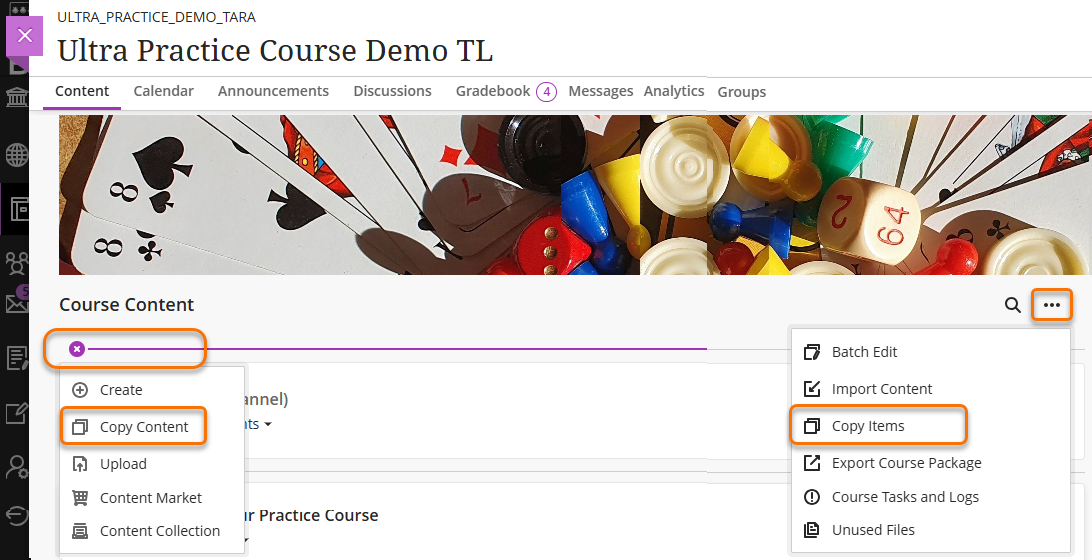
Step 1: In an Ultra course use the plus sign icon and select Copy Content or course three dot menu and select Copy Items to open the Copy Items page.
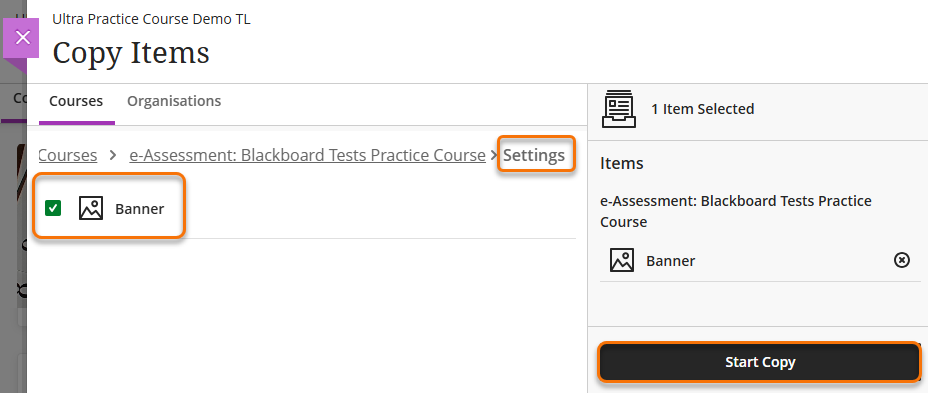
Step 2: In the Copy Items page find the course you wish to copy the banner from. Click on the course to open its contents.
Step 3: The contents of the course appear in folders. Open the folder named Settings.
Step 4: Select the banner and then select Start Copy.
The banner will then appear at the top of the course.
If the banner image on your course is turned off when you start the copy, the banner will still appear in the course and will be turned on.
Guide last updated on May 26, 2025