The institutional Padlet licence is for Teaching and Learning at the University of Reading. It allows Blackboard users to make, configure and securely share an unlimited number of padlets with your students.
This guide takes you through the step by step process to access and use your university Padlet account. 
- How to activate your institutional Padlet licence
- How to access your account
- How to make a padlet
- How to share padlets
- How to add padlets to Blackboard
- What are the other options for controlling access to a padlet
For more Padlet features and ideas for learning activities, see guidance ‘Using Padlet for Teaching‘.
How to activate your institutional Padlet licence
To start using the institutional Padlet licence, you will need to activate your ‘Teacher’ account (all UoR Staff).
- Please go to any Blackboard course.
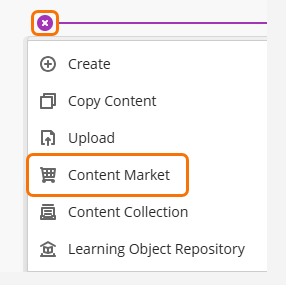
- Open the purple plus sign menu anywhere on the course and select Content Market.
- In the Content Market select Padlet LTI
- From the Padlet page click “Open dashboard” in the top left of the screen.
- This action creates your account.
How to access your account
After you have activated your account via Blackboard (see above instruction) you then have two optional routes for accessing Padlet:
- route 1: Open a Blackboard course and select Padlet from the Content Market.
- route 2: Visit padlet.com/universityofreading and sign-in with Microsoft (we recommend bookmarking this link in your browser for quick future access).
How to make a padlet
Depending on your learning activity, there may be a particular padlet format well suited to the task you have designed. Use this video to see the options and suggested learning activities for each format.
Here is a summary (and examples) of the format options:
- Wall: posts will be compactly arranged into a “brick-like” layout.
- Columns: turning on Sections allows you to add column headings (to a Wall or Grid) or row headings (to a Timeline).
- Grid: creates uniform spacing between each post.
- Table: Arrange fields into structured tables. This format will create a board in a table-like layout where each post you publish will create a row and each field within that post creates a column.
- Freeform: posts can be positioned freeform anywhere on the board; they can be resized, connected with lines and labelled.
- Rows: posts will appear in a clean horizontal layout (post size is wider than in a grid layout)
- Timeline: posts appear along a horizontal line.
- Stream: posts arranged in a top-to-bottom feed.
- Map: posts can be pinned to any location on a map background.
Alternatively you could create a Sandbox this format is like a collaborative whiteboard, great for mind mapping, post-it note activities, etc. For more information on Sandboxes see Padlet’s guide What is Sandbox?
How to share padlets
Before sharing your padlet, open it and choose the share setting permissions. You can do this from the share settings panel (right side of the padlet screen).
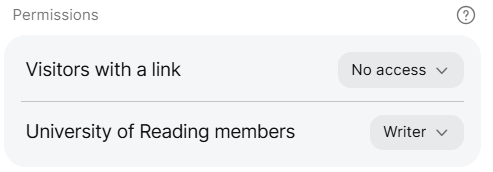
The default share permissions are:
- Visitors with a link – No access
- University of Reading members – Writer
Use the drop down list for each user type to select desired permission option (i.e. Reader, Commenter, Writer, Moderator etc.)
Carefully check these options in the table below before altering the default settings.
| Laptop Access | Mobile Access (QR code) | Avatar only board |
|---|---|---|
| Students accessing a Padlet via their laptop either in class or independently. Use the Padlet integration with Blackboard to insert the padlet on to your module’s Bb course | Students accessing a padlet in a class via a link or QR code. | A Padlet board where the students are not matched with their UoR accounts. Provide students with link or QR code. If adding to Blackboard use link in preference to using Padlet integration. |
| Visitors with a link (No access) UoR Members (Writer) Students are already logged into their UoR accounts so will be able to access without delay. | Visitors with a link (Writer) UoR Members (Writer) – Less access prohibited Provides a smooth connection for all students following a link or QR code. Students signed into Padlet will be linked to their name and UoR email.Students not signed are given an avatar name, they can replaced this with their name. | Visitors with a link (Writer) UoR Members (Writer) – Less access prohibited Students will need to open the link/QR code in an incognito or private window. The students’ browsers may remember their Padlet login and connect to their account if an incognito or private window is not used. |
Student access screens from mobile devices
Visitor with a link (Writer) access when not linked to student account (i.e. when the student has not created an account or using incognito window)
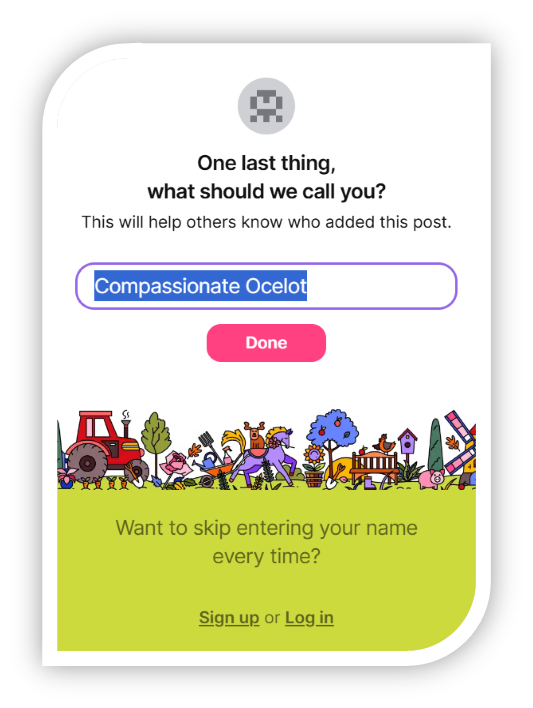
Students can keep the fun avatar name or replace it.
Visitor with a link (No access) when not linked to student account (i.e. when the student has not created/logged into an account)
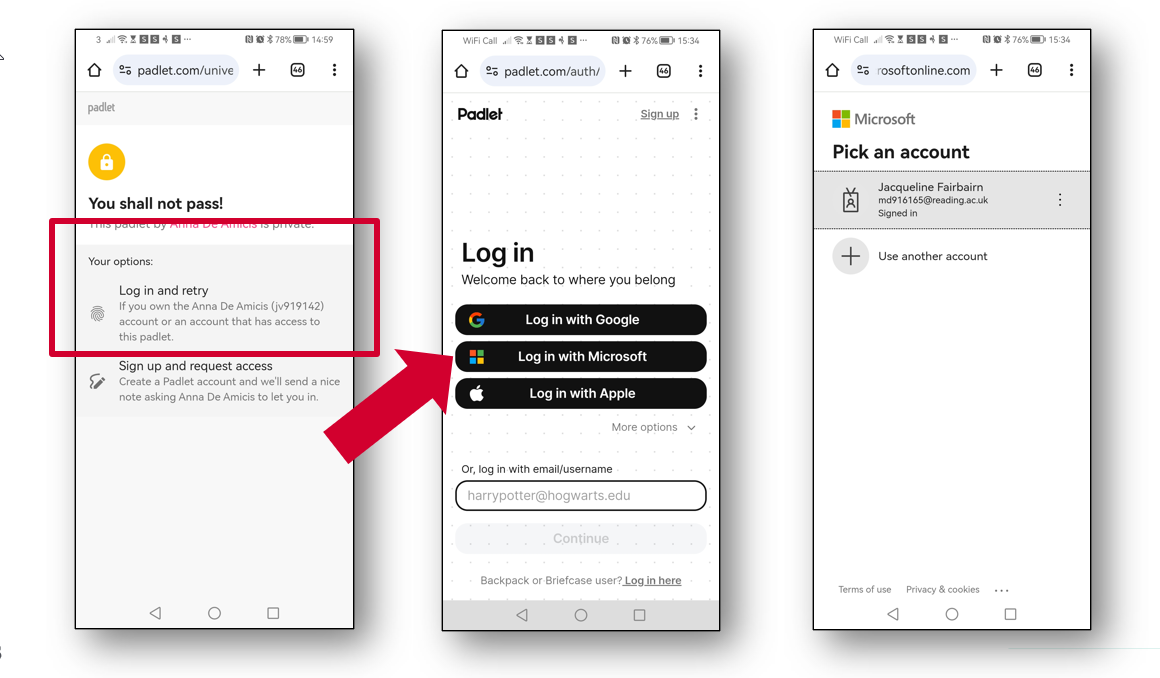
States “you shall not pass” but students can login via Microsoft option.
Sharing complete padlet with the class
Typically, once students have posted on the padlet, you will want to display the entire board for the whole class to see. It is not possible to embed padlets into a PowerPoint, so you should open the padlet in a browser window, to display to the class.
If you would like to prevent students from adding to the padlet after the class or on a specific date you can use the freeze board function.
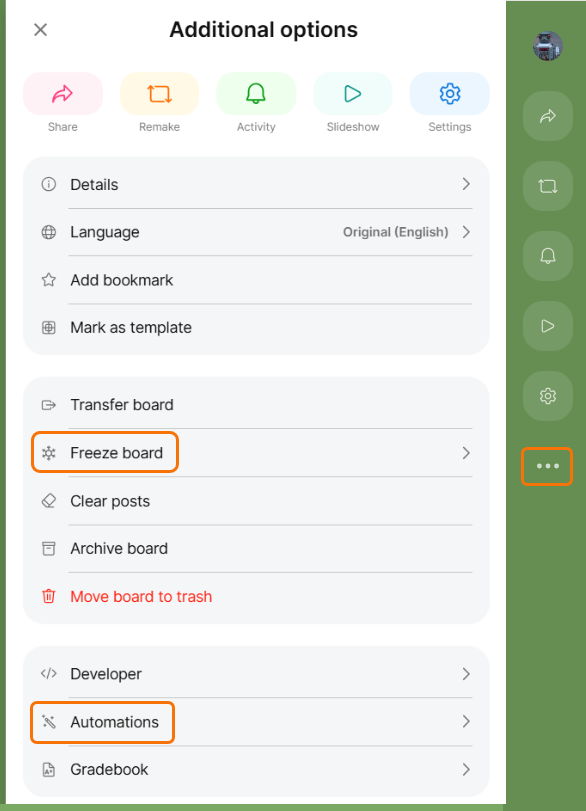
Click on the three dot menu on the right-hand side panel, this will open the Additional options menu.
Select Freeze board to immediately freeze the board. A “Frozen” icon will appear next to the padlet title.
Alternatively you could use the Automations option to set a time for the padlet to freeze or unfreeze.
How to add padlets to Blackboard
Please be aware you will need to refresh your course to view padlets added via Blackboard Content Market.
There are two options for sharing padlets via Blackboard:
Option 1 – as a link (e.g. via a content folder):
- Locate your Blackboard course and open the folder you wish to populate,
- Click the purple ‘create’ button and select Content Market from the dropdown list.
- From the dropdown list, select Content Market and choose Padlet
- This action opens a window displaying your ‘Recent’ padlets, choose from the list or select ‘Make’ to create a new one. If you cannot see your padlet in the list, refresh the page or reopen the Content Market.
- Once you have selected your padlet, close the Content Market window to return to the course.
- The padlet will be added to your course folder as a link. You can edit the display title and description.
Option 2 – as an embedded item (e.g. via an Ultra Document):
- Create an Ultra Document or open an existing one
- Select ‘Add Content’ and open the Content Market (click the plus button in the Blackboard Ultra Editor toolbar).
- From the Content Market, choose Padlet
- This action opens a window displaying your ‘Recent’ padlets, choose from the list or select ‘Make’ to create a new one. If you cannot see your padlet in the list, refresh the page or reopen the Content Market.
- Once you have selected your padlet, close the Content Market window to return to the Ultra Document.
- The padlet will display as an embedded item.
What are the other options for controlling access to a padlet?
Depending on your planned learning activity, you may find the following options useful to control access:
| Setting | What does it allow? |
| ‘Visitors with a link’ | This setting can be enabled alongside the default permission ‘University of Reading members’. It allows padlets to be accessed by anyone who has the link or QR code, users are not required to sign into their university account to access the board. Students will be given the option to use a nickname, psuedo animal name or to login to their university account. Be aware, if this setting is enabled then it is not possible to prevent students linking the padlet content from social media or other external platforms. These padlets have the benefit that they can be shared externally and in ad hoc scenarios where this may be needed, however, as they present risks in terms of governing who can access (i.e. if the link is passed on), this setting should only be used where data security and accurate author attribution is not a concern. |
| ‘University of Reading members‘ | This default share setting prevents padlets from being accessed externally. This is the recommended way to share padlets with students when anonymity is not required, and is best used when asking students to access the padlet via Blackboard. Students university usernames will be recognised and attributed to posts (you can toggle ‘Show/Hide’ names if wanting to remove display of authors from the board). If students are using a device that is not already logged into Blackboard, i.e. access via a QR code scanned by their mobile device, they will see a ‘Login’ screen before viewing the padlet (ask students to choose the ‘Login with Microsoft’ option). Ensure you make them aware of this potential pop up screen and allow a minute or so for users to login with their university credentials. |
| Permission options | If you wish to change the default ‘Writer’ permission to another type (to allow students to join the padlet with Read only, Commenter, Admin, or Moderator, or to prevent access entirely via ‘No Access’), you can use the drop down list to select another permission option. |
| ‘Collaborator’ email invitations | If you wish to give specific padlet roles to other staff or select students, send them a ‘Collaborator’ invite. The recipient receives an email containing a joining link, which will open the board and assign the specific padlet role you have chosen. Collaborator invites can only be sent to other university padlet account holders, and cannot be passed between users within the university or externally (the link will only work for the invited user account). This is useful if you want another member of staff, or specific students, to moderate posts or co-own the padlet. |
| ‘Freeze’ padlet board | This setting prevents further interaction with the padlet (for example, posting and commenting), but allows students to continue viewing the padlet. This setting is useful when you no longer want to monitor the padlet i.e. the activity has finished but you wish students to retain viewing access without making further posts, comments, reactions etc. You can set a future date to freeze your padlet using ‘Automations‘. |
| ‘Submission‘ link | A submission request allows anyone with the link to post to a padlet without first visiting the board. This feature is especially helpful to prevent students from seeing others’ posts before submitting their own. |
| ‘Auto-Remake‘ link | Auto-remake links allow anyone who clicks on your padlet link to automatically create a duplicate of the padlet in their own account, for editing. This is extremely useful for teachers who want students to work on their own version of a padlet; you can easily view each remade padlet via a list, each student copy can be quickly accessed from your original padlet. |
| ‘Breakout‘ link | If you want students to restrict students to collaborate on a section of a padlet, without seeing the rest of the board, then send them a breakout link. |
For more Padlet features and ideas for learning activities, see guidance ‘Using Padlet for Teaching‘.
Guide last updated on February 11, 2026