
Groups in Blackboard Ultra allow you to facilitate student collaboration through assessment and activities. Groups can also allow instructors to control content availability for specific sets of students via release conditions.
Creating Group Sets
To begin creating Groups Sets, select the Groups tab from the navigation bar.
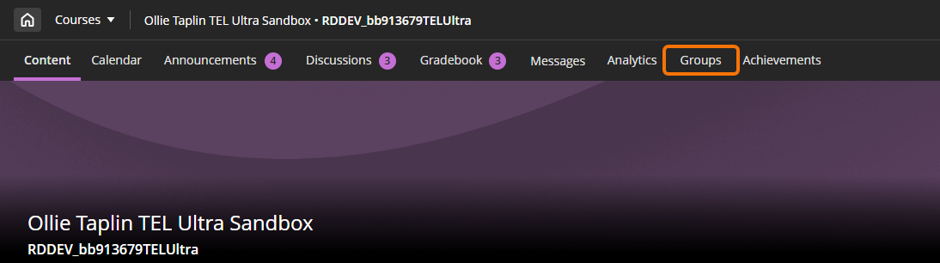
This will open the Course Groups page, where you can create a new Group Set, import groups via a spreadsheet, or manage existing groups.
All groups are created within Group Sets. It is possible to have Group Sets with some members unassigned; therefore, you can have specific groups that do not involve the whole cohort. Each student can only be in one group within a Group Set.
Before creating Group Sets, it is useful to know which type of group will work best for your purposes.
To create a Group Set, click the New group set button and select one of the listed options.
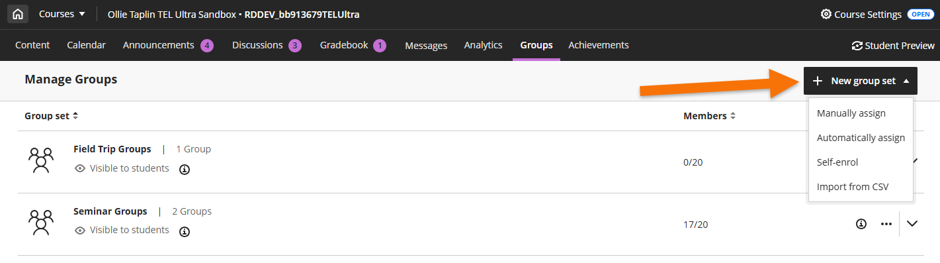
Manually assign
Manually assign offers you the most flexibility, allowing you to create a custom set of groups and manually allocate students accordingly. This option can be selected when group membership is known in advance of an activity or assessment.
- The Group Set will be assigned a default title. To update it, click on the title and enter your preferred name.
- Select the arrow button to open the Add group drop-down menu.
- Select Create a group to create a single group.
- Select Create multiple groups to define the number of groups to create.
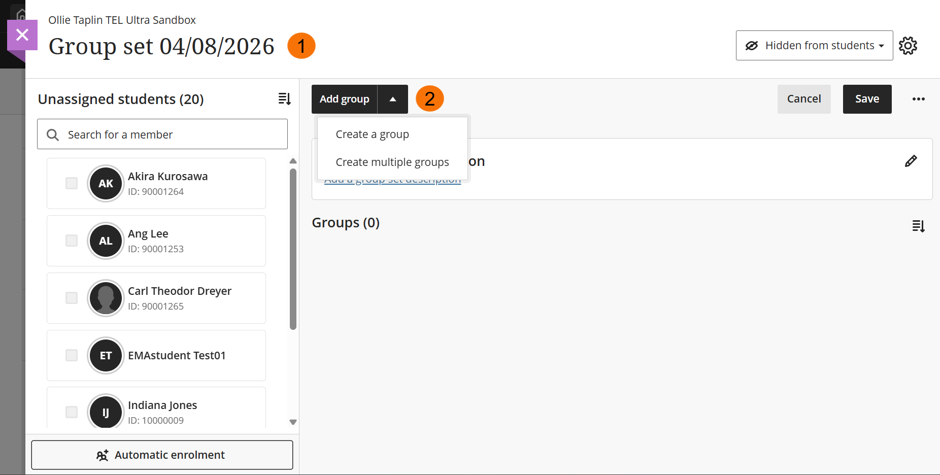
If you have large cohorts of students on a course, it may be quicker to set up empty groups and edit the membership afterwards.
Further information on editing membership can be found here.
Automatically assign
Randomly assign students to groups by specifying the number of members per group. You can adjust the group membership before finalising. Select this option to quickly create groups where random membership is appropriate.
- Specify the number of students per group. You will be shown the number of groups that will be created.
- Click Enrol members.
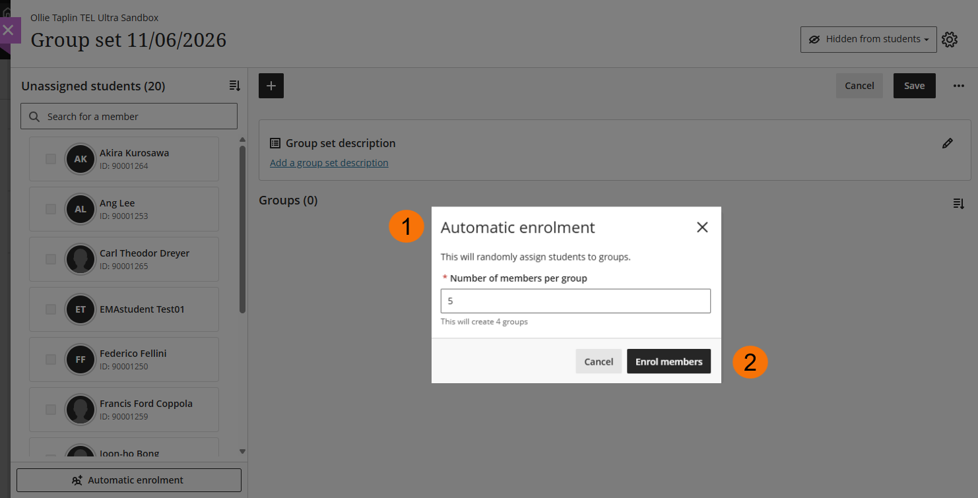
- (Optional) The Group Set will be assigned a default title. To update it, click on the title and enter your preferred name.
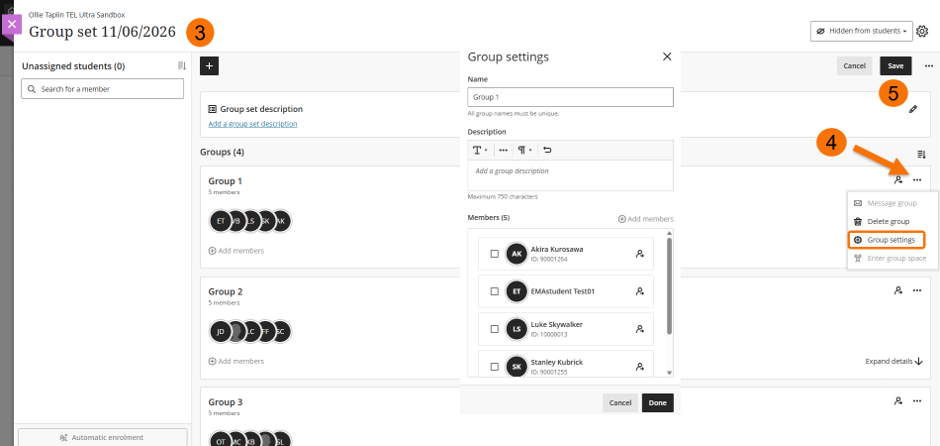
- (Optional) Click the three-dot icon and select Group Settings to edit group names and descriptions.
- Save groups. You can continue to edit the groups after saving.
Self-enrol
Self-enrol allows you to create a specific number of groups that students can enrol themselves into. You can set date ranges for the enrolment window if you choose. You can also choose what happens to students who do not enrol into a group – either they are automatically enrolled into a group that is not full or they are not enrolled in any group and must be allocated a group manually.
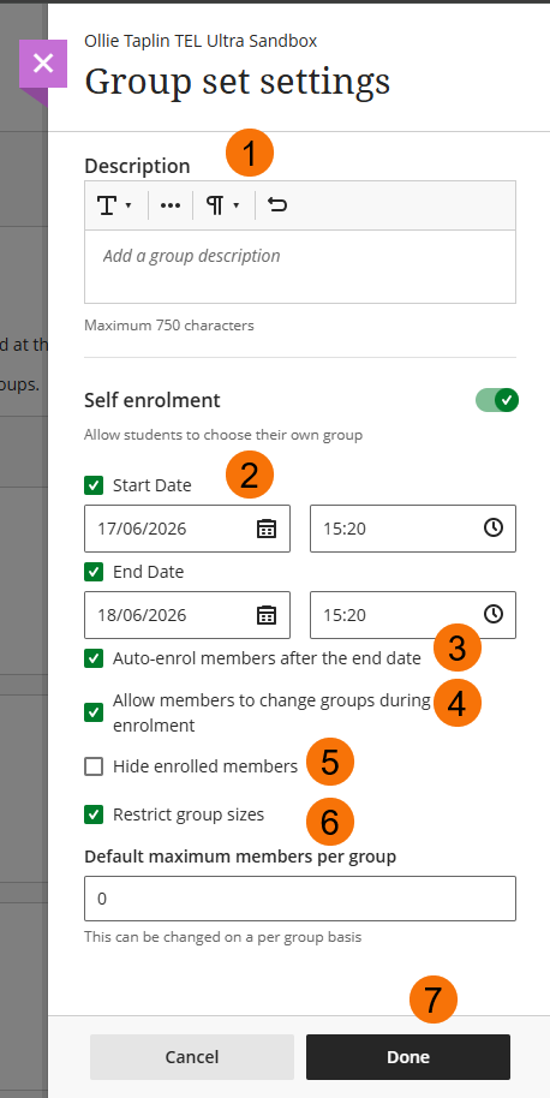
- (Optional) Add group description.
- (Optional) Specify enrolment start and end dates.
- (Optional) Specify whether students are automatically enrolled in groups after the enrolment period ends. A date range (2) must be defined for this option to be available.
- (Optional) Allow students to switch groups during the enrolment period.
- (Optional) Hide enrolled members from other students when selecting a group.
- (Optional) Set the maximum number of students per group.
- Select Done when settings are complete.
Please note:
- When a self-enrol Group Set is created, the number of groups defaults to three. You will need to add all extra groups manually.
- An automated email announcement will be sent to all students informing them that there are groups that they can enrol into. This cannot be edited and has limited information. You may wish to send your own text as an announcement to explain how students should sign up. You can delay the automated message with the availability from setting.
Import from CSV
You can import group sets from one Blackboard course to another. Student enrolments can also be imported, but this requires the same students to be enrolled in both courses.
Please see our more detailed guidance on our support page: Importing and Exporting Groups.
Creating groups
Create a single group
- Open the relevant Group Set and select Add group.
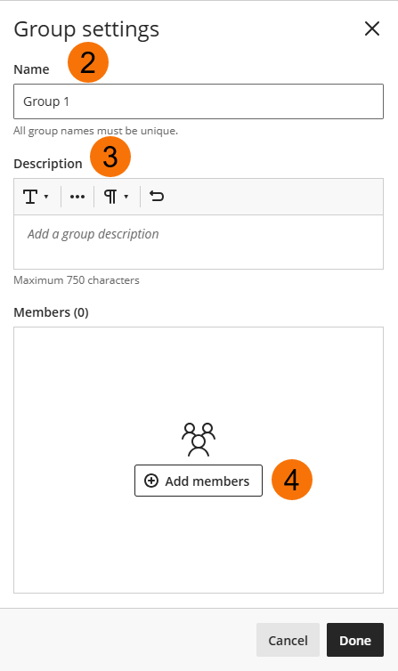
- (Optional) Name group.
- (Optional) Add group description.
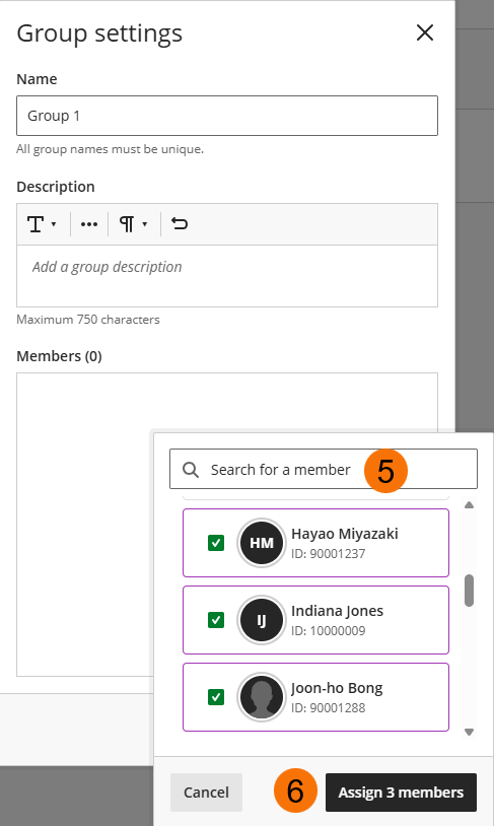
- Add members to the group.
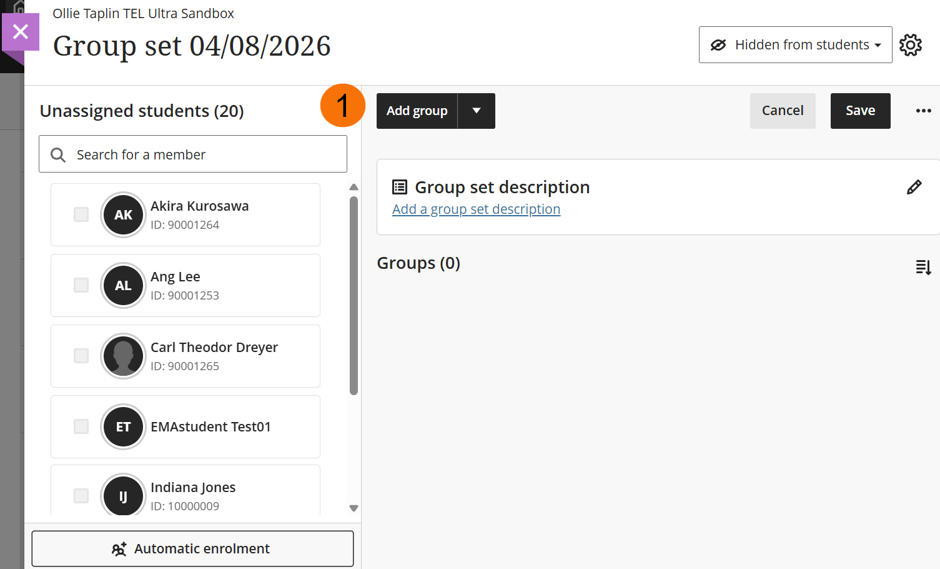
- Use the search bar to find specific students or scroll through the list. Tick all students you want to enrol in the group.
- Click the Assign members button once all group members have been selected.
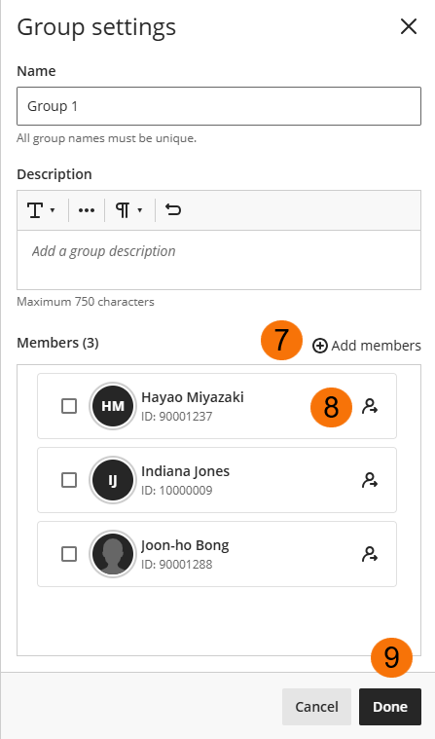
- Add further students as required.
- Remove students if added in error.
- Click Done to save the group.
Create multiple groups
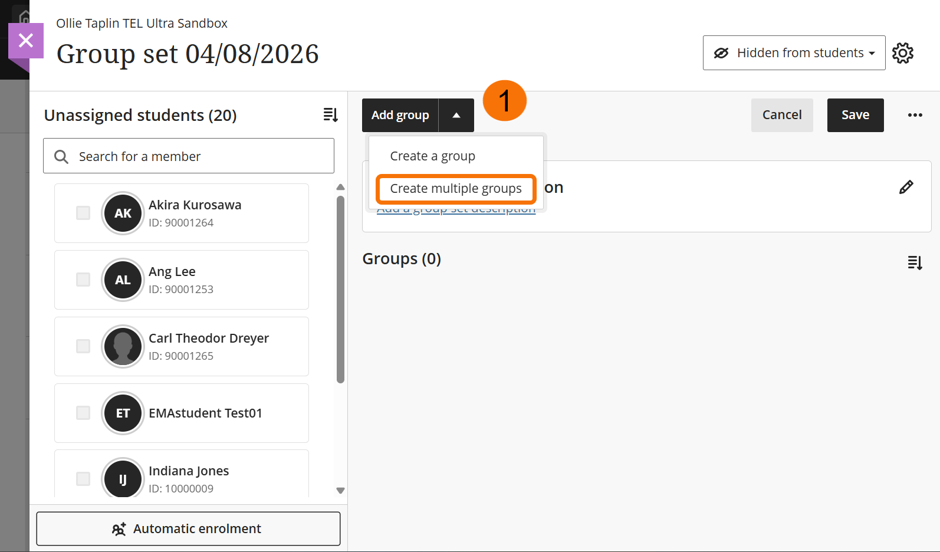
- Open the relevant Group Set and select the arrow icon. Select Create multiple groups.
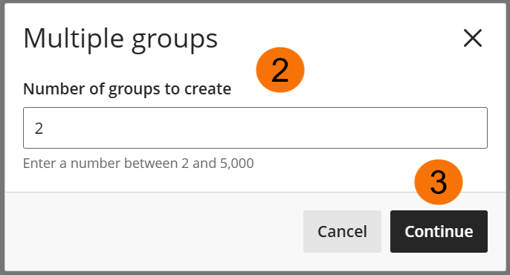
- Enter the number of groups you want to create.
- Select Continue to create the groups.
Editing groups
Once groups have been created, you can edit the membership.
Edit membership
Open the Group Set you want to edit by selecting it from the list on the Groups page.
Option 1
- Locate the relevant group and select Add members.
- Tick the box next to the desired students names. You can use the search bar to search for specific students.
- Click the Assign members button to add the selected students to the group.
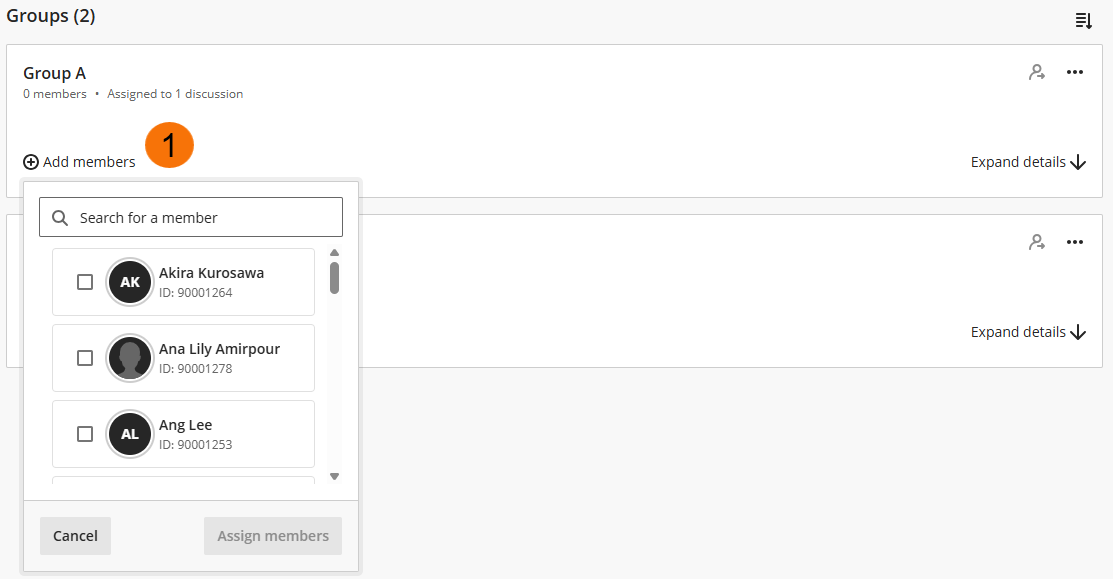
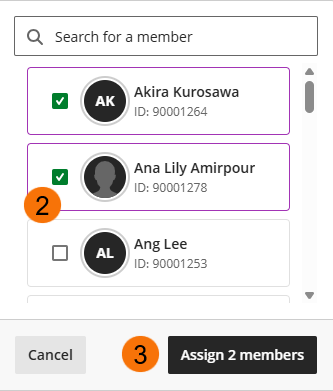
Option 2
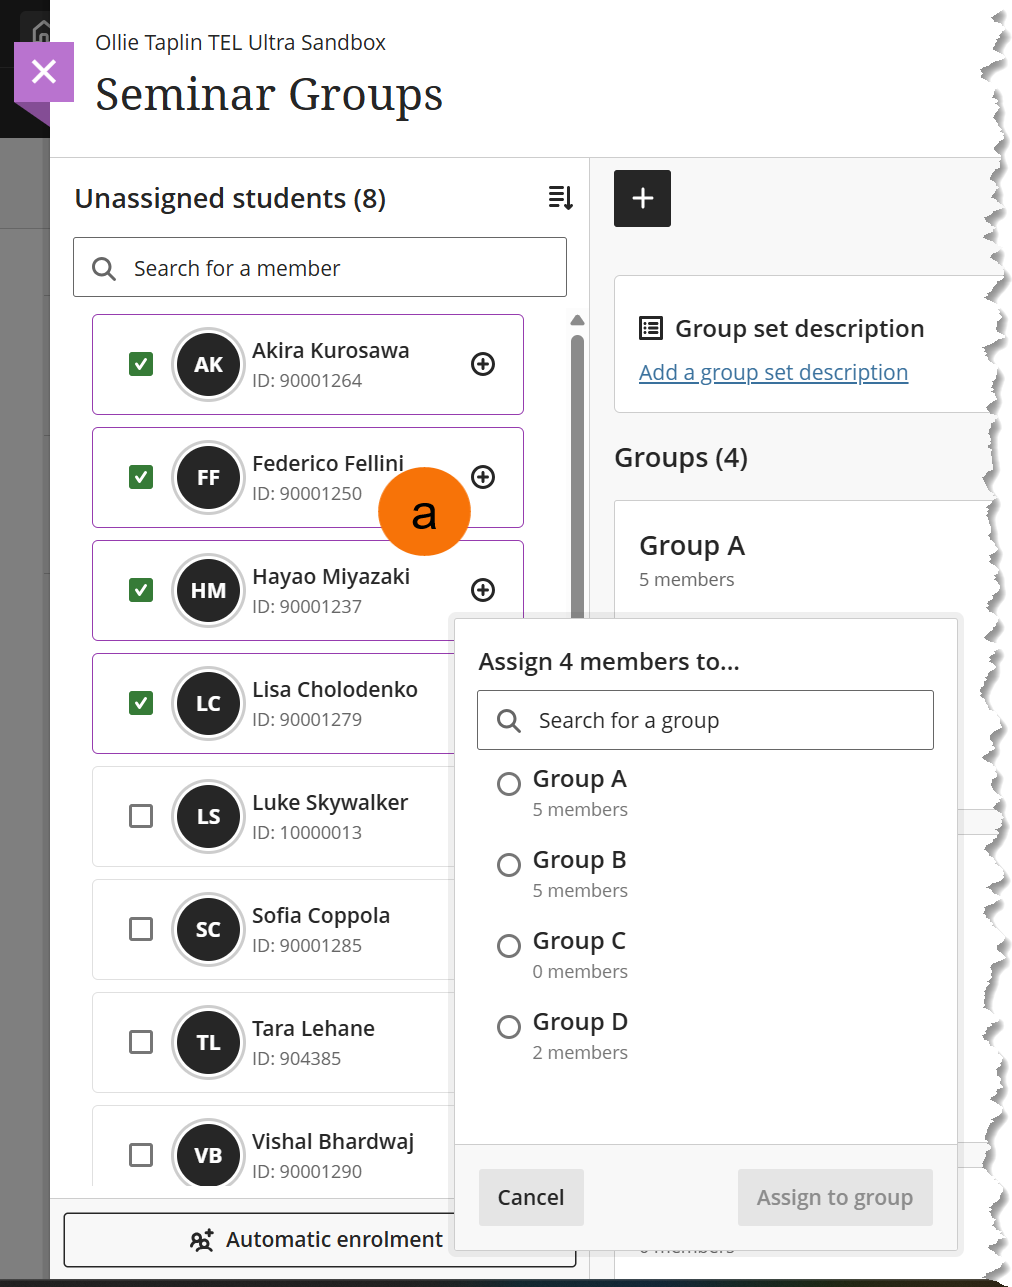
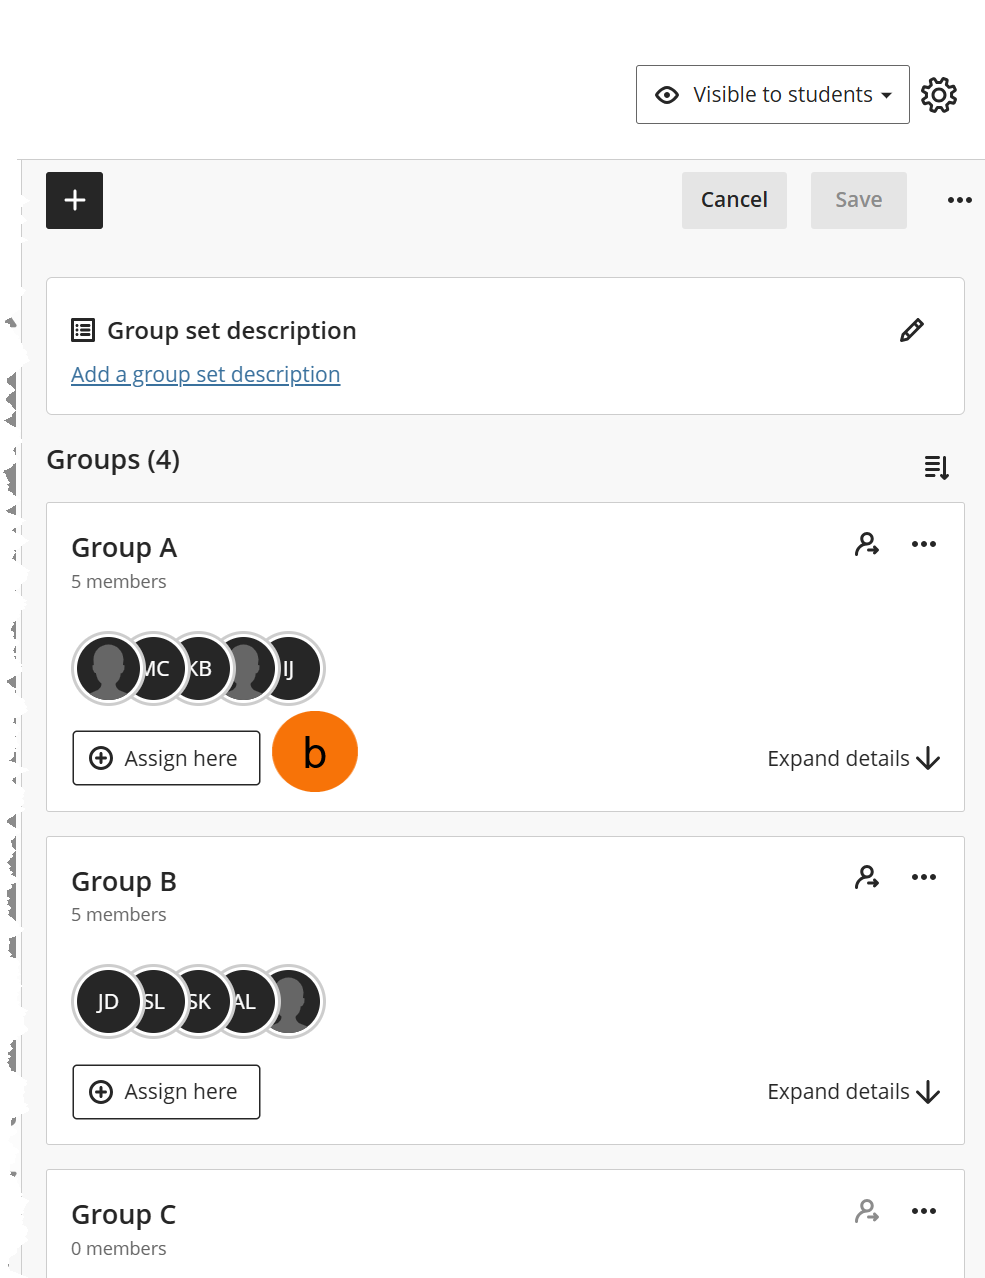
a) Select students from the unassigned list and click the plus icon to assign to groups. You can use the search bar to search for a specific group.
OR
b) Select students from the unassigned list and select a group to enrol them into.
Drag and drop
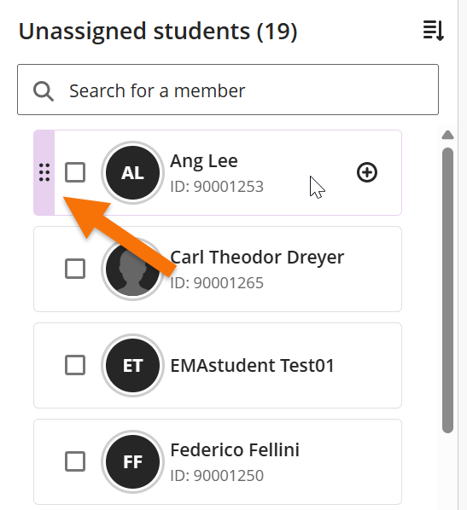
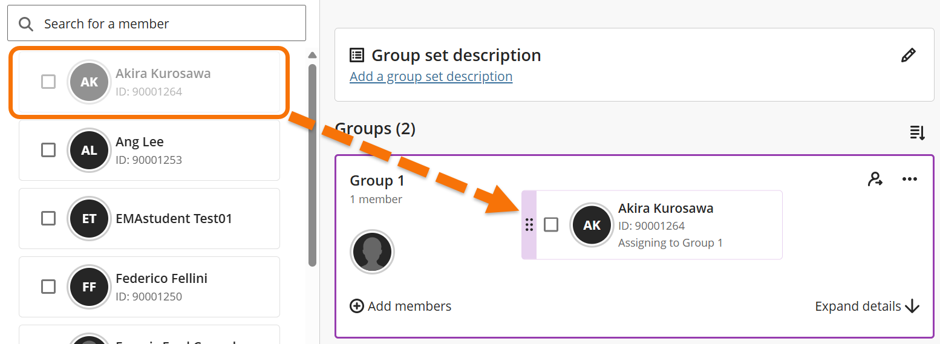
Students can be dragged and dropped from the unassigned student list. You can use this method to quickly move small numbers of students into groups, but we don’t recommend doing it for large numbers of students.
- To drag and drop, hover over a student in the unassigned list and click and hold the purple six-dot icon when it appears. Then, move the student into the desired group and release the click to add the student to the group.
Switch a student’s group
If you need to move a student into a different group, you must first unassign them from the group they are enrolled in.
- Select student(s) you want to move into another group.
- Click the icon to remove the students. If you have selected multiple students, they will all be removed in one click
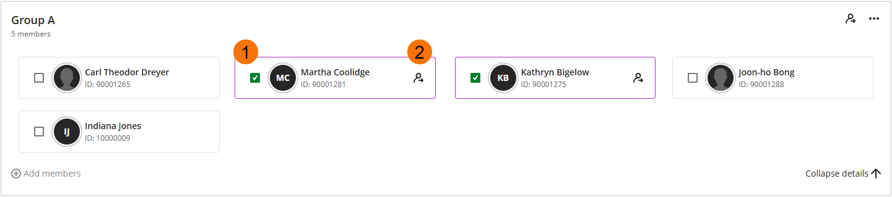
Any student removed will appear in the left-hand menu. You can re-enrol them into another group by either of the methods listed above.
Please note:
- Changing group membership will affect where group release conditions have been set, meaning students may lose access to some content items.
- Flexible grading allows moving group members even after submission or where work has been marked. When you move members to different groups, their marks move with them, but their work doesn’t.
Deleting groups and Group Sets
To delete a group:
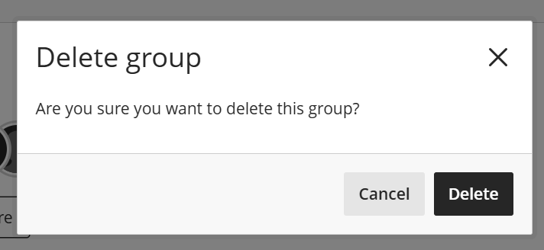
- Click the three-dot icon and select Delete group.
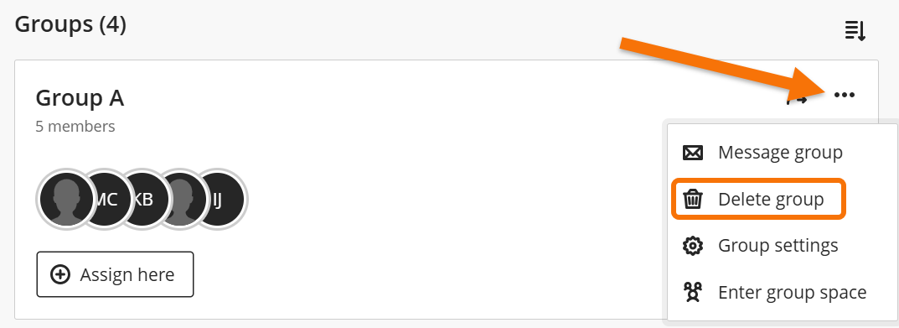
- When prompted, select Delete to permanently remove the group (or Cancel to keep the group).
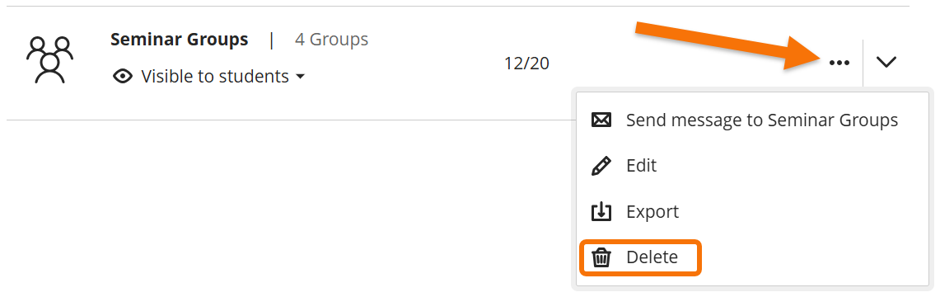
To delete a Group Set:
- Click the three-dot icon and select Delete.
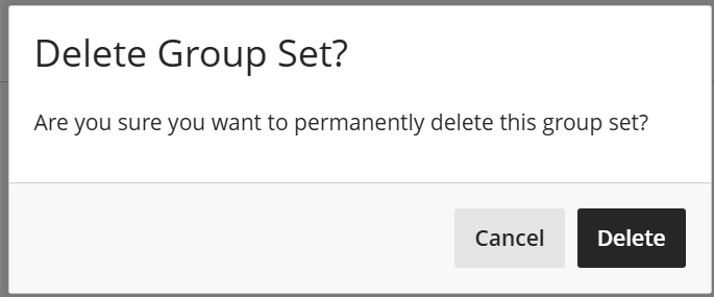
- When prompted, select Delete to permanently remove the Group Set (or Cancel to keep the Group Set).
Please note:
- Deleting groups is irreversible; you will need to recreate them if they are needed again.
- Deleting group sets attached to assessment or content Release Conditions will cause those group release conditions to be removed.
- If you delete an assessment or content item that has groups attached to it, the group sets will not be affected.
Guide last updated on August 12, 2026