What is a Wiki?
A wiki allows students to work together – for example within Blackboard course groups – to create a collaborative web resource.
For more information on how wikis can be used in teaching and learning, see Wikis on the TEL website.
How do I create a Wiki?
Within a Blackboard course or organisation you can create a wiki:
- for the whole course
- for one or more course Groups
Assessed Wikis
If you are using a Wiki for summative assessment, please read EMA Integration: Wikis
To create a Course Wiki
Go to Control Panel > Course Tools > Wikis
Click on Create Wiki

On the next screen, enter a title and instructions.
Other options should be self-explanatory but for further help click on More Help at the top of the page.
Note that you can enable marking on the Wiki, if appropriate. See below under Assessment settings
Click Submit and the Wiki will be created and ready for users to add content.
To create a Group Wiki
If you have Groups set up on your course, you can create a Wiki for use by the members of each Group.
You can specify the tools you want to be available when setting up a Group.
If you have already set up your Groups but did not enable Wikis, go to
Control Panel > Users and Groups > Groups
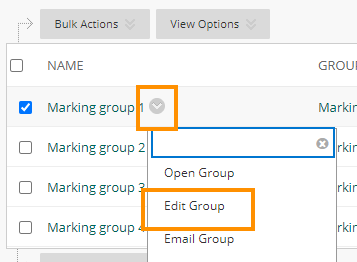
Click on the editing chevrons next to the Group name, and choose Edit Group.
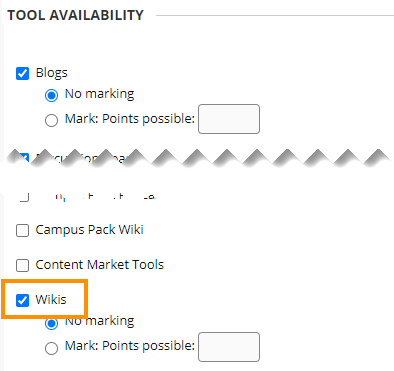
Scroll down to Section 2 ‘Tool Availability’, tick the box next to Wikis and then Submit.
If your groups are created as part of a Group Set, there are certain settings that can be applied to the Group Set as a whole:
- creating a Wiki for each group in the set
- setting these Wikis to be gradable
However the due date and points possible have to be edited for each Group
- by editing the Group Properties
- or by editing the column created for the Wiki in the Grade Centre
For more on managing Groups see Blackboard: Groups – Getting Started
Assessment settings
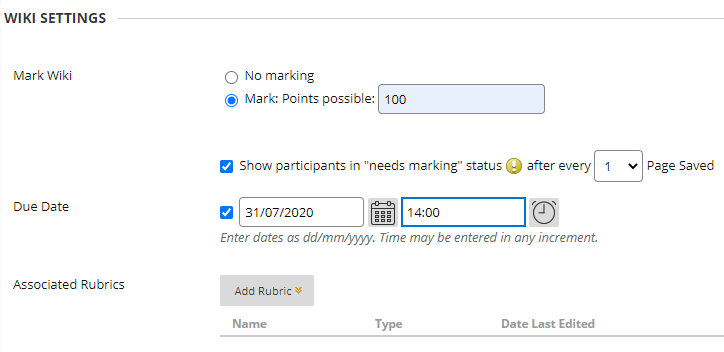
As with course wikis, you can enable marking on a Group wiki.
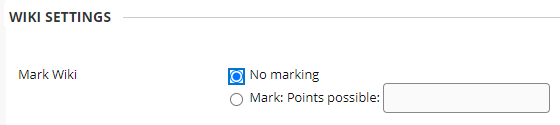
Choosing the ‘Mark’ option reveals additional choices.
For Group wikis used in summative assessment, see EMA Integration: Wikis
Editing Wiki settings
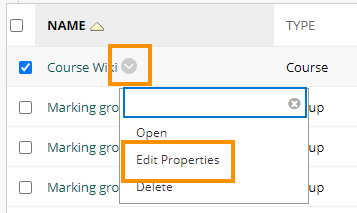
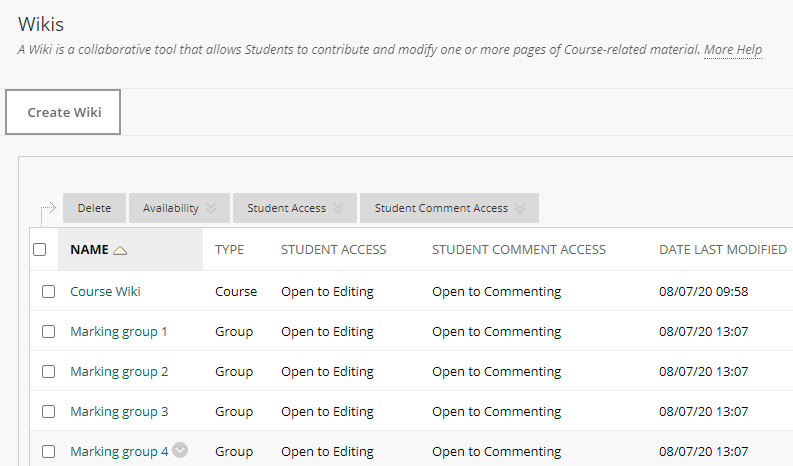
If you go to Control Panel > Course Tools > Wikis at any time, you will see a list of all the Wikis which exist on the course. To enter a Wiki, simply click on its name.
To edit a Wiki’s settings, click the chevrons to the right of the name and choose Edit Properties.
Making your Wiki available to students
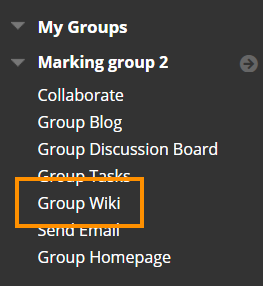
Group Wikis
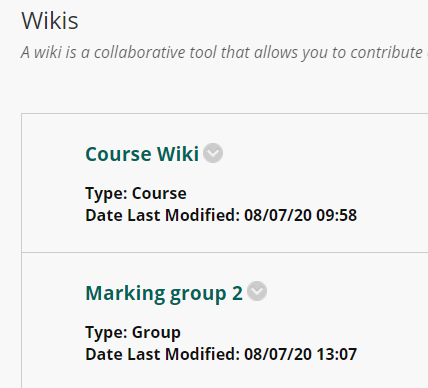
If you are using Group Wikis, then students will be able to access these from the My Groups panel at the bottom of the main course menu.
Course Wikis
The best way to enable students to access a course wiki is to link to the item from within a content area.
Add a link to a specific Wiki through a course content area
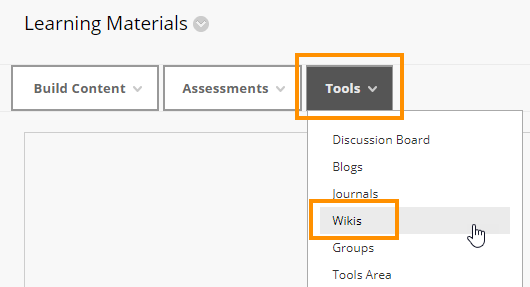
You can create a link to a specific Wiki from any content area.
To do this, go into the content area and select Tools > Wikis
You can then
- link to a list of all Wikis
- link to a specific Wiki
- create a new Wiki and link to it
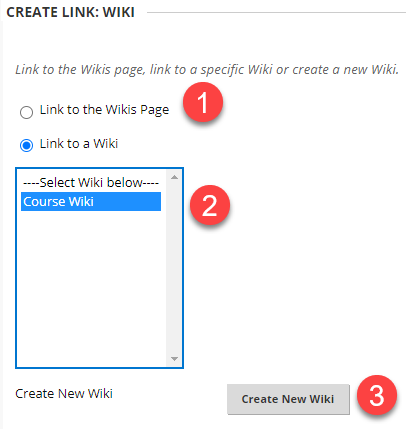
When you create links in this way, students will see them as shown.

Date restrictions on Blogs and Journals
To view or edit the settings for a Blog or Journal, go to Control Panel > Course Tools > Blogs / Journals.
However, when you add a link to a Blog or Journal in a Blackboard content area, there are some settings which appear in both places: notably the Display After / Display Until settings.
There are in fact 2 different settings:
- The date restrictions on the content item only apply to the link.
- These are overridden by any date restrictions on the Blog or Journal itself.
If the only way students have access to their Blog or Journal is via a link in a content area, then you don’t need to apply any restrictions on the Blog or Journal itself. If students might have more than one route to access the tool, then it is best to apply date restrictions directly to the Blog or Journal.
Please avoid applying restrictions in both places, as this creates extra work, and can lead to inconsistencies if any dates need to be changed at a later date.
Add a link to the course menu
Another approach is to add a link to the course menu.
With Edit Mode turned ON, click on the + sign at the top of the menu and choose Tool Link.
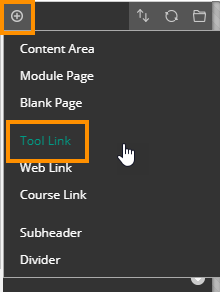
Enter a name for the new menu item and from the ‘Type’ drop-down list select Wikis.

Remember to tick the box next to ‘Available to users’, otherwise students will not be able to see the link.
The new Wikis link appears at the bottom of your menu. You can drag it to any position on the menu by using the up-down arrow icon to the left of the button.
As an instructor, if you click on the menu item, it will display a list of all of the Wikis which exist within the course.
Students clicking on the link will see all wikis to which they have access.
How do you edit a Wiki?
This applies equally to anyone who is editing wiki content, whether staff or student.
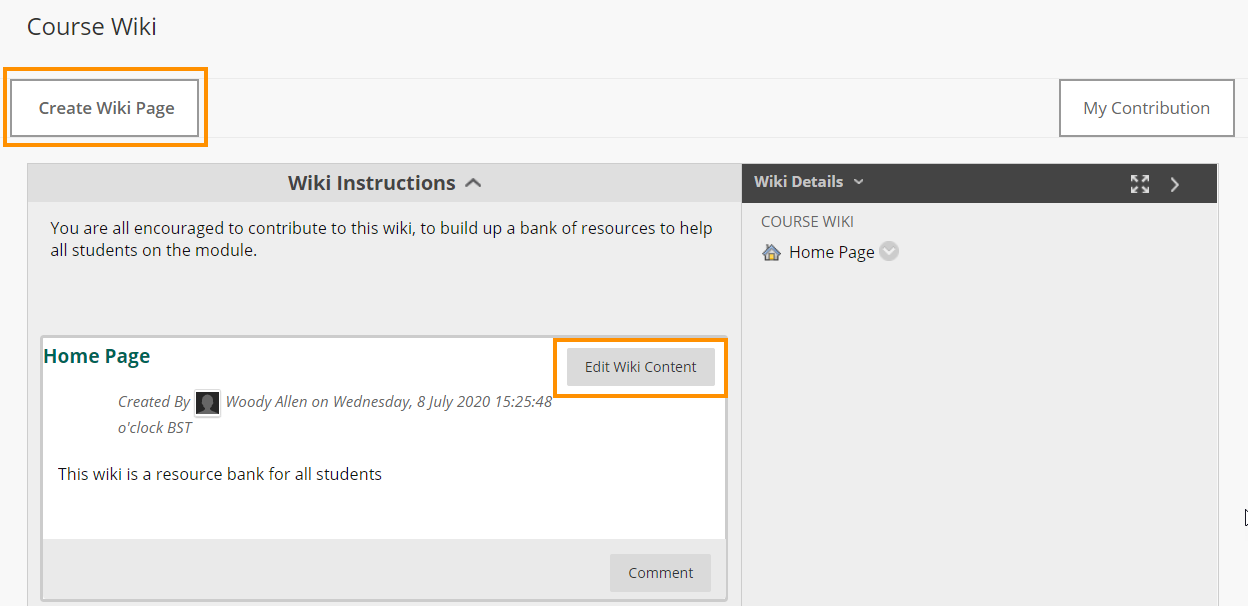
The first thing that you need to do when building a Wiki is to create a home page. If you access a Wiki without any pages, you will see the Create Wiki Page screen. This has the standard Blackboard editing toolbar, enabling you to format text, and upload images and other media to display within Wiki pages.
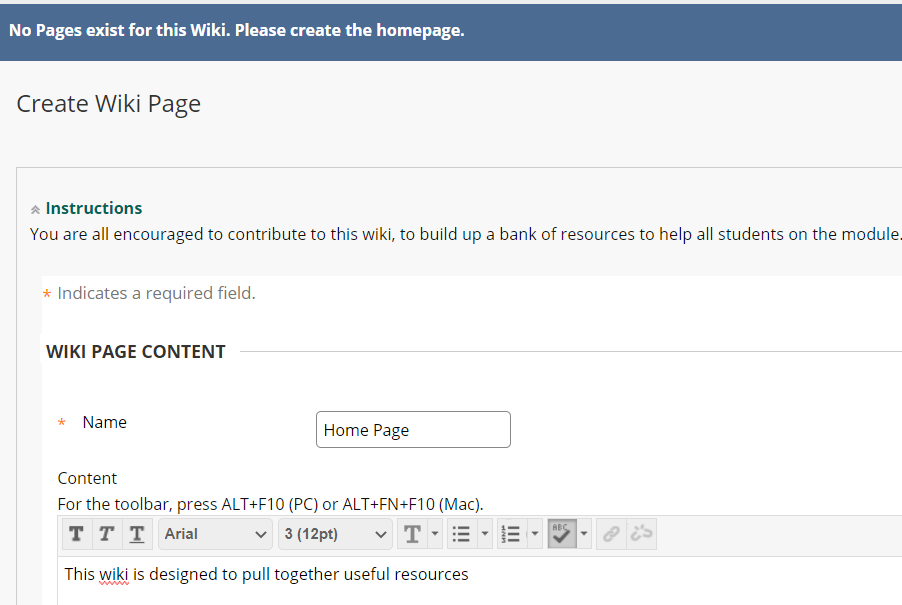
Click Submit when you have finished creating the home page.
Once you have done this, you can add further pages by clicking Create Wiki Page, or edit existing pages by clicking Edit Wiki Content.
Linking to other wiki pages
Following the introduction of the new Blackboard content editor there is no longer a dedicated icon allowing you to link from one wiki page to another. Please use this workaround.
Wiki character limits
There is a limit of 200 000 characters on individual wiki pages.
If you paste in content from Word please choose the ‘Remove formatting’ option. If you choose ‘Keep formatting’ the additional formatting information will massively swell the number of characters and reduce the number of words your page can contain.
There is a limit of 2000 characters on wiki Comments.
Assessing each user’s contribution to the Wiki
You can track how much each student has contributed to the wiki, and see the specific edits made.
Please see Blackboard Wikis: assessing participation
For additional information please see the Blackboard help page on Wikis
Page last updated on October 21, 2021 by andyturner
You must be logged in to post a comment.