What ‘visual design’ elements can I control in Blackboard?
Visual design elements, such as images and text formatting, can be displayed in several places on Blackboard module pages:
- the module banner
- folder descriptions, announcement posts, content items and activity instructions
- within uploaded content and screencasts, for example, documents and PowerPoints
*University templates for Office contain DPS images, however you may consider sourcing additional images to signpost and illustrate content
Why use visual design elements in a Blackboard module?
Visuals can enhance or clarify information, and help foster a module identity (when used with consistency). However, visual elements may create exclusion for users who are unable to view them or rely on text versions of visual content. For example, screen-reader users will be unable to interact with content that is entirely image based, or relies on use of colour to communicate meaning.
How to use visual design elements in Blackboard
Module banner
Banners provide an attractive visual identifier for the course, they can be image or text based (or a combination) and are often designed to represent the 'theme’ of the module (avoid selecting images of people, as it may be difficult select images representative of your cohort). Banners are essentially an image file that displays on the module homepage (it is recommended to set Announcements as the module homepage).
Use banners for ‘decorative’ purposes only, they are not accessible (a module banner comprising text is essentially an image file; you should only include the module title, and optionally the code and/or academic year/term in your banner).
How to choose a banner size
- Blackboard recommends a banner size of approximately 480 by 80 pixels; too small and it may lose impact, too big and users may feel the banner is distracting.
- Keep in mind that users can resize their browser windows, expand and collapse the course menu, and use monitors of varying sizes and screen resolutions. After you upload a banner, view it under those conditions to be sure the banner appears as intended.
How to create a module banner
- Adding a banner image to your Blackboard module.
- Once you have created a banner, you can add the image to the top of other module pages by creating an item and using the content editor to insert an image.
Tips when designing a module banner:
- PowerPoint can be used to quickly create a module banner. You can download a selection of PowerPoint banner templates and examples for inspiration. Alternatively, there are a variety of image editing applications available from AppsAnywhere.
- Banners must be web friendly image files, such as .jpg, or .png.
- Check copyright before using images in the banner. Commonly used sources can be found at pixabay, Unsplash, unDraw and Flickr.com/CreativeCommons. You can source University images from the DPS library.
- Align text left or centre, so that small screen users do need to scroll right to view full banner text. The banner file will always appear centred, it is not possible to align the file right or left.
- Use solid colour text backgrounds (avoid text over patterns or transparent layers).


Colours and themes
- Use the default University colour theme for Blackboard, it has been selected for optimum colour contrast. It is not advisable to change/customise the colour theme of Blackboard modules.
- Ensure there is sufficient colour contrast in any text formatting or imagery in your Blackboard module. Tools like Blackboard Ally will prompt you to select an accessible colour combination if there is not sufficient contrast in Blackboard content. You can also check colour contrast using the WebAIM contrast checker.
![]()
- Do not use colour alone to denote meaning. For example, when highlighting text, consider adding an *astrix to draw attention to points for screen reader users.
![]()
- Choose pastel shades for text backgrounds, rather than bright colour or pure white. The University document/presentation templates use accessible colour schemes. Note, text displayed on Blackboard module pages automatically appears on a pale grey background (even though the Blackboard content editor displays a white background).
- Avoid using multi coloured text or highlighting.
![]()
Images and icons
Commonly used image sources can be found at pixabay, Unsplash, unDraw and Flickr.com/CreativeCommons. You can source University images from the DPS library.
- Model good academic practice by citing sources and using third party content appropriately. Always check licensing before using images, if unsure, contact university IMPS or seek advice from the library copyright guidance.
- Provide a text description for images, for example, using alt-text. This is necessary when inserting via the Blackboard content editor or within uploaded materials (excluding module banners). A text description will enable assistive technology to read aloud an image description for sight impaired users. Tools like Blackboard Ally will prompt you to add alt-text to any images. Note; Ally does not check images present in video content, it is recommended to check your video Stream captions to ensure they provide an adequate description of non-decorative images used in the video (or you may consider creating a supplementary document for students who have a registered need).
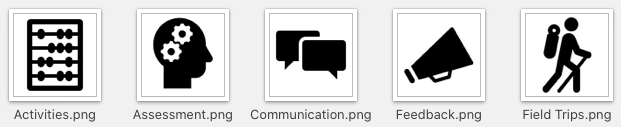
- You may use the university Blackboard icons, alongside headings and titles, to signpost content. This helps students to visually identify links to their Module roadmap / Weekly plans; therefore icons must not replace a heading, title or any other text. A sample of the icons is shown below. you can download the full set of image files and insert via the Blackboard content editor or within uploaded materials (such as documents and PowerPoints). The icon file name contains a key term you should use in item titles or document headings, to provide parity for assistive technology users (it is recommended to use Blackboard Ally to mark these icons as 'decorative').